
Your home's plumbing is its circulatory system, working quietly behind walls and under floors. However, out of sight should not mean out of mind, particularly in Denver where unique climate challenges like sudden freezes and expansive soil put significant stress on pipes and fixtures. A minor, undetected drip or a poorly functioning component can rapidly escalate into a catastrophic failure, resulting in thousands of dollars in water damage, emergency repairs, and major disruptions to your life.
This comprehensive home plumbing inspection checklist is designed to empower you with the knowledge to proactively identify potential issues before they become crises. By systematically reviewing each critical area, you can gain confidence in your home's infrastructure, extend the lifespan of your entire plumbing system, and learn to recognize the clear signs that it's time to call a professional. This systematic approach is crucial for maintaining your property's value and safety. Beyond plumbing, a thorough approach to home maintenance often involves various checks, similar to how investors use a detailed fix-and-flip checklist for property success.
Our guide will walk you through a room-by-room and system-by-system evaluation, providing actionable steps and expert insights tailored specifically for the unique demands of Denver-area homes. We'll cover everything from water pressure and pipe integrity to drain performance and water heater safety. Let's get started on protecting your most valuable asset.
1. Water Pressure Testing
The first and most fundamental step in any comprehensive home plumbing inspection checklist is evaluating your water pressure. This test measures the force of the water moving through your pipes, expressed in pounds per square inch (PSI). It provides a critical snapshot of your system's health, revealing whether the pressure is too high, too low, or just right, each indicating different potential problems.

This process involves more than just a single reading. A thorough inspection requires checking both static pressure (when all fixtures are off) and dynamic pressure (while one or more fixtures are running). This dual approach helps diagnose issues ranging from municipal supply problems to internal clogs or a failing pressure regulator.
When to Test Your Water Pressure
Water pressure testing isn't just for troubleshooting. It's a proactive measure that should be part of your regular home maintenance, especially in these situations:
- New Home Purchase: Before closing, ensure the home’s plumbing meets standard pressure requirements.
- Older Homes: Properties with aging galvanized or copper pipes can suffer from buildup that restricts flow, making regular pressure checks essential.
- Noticeable Changes: If you observe a sudden drop in flow from your shower or a trickle from your kitchen faucet, a pressure test is your first diagnostic tool.
- Denver's Climate: After a hard freeze, pressure fluctuations can indicate pipe damage that isn't yet a full-blown leak.
Actionable Tips for Accurate Testing
To get a reliable reading, you'll need an inexpensive water pressure gauge that screws onto an outdoor spigot or your washing machine's cold water bib.
- Establish a Baseline: First, measure the static pressure. Ensure no water is running inside or outside the house, attach the gauge, and turn the faucet on fully. Ideal residential pressure in the Denver area is typically between 50 and 70 PSI.
- Test Dynamic Pressure: While the gauge is still attached, have someone turn on a shower or bathtub faucet inside. The pressure will drop; a significant drop of more than 10-15 PSI could signal a problem.
- Check Multiple Locations: If possible, test at various points, such as a front and back spigot, to see if pressure is consistent throughout the property.
Key Insight: Document your PSI readings and the date. This historical data is invaluable for identifying gradual pressure loss over time, which often points to slow-forming clogs or a failing Pressure Reducing Valve (PRV).
If your tests reveal consistently low pressure, it can be frustrating. For a deeper dive, it's helpful to explore resources for understanding low water pressure issues and their potential fixes. Conversely, pressure that is too high (above 80 PSI) can damage appliances and cause leaks. If you encounter either extreme, it's a clear sign to investigate further or consult a professional. You can explore our guide on low water pressure troubleshooting in Denver for more localized advice.
2. Pipe Material and Condition Assessment
A crucial part of any thorough home plumbing inspection checklist involves identifying and evaluating the condition of your pipes. This assessment goes beyond looking for obvious leaks; it requires a detailed examination of all visible supply lines, drain lines, and vent pipes to understand the materials used, their age, and their current state. Knowing your pipe material is essential for predicting potential failures and ensuring compliance with modern building standards.
This inspection helps identify outdated or problematic materials, like galvanized steel prone to corrosion or polybutylene pipes known for premature failure. It also checks for signs of degradation such as rust, flaking, or discoloration, which are early warnings of future plumbing emergencies.
When to Assess Your Pipes
A detailed pipe inspection is a non-negotiable step in several scenarios, protecting your investment and preventing catastrophic water damage.
- Buying an Older Home: Properties built before the 1990s, especially those in established Denver neighborhoods, may have original galvanized, lead, or polybutylene pipes that are nearing the end of their functional lifespan.
- Planning a Renovation: Before you remodel a kitchen or bathroom, you must know if the existing plumbing can handle increased demand or if it needs to be replaced to meet current codes.
- Experiencing Recurring Clogs: If you face persistent drain issues, the problem might not be a simple blockage but rather internal corrosion and scale buildup in old galvanized pipes, which severely restricts flow.
- After Unexplained Water Bill Spikes: A hidden leak from a corroded or cracked pipe is often the culprit behind a sudden increase in water usage.
Actionable Tips for Pipe Inspection
You don't have to be a master plumber to perform a basic visual inspection. Grab a good flashlight and focus on these key areas.
- Identify the Material: Look at the pipes coming from your water meter and under your sinks. Copper pipes are reddish-brown, PVC is white or cream-colored plastic, and PEX is flexible plastic tubing, often in red, blue, or white. Older galvanized steel pipes are a dull, dark gray.
- Check for Corrosion: On copper pipes, look for green or blue stains (patina), which indicate a slow leak or persistent moisture. For galvanized steel, check for rust spots, flaking, or bubbling textures on the exterior.
- Inspect Drain Lines: Ensure all drain lines (usually PVC or cast iron) have a consistent downward slope. A "belly" or sag in the line can collect debris and cause chronic clogs.
Key Insight: Take clear photos of your pipes in the basement, crawl space, and under sinks. Documenting the material and any visible signs of wear creates a valuable record for future repairs and helps you explain issues to a professional plumber.
This quick reference summarizes the typical lifespans of common residential plumbing materials.
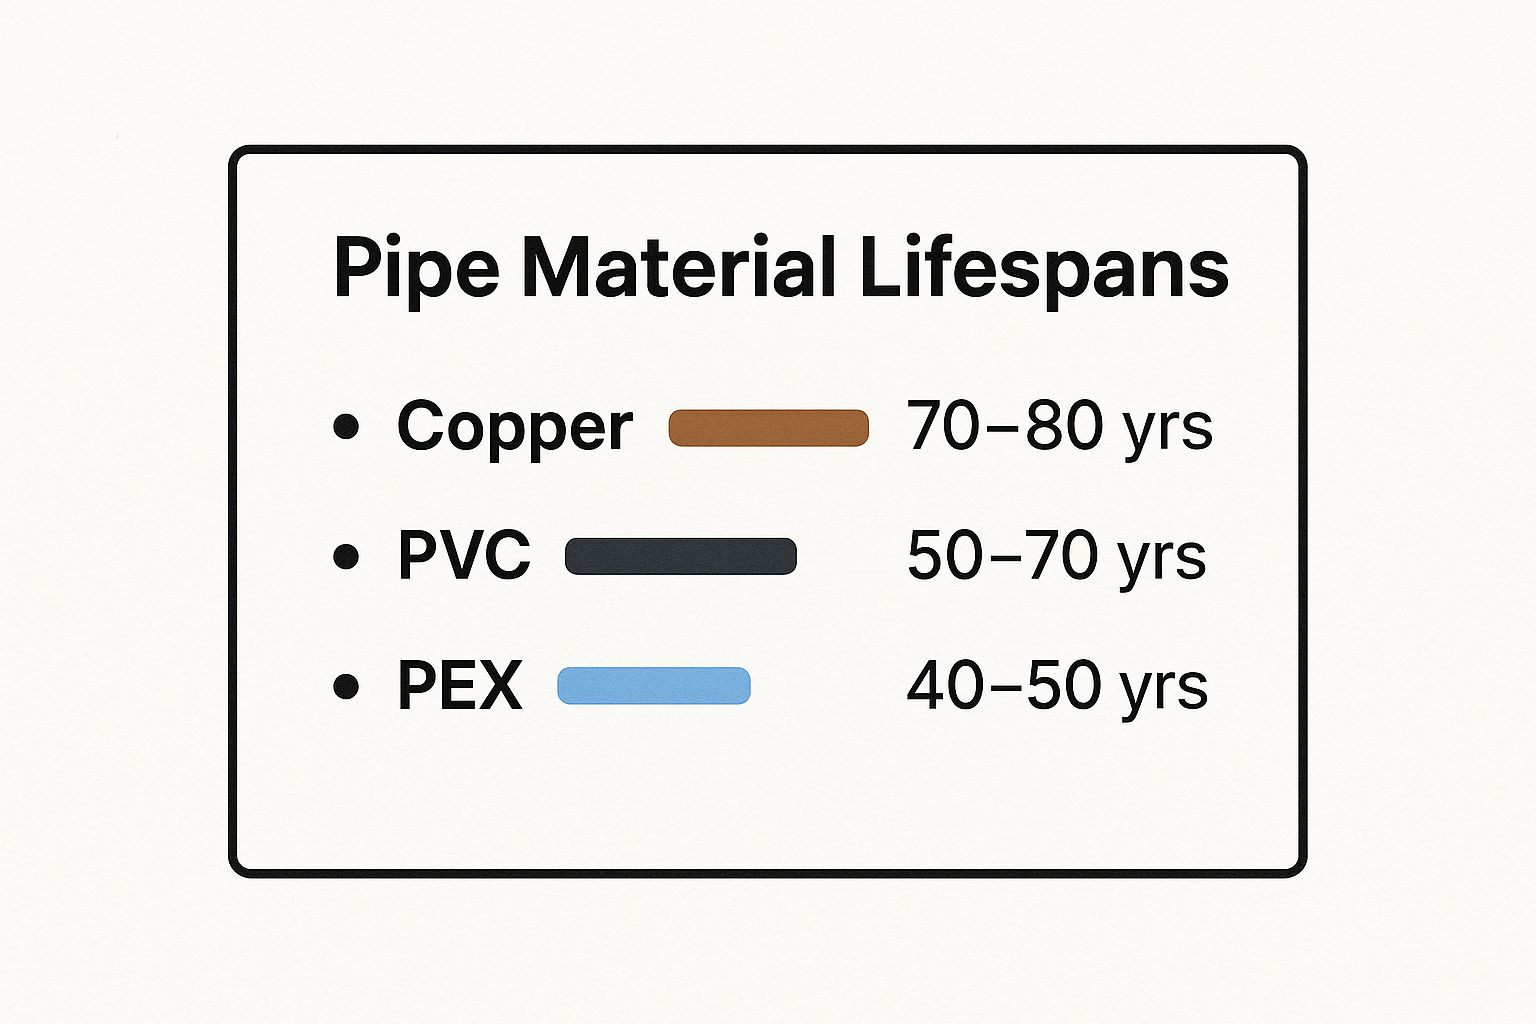
Understanding these lifespans helps you contextualize your inspection findings and anticipate when replacements might be necessary. If your home has aging materials that are approaching or have exceeded their expected service life, proactive replacement is often the most cost-effective strategy to avoid a major failure.
3. Drain and Sewer Line Inspection
A crucial component of any thorough home plumbing inspection checklist involves a comprehensive evaluation of your drain and sewer lines. This inspection goes beyond simply ensuring a sink drains; it assesses the entire waste removal system, from individual fixture drains and floor drains to the main sewer line connecting your home to the municipal system or a septic tank. It focuses on identifying blockages, checking for proper flow, and verifying the structural integrity of the pipes.
Slow drains are more than an annoyance; they can be early warning signs of significant problems downstream. A systematic inspection can uncover issues like partial clogs from grease and debris, or more severe structural problems like root intrusion or collapsed pipes, preventing a messy and costly sewer backup.
When to Inspect Your Drains and Sewer Lines
Proactive drain and sewer line inspection is vital for maintaining a healthy plumbing system, particularly in these scenarios:
- Homes with Mature Trees: Large trees, a common feature in many Denver neighborhoods, have extensive root systems that aggressively seek water sources, often infiltrating and damaging older sewer lines.
- Older Properties: Homes built before the 1980s may have clay tile or cast iron sewer pipes, which are susceptible to cracks, joint separation, and corrosion over time.
- Recurring Clogs or Slow Drains: If you are constantly dealing with slow-draining sinks, toilets, or tubs, it points to a larger issue in the main line rather than an isolated fixture clog.
- Unpleasant Odors or Gurgling Sounds: Foul sewer gas smells or gurgling noises from drains when a toilet is flushed are classic symptoms of a blocked or improperly vented drain line.
Actionable Tips for a DIY Drain Check
While a full sewer line camera inspection requires a professional, you can perform several preliminary checks yourself to spot potential problems.
- Test All Drains: Systematically run water for a few minutes in every sink, tub, and shower. Watch for how quickly the water recedes and listen for any unusual gurgling sounds from nearby fixtures.
- Check for Odors: Pay close attention to any sewer gas smells, especially around floor drains in the basement or laundry room. This could indicate a dried-out P-trap or a venting problem.
- Inspect Cleanouts: Locate the main sewer line cleanout cap in your basement, crawlspace, or yard. Look for any signs of moisture, rust, or sewage residue around the cap, which would indicate past or current backups.
Key Insight: Note which drains are slow. If multiple lower-level fixtures drain poorly at the same time, the blockage is likely in the main sewer line, not the individual branch lines. This distinction is critical for diagnosing the problem's severity.
A professional camera inspection is the only way to see the true condition inside your main sewer line. This technology can pinpoint the exact location of cracks, root intrusion, or pipe sagging without any excavation. For a deeper understanding of potential problems, you can explore more about sewer line issues and repairs in Denver to learn what to expect. Addressing these issues early is key to preventing a catastrophic system failure.
4. Fixture and Appliance Evaluation
Moving beyond the core pipe system, a crucial part of any home plumbing inspection checklist involves a detailed assessment of every fixture and water-using appliance. This step evaluates the functionality, efficiency, and installation integrity of toilets, sinks, showers, bathtubs, water heaters, washing machines, and dishwashers. It’s a hands-on review to catch small issues before they become major, costly repairs.
This evaluation is about more than just checking for drips. It's an opportunity to assess the overall health and efficiency of the components you interact with daily. From a toilet that constantly runs to a water heater showing early signs of corrosion, these endpoints of your plumbing system are often the first to signal underlying trouble.
When to Evaluate Fixtures and Appliances
A thorough fixture and appliance check should be performed annually and is especially critical in specific circumstances:
- Before a Home Purchase: Identifying an old, inefficient water heater or a leaky shower valve can be a significant negotiating point.
- High Water Bills: If your usage seems unusually high, a systematic check of all fixtures is the first step to finding the "phantom leak."
- Older Homes: Properties in Denver with fixtures from the 1990s or earlier often have toilets using 3.5+ gallons per flush. Evaluating them for an upgrade to a modern 1.28 GPF model can yield substantial water savings.
- After Major Temperature Swings: Extreme cold can stress supply lines connected to appliances, making a post-winter inspection a smart preventative measure.
Actionable Tips for a Thorough Evaluation
Go through your home room by room and systematically check each item. Keep a notepad to document your findings.
- Test All Functions: For each faucet and shower, test both the hot and cold water operation. Note any low flow, delays in getting hot water, or unusual noises.
- Inspect for Leaks: Carefully check around the base of toilets, under sink drains (P-traps), and at all water supply line connections for signs of moisture, water stains, or active drips.
- Evaluate Appliance Age and Condition: Check the manufacturer's label on your water heater, dishwasher, and washing machine. Document the installation date and model number. Water heaters nearing the 10-year mark warrant closer scrutiny for rust or leaks.
- Check for Stability: Gently try to rock toilets and sinks. Any movement can indicate a failing wax ring on a toilet or loose mounting, which can lead to leaks.
Key Insight: Create a simple log of all your major water-using appliances, including their installation date, model number, and last inspection date. This "plumbing inventory" makes it incredibly easy to track lifespans, look up parts, and schedule proactive replacements before a catastrophic failure occurs.
5. Water Heater Safety and Performance Check
Your water heater is one of the hardest-working appliances in your home, and a thorough inspection is a non-negotiable part of any home plumbing inspection checklist. This assessment goes beyond simply checking for hot water; it involves a detailed look at safety mechanisms, energy efficiency, and signs of wear. A failing water heater can lead to catastrophic water damage, inefficient energy use, or even dangerous conditions like carbon monoxide leaks.
Whether you have a traditional tank-style unit or a modern tankless system, the inspection process covers critical components that ensure both safe operation and optimal performance. For gas units, this means verifying proper venting and combustion. For electric models, it involves checking the heating elements and wiring. For all types, it includes looking for signs of corrosion and leaks that signal the end of the unit's lifespan.
When to Inspect Your Water Heater
Regular water heater checks are vital for safety and longevity. It's a key task that should be performed regularly, not just when you suspect a problem.
- Annually: A yearly checkup is the minimum for identifying potential issues before they escalate.
- Older Units: Once a water heater passes the 8-year mark, inspections become more critical as components begin to fail.
- Noticeable Performance Drop: If your hot water runs out faster, isn't as hot, or you hear popping or rumbling sounds from the tank, an immediate inspection is necessary.
- Denver's Hard Water: The mineral content in Denver's water can cause sediment buildup, reducing efficiency and damaging the tank. This makes regular flushing and inspection essential.
Actionable Tips for a Thorough Check
A careful visual and functional inspection can reveal a lot about your water heater's condition. Follow these steps for a comprehensive evaluation:
- Check the Age: Locate the manufacturer's sticker on the side of the tank. The serial number usually contains the production date. Most tank-style water heaters last 8-12 years; if yours is approaching this age, plan for a replacement.
- Test the T&P Valve: The Temperature and Pressure (T&P) relief valve is a crucial safety feature. Place a bucket under the discharge pipe, lift the lever briefly, and let a burst of hot water out. If it doesn't release water or continues to drip afterward, the valve must be replaced.
- Inspect for Corrosion: Carefully examine the tank's base, pipe connections, and the top of the unit for rust stains or active drips. Rust is often a sign of internal corrosion, meaning the tank is failing from the inside out.
- Verify Clearances (Gas Units): Ensure the area around your gas water heater is free of flammable materials. There should be adequate clearance for proper airflow and to prevent fire hazards. Also, check that the flue pipe is securely connected and venting correctly to the outdoors.
Key Insight: A small puddle or faint rust stain at the base of your water heater is the most common early warning sign of a pending failure. Don't ignore it. Addressing it immediately can prevent a basement flood and extensive water damage.
For homeowners looking to be more proactive, it's beneficial to understand the full scope of upkeep. You can dive deeper into our guide on hot water heater maintenance for more detailed procedures. If your inspection reveals significant rust, a faulty T&P valve, or any signs of a gas leak, turn off the unit and contact a professional immediately.
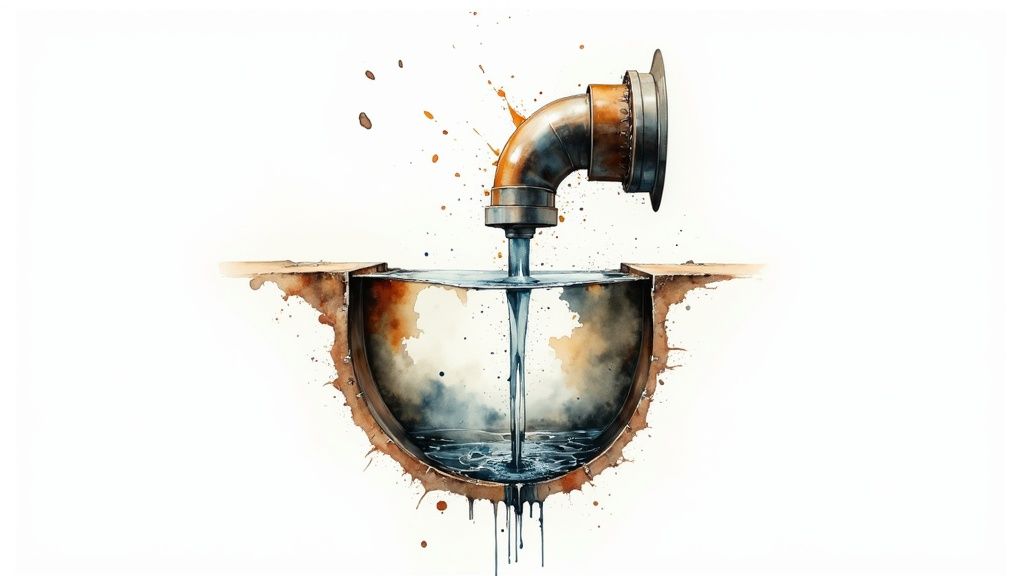
6. Leak Detection and Water Damage Assessment
A critical component of any thorough home plumbing inspection checklist is the systematic search for leaks and signs of past water damage. This process goes beyond looking for obvious drips; it involves a comprehensive assessment to identify both active leaks and the subtle, tell-tale evidence of previous issues. Unchecked moisture can lead to severe structural damage, costly repairs, and dangerous mold growth.
This inspection requires a keen eye and a methodical approach, moving from room to room to examine ceilings, walls, floors, and areas around fixtures. Finding a small, discolored spot on a ceiling or a slightly soft floorboard near a toilet can be the first warning sign of a much larger, hidden problem, such as a slow pipe leak behind a wall or a failing wax ring.
When to Perform Leak and Damage Checks
Proactively looking for leaks should be a routine part of your home maintenance schedule, not just a reaction to a visible problem. Pay special attention during these times:
- Seasonal Changes: In Denver, the transition from freezing winters to warmer springs can cause pipes to expand and contract, potentially loosening joints and creating leaks.
- After Major Storms: Heavy rain or rapid snowmelt can reveal weaknesses in your home's exterior plumbing seals or roof flashing, leading to water intrusion.
- Unexplained Utility Bill Spikes: If your water bill suddenly increases without a clear reason, a hidden leak is the most likely culprit.
- Musty Odors: A persistent damp or musty smell, especially in basements, crawl spaces, or laundry rooms, often indicates hidden moisture and potential mold.
Actionable Tips for a Thorough Inspection
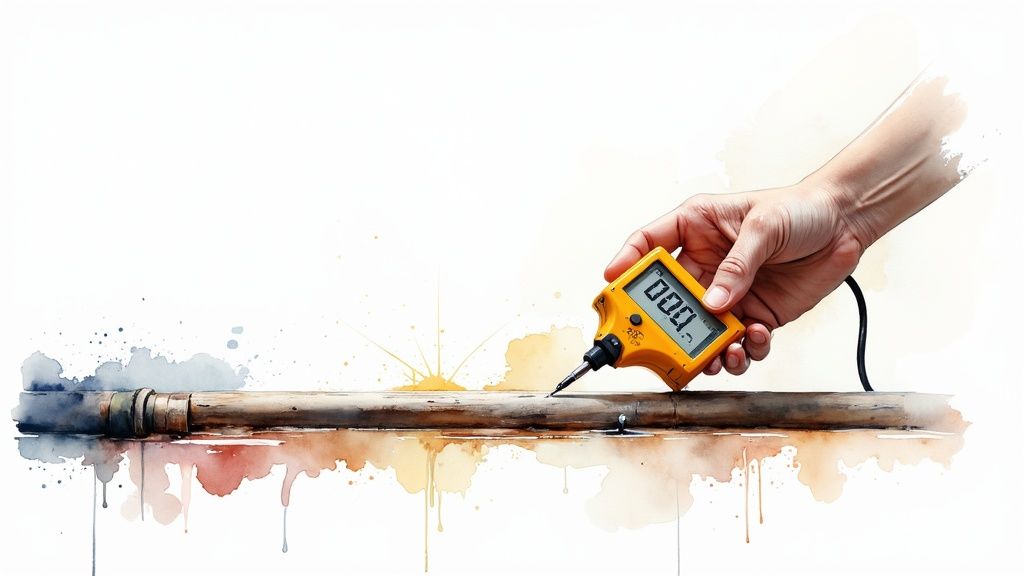
You can perform a highly effective leak detection sweep with a few simple tools and techniques. A bright flashlight and a keen sense of touch are your best assets.
- The Water Meter Test: For a whole-house leak check, turn off all water-using appliances. Read your water meter, wait for two hours without using any water, and then read it again. If the reading has changed, you have a leak somewhere in your system.
- Visual and Tactile Inspection: Carefully inspect ceilings and walls for any discoloration, staining, or peeling paint. Feel the flooring around toilets, tubs, and sinks for any soft, spongy, or warped areas, which signal subfloor damage.
- Check Under Sinks: Look inside bathroom and kitchen cabinets for any drips, water stains, or a damp, musty smell. Pay close attention to the P-trap and supply line connections.
Key Insight: Don't ignore small signs. A minor stain or a loose tile might seem insignificant, but they are often the only visible symptoms of a slow leak that has been causing damage for months or even years. Documenting these findings with photos can be crucial for professional diagnosis and insurance claims.
7. Shut-off Valve Functionality
A crucial, yet often overlooked, part of any home plumbing inspection checklist is testing your shut-off valves. These valves are your first line of defense in a plumbing emergency, allowing you to isolate water flow to a specific fixture or the entire house. A functional valve can mean the difference between a minor cleanup and catastrophic water damage.
This inspection involves more than a simple visual check. It requires physically operating each valve to ensure it moves freely and completely stops the water flow without leaking. This process confirms you have control over your plumbing system when you need it most, whether for a planned repair or a sudden pipe burst.
When to Test Your Shut-off Valves
Verifying your shut-off valves should be a routine part of your home maintenance schedule, not just something you think about during a crisis. It's particularly important in these scenarios:
- Annual Maintenance: At least once a year, test every valve to prevent it from seizing due to mineral buildup and corrosion, a common issue with Denver's hard water.
- Before Vacations: Test the main shut-off valve before leaving for an extended trip. This ensures you can shut off the water to prevent unexpected leaks while you're away.
- Planning a DIY Repair: If you're replacing a toilet or faucet, test its specific shut-off valve (the "angle stop") beforehand to confirm it will work, avoiding a simple project turning into an emergency.
- Emergency Preparedness: Knowing where your valves are and that they work is a key part of home safety, especially before winter when the risk of frozen pipes is higher.
Actionable Tips for Valve Testing
To properly test your valves, you don't need special tools, just a bit of diligence and a clear plan.
- Locate and Label: First, identify the location of your main water shut-off valve, which is typically in a basement, crawl space, or utility closet near where the water line enters your home. Also find the individual valves under sinks and behind toilets. Label them clearly for quick identification.
- Operate Gently: Turn each valve clockwise to close it completely. Do not force it if it's stuck. Once closed, turn on the corresponding faucet to verify the water has stopped. You should see a trickle of water that quickly ceases.
- Check for Leaks: With the valve closed, inspect the valve stem and packing nut for any drips. A small leak here can often be fixed by gently tightening the packing nut with a wrench.
- Reopen and Test Flow: Turn the valve counter-clockwise to open it again. Make sure it opens fully to restore normal water flow to the fixture.
Key Insight: Many older homes have gate valves that are prone to breaking or seizing. If a valve is difficult to turn or won't shut off the water completely, it's a sign that it needs to be replaced. Upgrading to modern quarter-turn ball valves provides much greater reliability and ease of use.
8. Ventilation and Code Compliance Review
A frequently overlooked yet critical part of a home plumbing inspection checklist is the review of your system's ventilation and its adherence to local codes. This assessment ensures your drain, waste, and vent (DWV) system functions correctly, preventing dangerous sewer gases from entering your home and ensuring wastewater flows away smoothly. It also verifies that any plumbing work, new or old, meets current safety and performance standards.
Your plumbing's vent system is designed to equalize pressure, allowing air to enter behind draining water. Without proper ventilation, fixtures can gurgle, drains run slow, and the water in P-traps can be siphoned out, breaking the seal that blocks sewer gas. A code compliance review confirms that all installations, from a remodeled kitchen to a new basement bathroom, are correctly and safely integrated.
When to Review Ventilation and Code Compliance
This review is essential for maintaining a safe and functional plumbing system, particularly in these common scenarios:
- Remodeled Homes: If a kitchen or bathroom was added or renovated, verifying that the new plumbing was vented correctly and permitted is crucial.
- Older Properties: Homes built under outdated codes may have inadequate or non-existent venting for some fixtures, leading to persistent drainage issues.
- Unexplained Odors: A persistent sewer smell, especially in bathrooms or utility rooms, is a classic sign of a compromised vent system or a dry P-trap.
- Slow Drains: When multiple drains are slow despite being clear of clogs, the issue often points to a larger, systemic problem like a blocked main vent stack.
Actionable Tips for Your Inspection
While a full code compliance audit requires a professional, you can spot key indicators of potential problems yourself.
- Check for Odors: The most straightforward test is your nose. Pay close attention to any faint or strong sewer gas smells near drains, which signals a venting failure.
- Verify Vent Terminations: Visually inspect your roof to locate the plumbing vent pipes. They should extend at least 6 inches above the roofline and be free of obstructions like bird nests or debris. In Denver's climate, ensure they are properly flashed to prevent leaks from snowmelt.
- Confirm Trap Seals: Ensure every fixture has a P-trap. For seldom-used drains, like in a guest bathroom or basement floor, run water for a minute to refill the trap and restore the water seal.
- Listen for Gurgling: When you flush a toilet or drain a full sink, listen for gurgling sounds from nearby drains. This is a tell-tale sign that the system is desperately trying to pull in air, indicating a vent issue.
Key Insight: Look for "S-traps" or improper "drum traps," especially under older sinks. These are no longer code-compliant in areas like Denver because they are prone to siphoning. Identifying and replacing them with modern P-traps is a significant safety upgrade.
If you suspect improper venting or unpermitted work, it’s a serious issue that affects both your home's safety and its value. You can often check with the Denver building department for records of past permits. For a thorough evaluation and to ensure your home is up to code, consulting a licensed plumber who is familiar with local regulations is the safest course of action.
Home Plumbing Inspection Checklist Comparison
| Inspection Type | Implementation Complexity 🔄 | Resource Requirements 🔄 | Expected Outcomes 📊 | Ideal Use Cases 💡 | Key Advantages ⭐ |
|---|---|---|---|---|---|
| Water Pressure Testing | Moderate – requires pressure gauge and access points | Pressure gauge, partial system access | Identifies pressure issues, flow adequacy, regulator function | New construction, older homes with pressure issues, well systems | Quick, inexpensive, diagnoses pressure-related problems |
| Pipe Material and Condition Assessment | High – knowledge intensive, partial invasive | Visual inspection tools, possible destructive testing | Reveals pipe material, condition, code compliance | Homes with aging pipes, planning replacements | Detects hazards, plans replacements, ensures compliance |
| Drain and Sewer Line Inspection | High – may need camera equipment and expert skills | Professional camera inspection recommended | Detects blockages, root intrusions, flow and venting adequacy | Homes with flooding, old sewer pipes, root infiltration | Prevents costly repairs, ensures drainage function |
| Fixture and Appliance Evaluation | Moderate – individual fixture testing required | Basic testing tools, time-consuming per fixture | Identifies leaks, inefficiency, installation errors | Older fixtures, appliances nearing end-of-life | Pinpoints repair/replacement needs, promotes water saving |
| Water Heater Safety and Performance Check | High – specialist tools/knowledge for gas systems | Safety testing tools, expert inspections | Ensures safe operation, energy efficiency, predicts replacements | Gas/electric water heaters, tank and tankless systems | Prevents hazards, reduces energy waste, ensures code safety |
| Leak Detection and Water Damage Assessment | Moderate to High – requires specialized moisture tools | Moisture meters, visual inspection, water meter tests | Detects hidden leaks, water damage, mold risk | Homes with suspected leaks, water damage symptoms | Prevents major damage, uncovers hidden issues |
| Shut-off Valve Functionality | Low to Moderate – basic valve operation tests | Manual valve operation, minimal tools | Confirms valve operability for emergencies | Emergency preparedness, repairs, maintenance | Enables quick shut-off, limits water damage |
| Ventilation and Code Compliance Review | Moderate to High – code knowledge and roof access | Visual inspection, plumbing code references | Prevents sewer gas entry, verifies proper venting and permits | New additions, remodels, older homes requiring updates | Ensures safety, drainage function, insurance compliance |
From Checklist to Action: When to Call a Denver Plumbing Pro
Congratulations on completing this comprehensive journey through your home's plumbing system. By diligently working through this home plumbing inspection checklist, you have moved from being a passive homeowner to an empowered guardian of your property’s most vital network. You are now equipped with a deeper understanding of everything from your water pressure and pipe materials to the critical functions of your water heater and main shut-off valves. This isn't just about ticking boxes; it's about building a foundational knowledge that allows you to spot trouble before it escalates into a catastrophic and costly failure.
The true value of this inspection lies in transforming your newfound knowledge into proactive maintenance and decisive action. You've learned how Denver’s unique climate, with its freeze-thaw cycles and hard water, can specifically impact your plumbing. Now, instead of being surprised by a burst pipe during a cold snap, you know to check for proper insulation on exposed lines. You understand that a gurgling drain isn't just a nuisance but a potential precursor to a serious sewer line blockage.
Summarizing Your Inspection Findings
As you review your completed checklist, certain findings should stand out as immediate priorities. These are the red flags that separate minor maintenance from urgent professional intervention. Think of your inspection results as falling into three distinct categories:
- Green Light (Monitor & Maintain): These are the areas where everything checked out perfectly. Your water pressure is within the ideal 40-80 PSI range, your fixtures are drip-free, and your shut-off valves operate smoothly. For these items, your job is simple: continue with routine monitoring and seasonal maintenance.
- Yellow Light (Caution & DIY Potential): This category includes minor issues you might feel comfortable addressing yourself. A slow-draining sink, a running toilet flapper that needs replacement, or cleaning mineral buildup from a showerhead are great examples. These are noticeable but not yet critical problems.
- Red Light (Stop & Call a Professional): This is the most critical category. Any issue that falls here requires immediate attention from a licensed plumber. Attempting to DIY these complex and high-risk problems can lead to code violations, extensive water damage, or even safety hazards.
The Critical "Red Light" Issues: When to Call a Pro
While this guide empowers you with diagnostic knowledge, it is crucial to recognize its limits. Certain discoveries from your home plumbing inspection checklist demand professional expertise and specialized equipment. Do not hesitate to contact a professional if you have identified any of the following:
- Persistent Water Pressure Problems: If your pressure is consistently too high or too low and simple fixes don't help, it could indicate a failing pressure regulator or a hidden leak in your main service line.
- Signs of Corroded or Decaying Pipes: Visible flaking, discoloration, or pimples on pipes, especially older galvanized steel, are signs of imminent failure. A professional needs to assess the extent of the decay and recommend repiping solutions.
- Evidence of Hidden Leaks: Unexplained wet spots on ceilings or walls, a musty odor, or a water meter that runs continuously are classic signs of a hidden leak that requires professional electronic leak detection to locate without causing unnecessary damage.
- Major Drain or Sewer Line Issues: Recurrent clogs, multiple slow drains, foul odors from drains, or sewage backup are all indicators of a significant blockage or break in your main sewer line. This requires a professional camera inspection.
- Water Heater Irregularities: Any signs of a gas leak (rotten egg smell), a malfunctioning temperature and pressure relief valve, or significant rust on the tank itself are serious safety concerns that a licensed plumber must address.
- Code Compliance Questions: If you suspect any part of your plumbing, particularly vents or gas lines, does not meet Denver's local building codes, a professional inspection is essential to ensure your family's safety and avoid issues during a future home sale.
Mastering your home’s plumbing is not about becoming a master plumber overnight. It’s about being an informed and proactive homeowner who knows when to observe, when to act, and, most importantly, when to call for expert help. Your efforts in completing this inspection have already put you miles ahead in protecting your home’s value and ensuring its long-term safety and efficiency.
Ready to take the next step and get a professional opinion on your findings? The team at Professional Plumber Denver specializes in turning your checklist concerns into concrete solutions. We leverage our deep knowledge of Denver’s specific plumbing challenges to provide thorough diagnostics and expert repairs, ensuring your home is safe and sound. Contact Professional Plumber Denver today to schedule a comprehensive evaluation or for 24/7 emergency service.
