
Before you even think about grabbing a wrench, let's talk about what really makes or breaks a water heater installation: the prep work. A solid game plan is your single best tool. It’s what separates a smooth, safe project from a frustrating weekend of endless trips to the hardware store.
Taking the time to get this foundation right—choosing the right unit, getting your tools together, and knowing the local rules—makes every other part of the job ten times easier.
Your Essential Pre-Installation Game Plan
A successful install is all about careful planning, not just brute force. I’ve seen it a hundred times: someone rushes in, and what should have been a half-day job turns into a multi-day disaster. Think of this stage as drawing up the blueprint. The more detail you put in now, the less you’ll be scratching your head later.
Your first move is picking the right water heater. Don't just automatically grab another 40-gallon tank because that’s what was there before. Take a minute to think about your family's actual hot water use. Are you constantly the last one in the shower with lukewarm water? You might need a bigger tank or maybe a high-recovery model. On the flip side, getting a unit that’s too big is just throwing money away on your energy bill every single month.
For the pros out there, planning goes beyond just the physical work. Using tools that help you efficiently track jobs and costs can make this whole prep phase much more organized.
Assembling Your Tools and Materials
Got your new heater? Great. Now it’s time to gather your arsenal. Having everything you need laid out and ready to go is a huge momentum-saver. There's nothing worse than being midway through a connection and realizing you don't have the right size fitting.
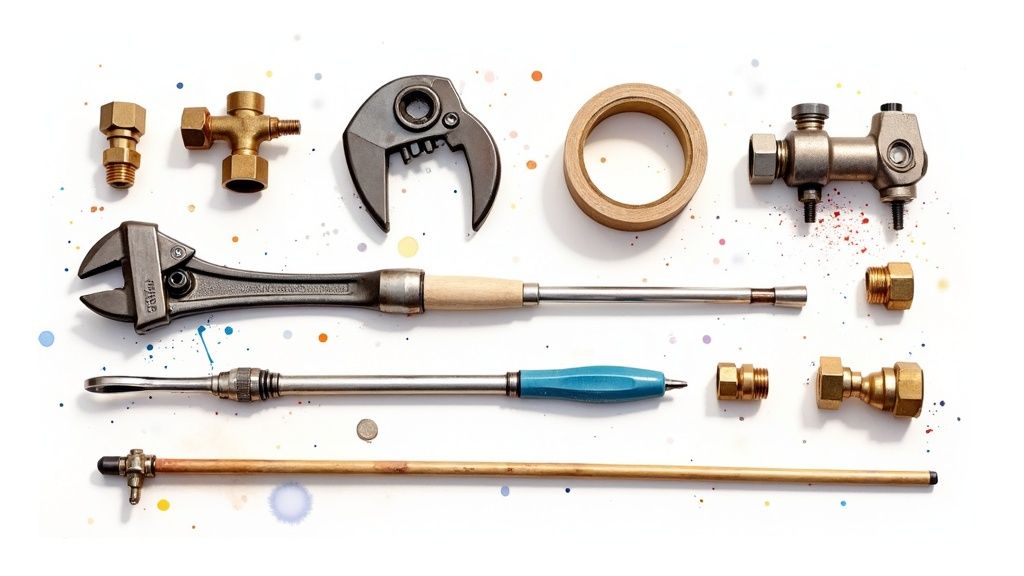
Here’s what I always make sure I have on hand:
- Wrenches: A good pipe wrench and a couple of adjustable wrenches are essential for those supply line connections.
- Tubing Cutter: This is for making clean, professional cuts on copper pipe. No hacksaws here.
- Soldering Kit: If you're working with copper, you'll need your torch, lead-free solder, and flux.
- PEX Tools: For those using PEX, have your specific crimping or clamping tools ready.
- Safety Gear: Don't even start without safety glasses and gloves. Seriously.
- Miscellaneous: A roll of Teflon tape, some pipe dope, a tape measure, a level, and a bucket for catching drips are the unsung heroes of any plumbing job.
Also, don't forget the new materials you'll need for this specific job, like fresh flexible water connectors, new shut-off valves, and probably a new T&P (temperature and pressure) relief valve. It’s also a smart time to think about the anode rod. To learn more about this critical component, check out our guide on what an anode rod is and how it protects your new investment.
Safety Shutdowns and Code Compliance
Okay, before a single pipe gets disconnected, we need to talk safety. This is non-negotiable. The very first physical step is to secure all the utilities connected to the old unit.
CRITICAL SAFETY STEP: You must completely shut off the water, gas (for gas heaters), and electricity to the old water heater before you do anything else. For an electric model, find the right breaker in your main panel and flip it off. For a gas heater, find the gas shut-off valve near the unit and turn it to the "off" position.
Finally, you have to know the local rules. Here in the Denver Metro area, plumbing codes are no joke—they’re there for a reason, primarily safety. For instance, most local codes now mandate a thermal expansion tank if you have a "closed-loop" system (meaning you have a check valve or pressure-reducing valve on your main line). This little tank is crucial for preventing dangerous pressure spikes that can wreck your pipes and your brand-new heater.
Do yourself a favor and check with your local Denver-area building department about permits. Even for a DIY job, you’ll often need a permit and an inspection. It ensures the work is safe, and skipping it can cause major headaches and fines, especially when you go to sell your house.
Removing Your Old Water Heater Like a Pro
Alright, you've got the new unit ready to go and your tools are all laid out. Now it's time to tackle the main event: getting that old water heater out of the way. This isn't just about brute force and heavy lifting; there's a right way to do it that avoids turning your utility closet into a swamp.
Patience is the name of the game here. Nearly every DIY disaster I've seen on a water heater job comes from someone rushing the draining and disconnection steps. Take your time, and you'll sidestep a world of mess and potential damage.
The Draining Process Simplified
First things first, you've already shut off the power and water, right? Good. Now, let's get that tank drained. A typical 40- or 50-gallon tank is holding a lot of water—and probably a fair bit of nasty sediment—so this step can take a while.
Grab a garden hose and connect it to the drain valve down at the bottom of the heater. Route the other end to a floor drain or run it outside. Just make sure the end of the hose is lower than the valve so gravity can do its job.
Here's a trick that separates the pros from the rookies: head to a faucet somewhere in the house (the higher up, the better) and open the hot water side all the way. This lets air into the plumbing, which breaks the vacuum in the tank and allows the water to gush out instead of trickling. Seriously, don't skip this step. It can cut your draining time by more than half.
A quick heads-up: even when you think it's "empty," that old tank can still easily weigh over 100 pounds. Between the residual water and years of gunk settled at the bottom, it's always heavier than it looks. Don't get caught off guard.
Once the hose is down to a slow drip, you're about as empty as you're going to get.
Disconnecting Water, Gas, and Electrical Lines
With the tank drained, you're clear to start disconnecting the utilities.
- Water Lines: Stick a bucket under the hot and cold connections to catch the last few drips. The key here is to use two wrenches. Use one to grip the fitting on the water heater itself and the other to turn the nut on the supply line. This two-wrench method prevents you from accidentally twisting and damaging the pipes.
- Gas Lines: If you have a gas heater, be extra careful. Use that same two-wrench technique to disconnect the flexible gas line from the control valve. One wrench holds the valve steady while the other loosens the connector. You’ll also need to detach the metal vent pipe, or flue, from the draft hood on top of the heater.
- Electrical Lines: For an electric model, grab your voltage tester and double-check that the power is off at the heater's junction box. No assumptions. Once you've confirmed it's dead, take off the cover plate, unscrew the wire nuts, and carefully pull the wires out of the electrical conduit.
Getting the Old Tank Out
Now for the real workout. Wiggling a big, awkward tank out of a cramped space is often the toughest part of the job. An appliance dolly is practically a requirement here. Tilt the tank just enough to slide the dolly underneath, then use the straps to secure it tightly.
Don't be a hero. Move it slowly, especially when navigating tight corners or heading up a flight of stairs. This is absolutely a two-person job; trying to do it alone is a great way to hurt your back or punch a hole in the drywall.
So, what do you do with the old beast? You can't just drag it to the curb. Around the Denver area, most scrap metal recyclers will happily take old water heaters off your hands. Alternatively, some local waste management companies offer large appliance pickups for a fee. It's always a good idea to call your local provider first to see what your options are for responsible disposal.
Positioning Your New Water Heater for Safety and Access
Alright, with the old tank out of the way, you’ve got a clean slate. It’s tempting to just slide the new water heater into the old spot, but hold on. Where you place this unit is just as crucial as how you hook it up. A little thought right now can save you from huge headaches down the line.
Before that new heater moves an inch, get yourself a drain pan. I can't stress this enough. This simple plastic or metal tray is your first line of defense against a catastrophic leak, and it could literally save you thousands in water damage.
Think about it: if your tank ever springs a leak, this pan will catch the water and funnel it to a nearby floor drain. Without one, especially in a finished basement or a second-floor utility closet, a small drip can go unnoticed for days, silently ruining floors, subfloors, and ceilings. It’s cheap insurance and an absolute must.
Ensuring Proper Clearance and a Level Base
Once the drain pan is down, you can carefully move the new heater into place. Now, grab the manufacturer’s manual and look for the clearance requirements. This is non-negotiable, especially for gas models.
Fire safety is paramount. Most local codes here in the Denver area, along with manufacturer specs, demand specific gaps around the unit. A common rule is 6 inches of clearance on the sides and at least 12 inches from the top vent to any combustible surface like wood studs or drywall. Don't eyeball it; measure it.
With the heater sitting in its pan, get your level out. The tank needs to be perfectly level to function efficiently and to prevent strain on the plumbing connections. If your floor has a bit of a slope, use non-combustible shims—thin pieces of metal or hard plastic work great—to get it right. Never use wood shims, as they can rot or become a fire hazard.
Orienting for Future Access
Here’s a pro tip that separates a DIY job from a professional one: think about the future. Before you start connecting pipes, spin the heater around and consider how you or a future plumber will access it for maintenance.
Take a moment to position the unit so that the key components are facing out. You want easy, unobstructed access to the temperature and pressure (T&P) relief valve, the main drain valve, and the gas control valve or electrical access panels. Burying these against a wall is a classic rookie mistake that turns a simple repair into a frustrating ordeal.
Making sure you can easily get to these parts will make routine flushing, anode rod checks, or temperature adjustments so much easier. A little bit of foresight here is a hallmark of a quality installation and will pay off for years to come.
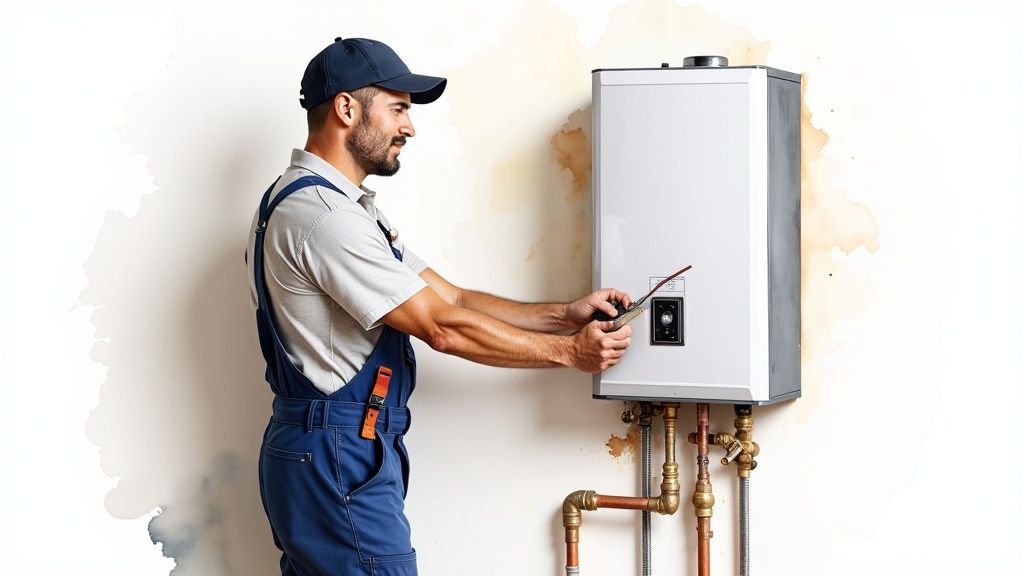
Alright, let's get those plumbing connections dialed in. This is where your new water heater installation really starts to come together, moving from demolition to creation. Getting these connections right—solid, secure, and completely leak-free—is arguably the most critical part of the entire job.
Whether you're sweating copper pipes like an old-school pro or using modern PEX, the fundamentals don't change. It's all about clean cuts, proper fittings, and a secure seal. This isn't just about twisting a wrench; it's about building a system that you can trust for years to come.
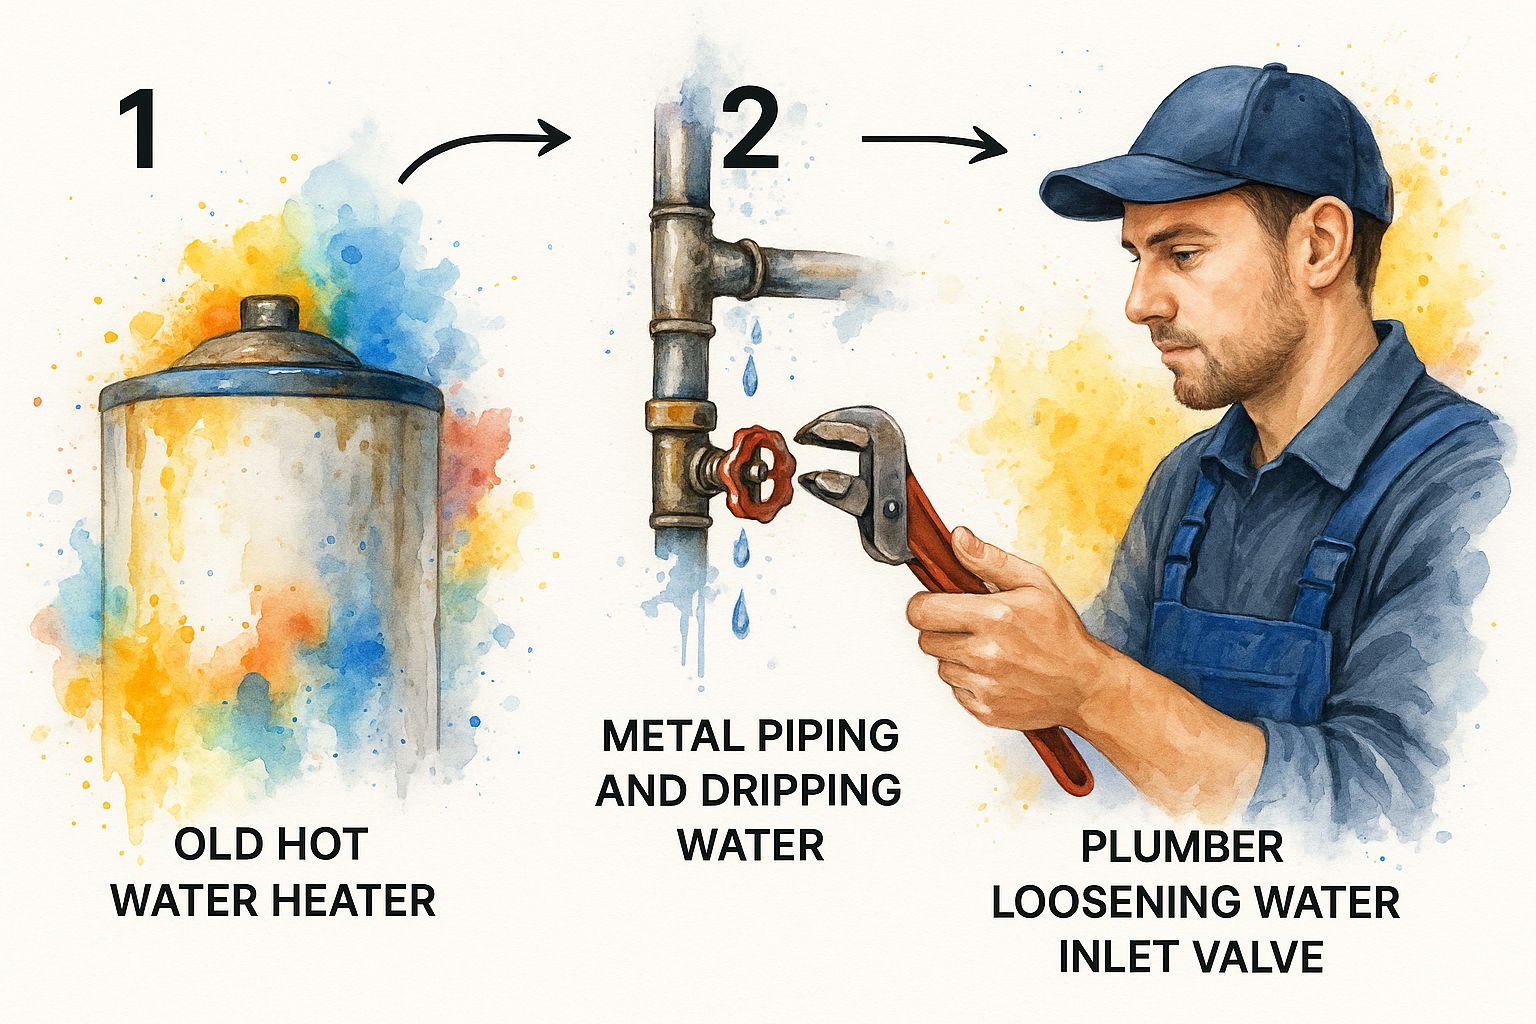
As you can see, even taking the old unit apart requires a careful hand. The last thing you want is to damage the existing pipes, turning a straightforward replacement into a major plumbing repair.
Identifying and Connecting Your Water Lines
First things first, take a look at the top of your new heater. You’ll find two ports, one marked "HOT" and the other "COLD," usually with red and blue rings to make it obvious. The cold water inlet (typically on the right) is where your main water supply feeds into the tank. The hot water outlet (on the left) sends that heated water out to your faucets and shower.
Sounds simple, right? I've been on service calls where these were hooked up backward. When that happens, the heater simply won't work correctly. The dip tube inside the cold port, which is designed to push cold water to the bottom for heating, can't do its job if it's connected to the hot line.
For the connections themselves, I highly recommend flexible braided steel connectors for any DIY install. They give you a little wiggle room and make getting a tight seal much easier.
- Start by wrapping the male threads on the heater's nipples and your home's pipes with 3-4 layers of Teflon tape. Always wrap in a clockwise direction—the same way the fitting will tighten.
- Thread the connectors on by hand first. This is crucial for preventing cross-threading, which can ruin the fitting.
- Once hand-tight, give it a final turn with a wrench. You’re looking for snug, not Herculean. Overtightening can crush the rubber gaskets inside and cause a leak.
A New Shut-Off Valve is Non-Negotiable
While you have the water off and the system drained, this is the absolute best time to replace the old shut-off valve. If you have an old, multi-turn gate valve, get rid of it. They are notorious for seizing up or failing to close completely.
Swap it out for a modern quarter-turn ball valve. It’s a far superior design that gives you a positive, reliable shut-off. You'll thank yourself for this upgrade the next time you need to do any maintenance.
Pro Tip: The shut-off valve must be installed on the cold water inlet line. I’ve seen them put on the hot side, and it's a dangerous mistake. Placing it on the hot outlet can trap pressure from thermal expansion, creating a hazardous situation inside the tank.
Routing the T&P Relief Valve Drain Line
Your Temperature and Pressure (T&P) relief valve is the most important safety device on the entire unit. If the tank ever over-pressurizes or gets too hot, this valve opens automatically to vent the danger. That scalding hot water needs a safe place to go, which is why a proper drain line is required.
In the Denver area, local codes are very clear on this. The drain line must:
- Be made from a material rated for high temperatures, like copper or CPVC.
- Run continuously downward to a floor drain or other approved discharge location.
- Maintain an air gap of at least 6 inches between the end of the pipe and the drain itself to prevent contaminated water from siphoning back into your tank.
- Never, ever be capped, plugged, or have another valve installed on it.
This isn't just a best practice; it's a life-safety requirement designed to prevent catastrophic tank failure.
Why a Thermal Expansion Tank is Mandatory in Denver
Most homes in the Denver Metro area are on what’s known as a “closed-loop” system. This means you have a pressure-reducing valve or a backflow preventer on your main water line, which stops water from flowing back into the city’s supply.
When water is heated, it expands—this is called thermal expansion. In a closed system, that expanded water volume creates excess pressure with nowhere to go. This pressure can cause your T&P valve to drip constantly, damage your fixtures, and drastically shorten the life of your new water heater.
This is precisely why a thermal expansion tank is required by local code. This small tank gets installed on the cold water line and has an internal air bladder that safely absorbs this pressure. Don't think of it as an optional add-on; for a safe, code-compliant installation in this region, it's essential. As you work with different hot water lines, knowing the properties of materials like PPR pipes can also be a huge advantage in creating a durable, long-lasting system.
Executing Safe Gas and Electrical Hookups
Now we're at the part of the job that demands your full, undivided attention: hooking up the energy source. Whether your new heater runs on natural gas or electricity, this is where precision is non-negotiable. A mistake here isn't just a simple do-over; it can be downright dangerous.
This is the moment to slow down, breathe, and double-check every single thing you do. Speed is not the goal. Getting it done safely and correctly the first time is. We’ll cover both gas and electric models, as each has its own set of rules you absolutely have to follow.
Safe Connections for a Gas Water Heater
Connecting a gas line is a game of inches and requires a meticulous touch. Even the smallest leak can lead to huge problems, so every fitting and every turn of the wrench is designed to create a perfect, gas-tight seal.
First things first, grab your pipe dope or gas-rated Teflon tape. You'll want to apply a good, even coat to the male threads of your pipe fittings. This isn't just for lubrication; it’s a critical sealant that ensures the connection is airtight.
When you're ready to connect the flexible gas line to the heater’s control valve, always use the two-wrench technique. It's simple but crucial. Use one wrench to hold the gas control valve assembly steady, preventing it from twisting. Use the second wrench to tighten the nut on the flex line. This move stops you from putting torque on the sensitive internal parts of the valve, which can be easily damaged.
A crucial but often-forgotten piece of the puzzle is the sediment trap (sometimes called a drip leg). This small assembly of pipe and fittings sits on the gas line just before it enters the control valve. Its entire job is to catch debris, moisture, or rust particles from the main gas line before they can clog or ruin your new heater's controls. Denver-area plumbing codes require this for good reason—it’s a simple part that adds years to the life of your appliance.
Once everything is tightened, it's time for the most important test. Mix up some dish soap and water in a spray bottle or cup. Coat every single joint and connection you made with the soapy solution. Then, slowly open the gas shut-off valve and watch carefully. If you see any bubbles—even tiny ones—you have a leak. Shut the gas off immediately, tighten that connection again, and re-test. Do not turn the heater on until you’ve confirmed there are zero leaks.
Secure Wiring for an Electric Water Heater
Working with an electric water heater brings its own set of rules, and they all start with one golden rule: make sure the power is off.
Head to your home's main circuit breaker panel and find the one labeled for the water heater. Flip it firmly to the "OFF" position. But don't stop there. Go back to the wires where you'll be making the connection and use a non-contact voltage tester. You need to be 100% certain the circuit is dead. This simple five-second check can literally save your life.
Most residential electric heaters use a 240-volt circuit. This usually means you'll see two hot wires (often black and red) and a ground wire (green or bare copper).
- Ground wire first, always. Connect the ground wire from the wall to the green grounding screw on the water heater. This is a vital safety feature that can't be skipped.
- Next, use wire nuts to connect the two hot wires from the house to the corresponding wires on the heater. With a 240-volt setup, it doesn't matter which hot wire connects to which, but the connections must be rock-solid.
- After twisting on the wire nuts, give each wire a gentle but firm tug. A loose connection can arc, melt, and become a serious fire hazard.
Once you’re confident in your connections, carefully tuck the wires back into the junction box and screw the cover plate back on. Never, ever run the heater without this cover securely in place. The success of the entire project hinges on these careful, deliberate connections.
Remember, a properly installed heater is a safe heater, but your job isn't quite done. Regular upkeep is just as important as a good installation. For tips on keeping your new unit in top shape for years to come, check out our guide on essential hot water heater maintenance.
Final Checks: Filling, Testing, and Insulating
You’re in the home stretch now. The heavy lifting is over, and your new water heater is in place. But don't get ahead of yourself—these final steps are what turn a collection of pipes and wires into a reliable appliance you can trust for years.
Rushing this part of the job is a classic rookie mistake that can lead to leaks, electrical problems, or a heater that just won’t fire up. Think of this as the quality control phase. It’s all about ensuring a safe, efficient, and long-lasting installation.
The Critical Filling Sequence
First things first: you have to fill the tank with water. The sequence here is absolutely everything, and getting it wrong can be a costly mistake.
Before you even think about touching the breaker or a match, make sure the drain valve at the bottom of the new heater is cranked down tight. Now, open the main cold water shut-off valve that supplies the heater. You should hear the sound of water rushing into the empty tank.
Here's the trick that every pro knows: head to the nearest faucet—a bathtub spout is perfect for this—and open the hot water side all the way. You’ll get a whole lot of hissing, spitting, and sputtering. That’s a good sign! It's just air being purged from the tank and the hot water lines.
Let that faucet run until you see a solid, steady stream of water. No more sputtering, no more air. That’s your confirmation that the tank is 100% full. Now you can shut the faucet off.
Warning: Never, ever restore power or light the pilot on an empty or partially filled water heater. With an electric model, you'll "dry fire" the heating elements, and they will burn out in seconds. On a gas model, you risk causing serious damage to the tank itself. This is a completely avoidable and expensive mistake.
Leak Inspection and Powering Up
With the system full and under pressure, it's time to play detective. Grab a good flashlight and a dry paper towel and meticulously inspect every single joint you touched.
Check these spots for even the smallest hint of moisture:
- The hot and cold water supply line connections
- The fittings on the T&P valve
- The main drain valve at the bottom
- Any connections for a thermal expansion tank, if you installed one
If you find a drip, don't just crank on it. Shut the water off, drain a little water to relieve the pressure, and then give the fitting a slight turn. Refill and check it again. Once you are absolutely confident that every connection is bone-dry, you can move on.
For an electric heater, head to the breaker panel and flip the correct circuit back to the "ON" position. For a gas heater, carefully follow the manufacturer's specific instructions for lighting the pilot and setting the thermostat.
Setting the Temperature and Final Safety Tests
The Department of Energy has a solid recommendation here: set your water heater’s thermostat to 120°F. This temperature is plenty hot for showers and dishes but significantly reduces the risk of dangerous scalding. As a bonus, it can also lower your water heating costs by as much as 10%.
Your last safety check is to test the Temperature and Pressure (T&P) relief valve. Place a bucket under the discharge pipe and briefly lift the test lever. You should get a quick, powerful burst of hot water. When you let go, the lever should snap back into place and stop the flow completely. This confirms the valve isn't stuck and is ready to do its job.
The Finishing Touch: Pipe Insulation
Please don't skip this final, simple step. Wrapping the first few feet of your hot and cold water pipes with foam insulation is one of the easiest energy-saving wins you can get. It can reduce standby heat loss and even raise the water temperature at the tap by 2°F–4°F.
Foam pipe sleeves are cheap and take minutes to install—just cut them to length and slip them over the pipes. It’s a small detail that pays you back on your energy bill every single month.
While this guide walks you through the process, remember that the complexities of local codes and the inherent risks of plumbing and electrical work are very real. For many homeowners, understanding why to have a professional plumber install your water heater brings the peace of mind that the job is done right, the first time.
For a guaranteed safe, code-compliant, and stress-free installation in the Denver area, trust the experts at Professional Plumbers Denver. Our experienced technicians handle everything from start to finish, ensuring your new water heater runs perfectly for years to come. Visit us at https://professional-plumbers-denver.com or call us today
