
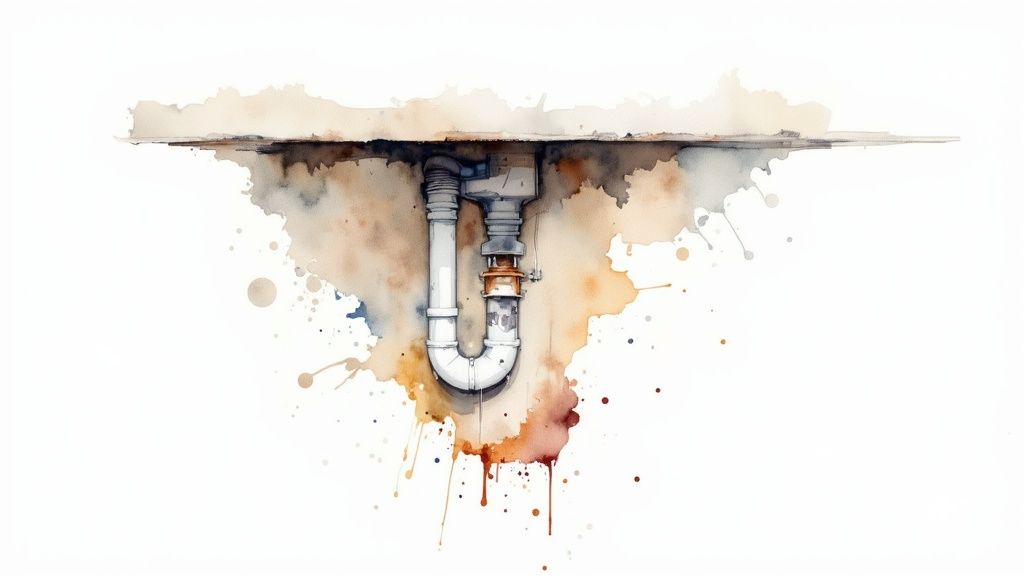
Ever glanced at the U-shaped pipe tucked away under your sink and wondered what it does? That’s a P-trap, and it’s one of the most vital, yet overlooked, components in your entire plumbing system.
Think of it as your home’s personal gatekeeper. Its simple, curved design is engineered to hold a small amount of water at all times. This water acts as a seal, creating a physical barrier that blocks smelly and potentially harmful sewer gases from wafting up your drains and into your home.
The Unsung Hero Under Your Sink
While it might seem like just another piece of pipe, the P-trap is a brilliant bit of low-tech engineering that pulls double duty in every modern home. Its main job is all about sanitation, but it also plays a role in keeping your plumbing practical and functional. Without it, your house would quickly smell unpleasant, and you could be exposed to unhealthy fumes.
The real magic is in its shape. Every time you run the water in your sink, shower, or tub, the P-trap’s U-shaped bend catches and holds onto a bit of that water. This permanent little puddle, called a trap seal, effectively seals off the drain, preventing anything from the sewer system from coming back up.
A Breakthrough in Home Sanitation
This simple water barrier is an absolute necessity for a healthy home. Before P-traps became standard, buildings were constantly filled with foul odors and the serious health risks that come with sewer gas exposure.
The modern design we use today was patented way back in 1775 by a watchmaker named Alexander Cumming. His simple but effective S-shaped trap (a precursor to the P-trap) revolutionized sanitation by creating a reliable water seal that dramatically improved indoor air quality. It was a game-changer for preventing the backflow of gases like methane, which is not only toxic but also flammable.
Key Takeaway: A P-trap’s main function is to hold a water seal that acts as a physical barrier. This seal stops sewer gases, pests, and unpleasant odors from coming up through the drain and into your home.
On top of blocking gases, the P-trap has another handy purpose: it’s a natural catch-all for small, heavy objects. If you’ve ever had that heart-stopping moment of dropping a ring or an earring down the drain, the P-trap is your best friend. It often catches the item in its bend, saving it from being lost forever in the vast sewer network.
We’ll take a closer look at the full purpose of a P-trap and all the ways it protects your home throughout this guide. For now, here is a quick summary of its most important jobs.
P-Trap Key Functions at a Glance
This table breaks down the essential roles a P-trap plays in your plumbing system.
| Function | How It Works | Why It’s Important |
|---|---|---|
| Blocks Sewer Gas | The U-shaped bend holds a small amount of water, creating a “trap seal.” | Prevents foul odors and potentially harmful gases like methane and hydrogen sulfide from entering your home. |
| Catches Debris | The curve slows water flow, allowing heavier debris to settle at the bottom. | Helps prevent larger clogs from forming deeper in your plumbing system where they are harder to reach. |
| Retrieves Lost Items | Small, heavy items (like jewelry) fall into the trap and are held by the water seal. | Allows for easy retrieval of accidentally dropped valuables by simply disconnecting the trap. |
| Stops Pests | The standing water acts as a physical barrier. | Prevents insects and other small pests from crawling up from the sewer pipes into your home. |
As you can see, this simple component is doing a lot of work behind the scenes to keep your home safe, sanitary, and functional.
How a P-Trap Protects Your Home
The real magic of a P-trap is in its brilliantly simple design. Every time you run water down the drain, that distinctive U-shaped bend is designed to hold onto a small amount of it. The rest of the water flows away, but this little plug remains. This is what plumbers call a trap seal.
Think of that trap seal as the single guard standing between the fresh air in your home and the entire city sewer system. It’s a remarkably effective physical barrier that gets topped up automatically every time you use the sink. As long as that water is there, it physically stops sewer gas from creeping back up your pipes.

Blocking More Than Just Bad Smells
The primary job of this water barrier is to stop those nasty, and potentially hazardous, fumes. Sewer lines are full of gases like hydrogen sulfide (the source of that rotten egg smell), ammonia, and methane. Not only are these unpleasant, but long-term exposure can be unhealthy. Methane, in particular, can even be flammable if it builds up.
A working P-trap isn’t just a nice-to-have piece of plumbing; it’s a critical safety feature that protects your home’s air quality from harmful sewer gases.
Beyond stopping fumes, the P-trap’s water barrier also keeps out unwanted guests. That pool of water makes it nearly impossible for insects or even small rodents to crawl up from the main sewer lines and into your house. If you’re dealing with a pest problem, understanding your plumbing can be a big help, and you can find more specific info in guides covering drain-related services for rats.
The P-Trap’s Unseen Partner: The Vent System
Here’s something many people don’t realize: a P-trap can’t work on its own. It absolutely depends on its partner, the plumbing vent. This is a pipe, usually running straight up through your roof, that lets air into your drainage system.
Ever tried to pour juice from a can with only one small hole punched in the top? It glugs and sputters. Your plumbing system is the same way. The vent is that crucial second hole.
- It keeps pressure neutral: The vent equalizes the air pressure throughout your drain pipes.
- It stops siphoning: Without a vent, a big rush of water would create a powerful vacuum, sucking the water right out of the P-trap and breaking the seal.
- It guarantees a smooth flow: Proper venting helps water and waste drain away quickly and quietly.
If you ever hear a loud gurgling noise from a drain after the water is gone, that’s a classic sign of a venting problem. The system is gasping for air and pulling it through the P-trap, which means your water seal is being compromised. That gurgle is often the first warning sign before sewer smells start to appear. Together, the P-trap and the vent system work as a team to keep your home’s plumbing safe, sanitary, and odor-free.
Choosing The Right P-Trap For Your Project
Walk down the plumbing aisle of any hardware store, and you’ll see that not all P-traps are the same. You’ll find a variety of options, each designed for different situations, budgets, and even aesthetic tastes. Picking the right one isn’t just about what fits; it’s about ensuring a solid, leak-free installation that works for your specific setup.

The two biggest factors you’ll need to weigh are the material and the trap’s specific design. The right choice often comes down to a simple question: will the plumbing be visible, like under a sleek pedestal sink, or will it be tucked away inside a cabinet?
Comparing P-Trap Materials
To help you decide, let’s break down the most common materials you’ll encounter. Each has its own set of pros and cons, making one a better fit than another depending on your project.
| Material | Pros | Cons | Best For |
|---|---|---|---|
| PVC (Plastic) | Very affordable, lightweight, easy to cut and install. | Can look cheap, not ideal for exposed plumbing. | Hidden sinks (inside vanities or walls). |
| ABS (Plastic) | Strong, easy to work with, similar to PVC. | Also not aesthetically pleasing for visible pipes. | Situations where local codes require it over PVC. |
| Chrome-Plated Brass | Highly durable, polished and professional look. | More expensive, can be trickier to install. | Exposed plumbing (pedestal or wall-mounted sinks). |
For most homeowners, the decision is pretty straightforward. If your pipes are hidden from view, affordable and easy-to-use plastic is the most practical choice. But if the P-trap is going to be on display, spending a little extra on a metal one will give you a much more polished and professional-looking finish.
Why You Must Avoid An S-Trap
While you’re picking out parts, it’s absolutely critical to know the difference between a modern P-trap and an outdated S-trap. Just like its name suggests, an S-trap forms a complete “S” shape. This design might look functional, but it’s now outlawed by most plumbing codes for a very important reason.
The deep S-curve creates a powerful siphoning action when the sink drains. This can easily suck all the water right out of the trap, destroying the protective water seal and allowing nasty sewer gases to flow directly into your home—which is the exact problem the trap is supposed to solve!
A proper P-trap, on the other hand, connects to a horizontal drain pipe in the wall that is linked to a vent system. This setup breaks the siphon and keeps that water barrier right where it needs to be. So, always double-check that your installation forms a “P,” not an “S.”
Knowing these details is also key when budgeting for new plumbing work. For a deeper dive into project planning, our guide on rough-in plumbing cost offers more great information. If you ever discover an old S-trap in your home, you should have it replaced with a modern, code-compliant P-trap to keep your plumbing safe and effective.
How to Install or Replace a P-Trap Yourself
Ready to roll up your sleeves and tackle a real plumbing project? You’re in luck. Replacing a P-trap under your sink is one of the best first projects for a new DIYer. It’s straightforward, doesn’t require a truckload of specialized tools, and gives you a major confidence boost.
Whether you’re swapping out an old, corroded metal trap, chasing down a stubborn leak, or putting the finishing touches on a brand-new sink install, this guide will walk you through it.
Getting Your Tools and Materials Ready
The secret to a stress-free plumbing job is having everything you need within arm’s reach before you disconnect anything. A little prep work now saves you from a frantic, mid-project run to the hardware store.
You probably have most of what you’ll need already. The parts are designed to be hand-tightened, but a good pair of pliers is your best friend for getting that last, leak-proof seal.
- A Bucket or Basin: You’ll want this sitting right under the old P-trap. Trust me, it’s holding more water than you think, and this will catch it all.
- Channel-Lock Pliers: These are the MVP for this job. They give you the leverage to get slip nuts unstuck and to apply that final, firm quarter-turn.
- Rags or Towels: Plumbing is a wet business. Keep these nearby for wiping up spills and cleaning off the old pipe connections.
- A New P-Trap Kit: This is the key. Make sure the new trap matches the diameter of your drain pipes. Most kitchen sinks use 1.5-inch pipes, while bathroom sinks typically use 1.25-inch pipes. Double-check before you buy!
Once your gear is laid out, you’re ready to get the old trap out of there.
Step-by-Step Installation Guide
Following a clear order of operations is what separates a quick fix from a frustrating afternoon. Go slow, be deliberate, and focus on getting the alignment right.
- Take Out the Old Trap: Find the two big slip nuts holding the trap in place. One connects to the vertical pipe coming down from the sink (the tailpiece), and the other connects to the horizontal pipe going into the wall (the drain arm). Try loosening them by hand first. If they’re stubborn, grab your channel-lock pliers. Wiggle the U-shaped bend free and dump the trapped water into your bucket.
- Clean Up the Connections: Grab a rag and wipe down the threads on the tailpiece and drain arm. You want to get rid of any gunk, old tape, or plumber’s putty. A clean surface is essential for the new washers to create a perfect, watertight seal.
- Put the New P-Trap Together: Your kit should have the U-bend, a J-shaped arm, and two slip nuts with washers. Start by sliding a slip nut and a washer onto the sink’s tailpiece. Now, connect the U-bend to that tailpiece and hand-tighten the nut.
- Connect and Align Everything: Attach the J-shaped arm to the other side of the U-bend and slide it into the drain pipe in the wall. This is the most crucial part: make sure the pipes are perfectly aligned before you tighten anything down. Fighting with misaligned pipes is the number one reason these installations leak.
This image gives you a great visual of how it all fits together.
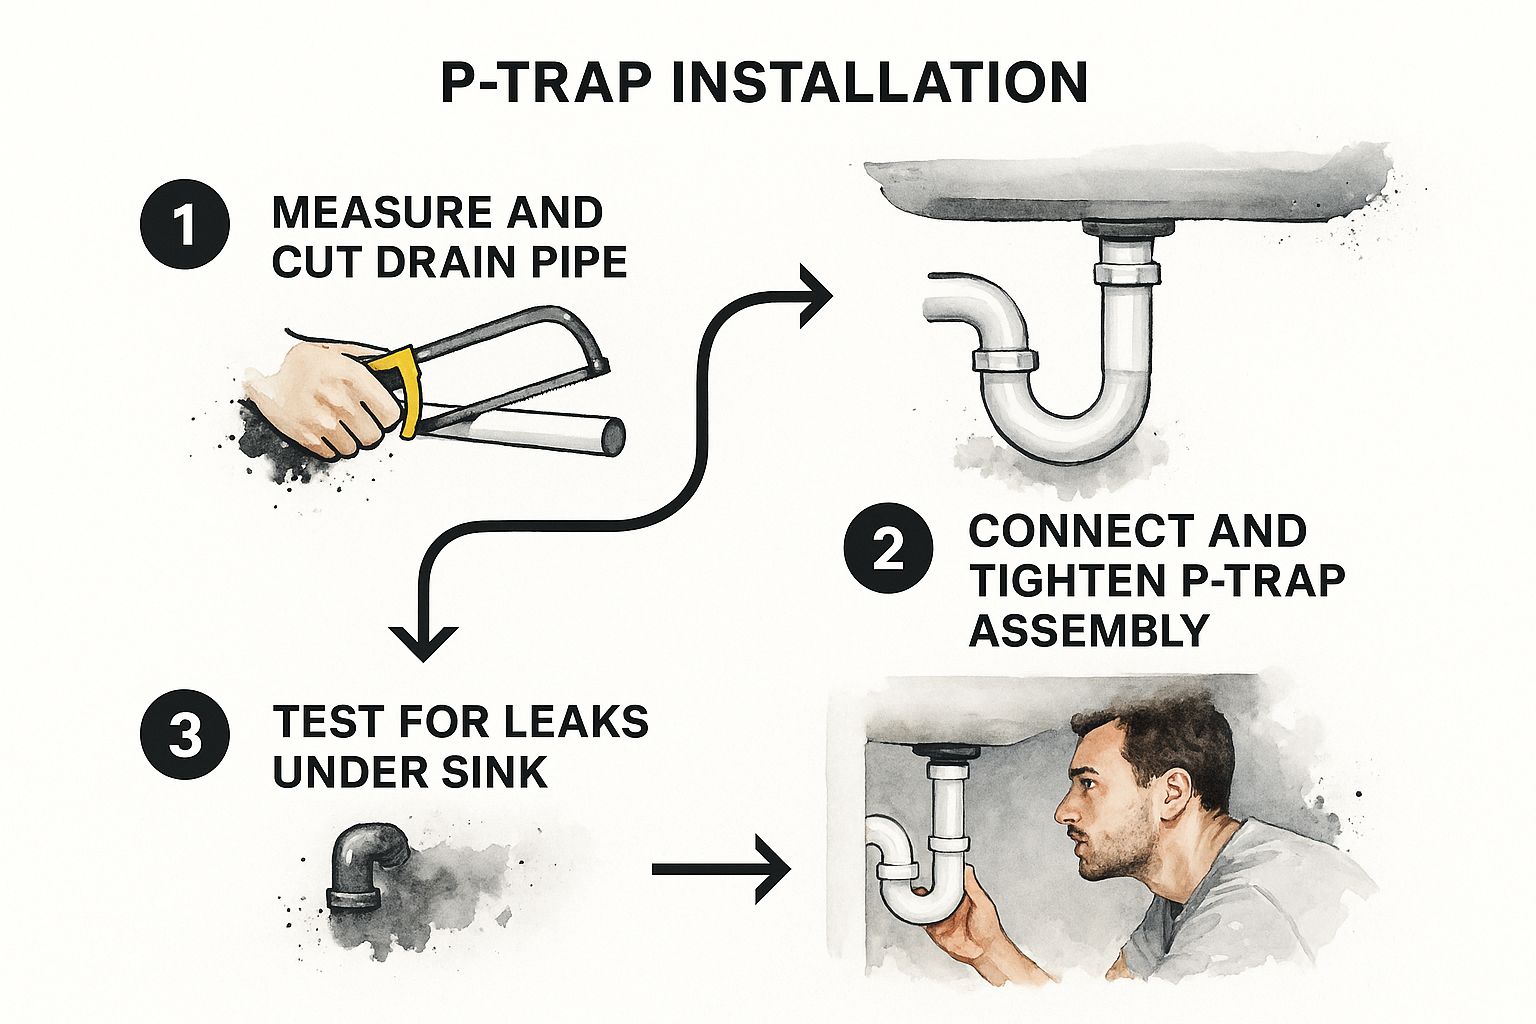
As you can see, it’s all about getting the measurements right, making sure the connections are secure, and then testing your work.
The Final Tightening and Leak Test
With all the pieces in place, it’s time to make it official. This final step is where you ensure all your work pays off with a leak-free drain.
Pro Tip: Tighten every connection by hand first until it’s snug. Then, use your channel-lock pliers to give each nut just one final quarter-turn. That’s it. Over-tightening is a common mistake that can crack the plastic nuts or warp the washers, causing the very leak you’re trying to prevent.
Once everything is tightened, turn on the faucet and let the water run for a solid minute. Get a flashlight and carefully inspect every connection point for any sign of a drip. If you spot one, give that nut a tiny extra turn and test it again.
When it’s bone dry, you can pack up your tools. You’ve just successfully handled a plumbing job from start to finish.
Troubleshooting Common P-Trap Problems
For such a simple piece of plumbing, the P-trap can certainly cause its fair share of headaches. The good news? Most of these problems are straightforward to diagnose and fix on your own. You’ll typically run into one of three common culprits: a slow drain, a persistent leak, or that unmistakable sewer gas smell.
Figuring out what’s causing the issue is half the battle. If your sink is draining slowly, it’s almost always a clog. Over time, that U-shaped bend becomes a magnet for all sorts of gunk—hair, soap scum, food bits, and grease—which eventually builds up and chokes off the water flow.
Identifying the Root Cause of P-Trap Issues
A leak, on the other hand, is usually a simple mechanical failure. Most often, it’s just a slip nut that’s worked itself loose. It could also be a plastic or rubber washer that’s gotten old and brittle, losing its watertight seal. And that foul odor? That almost always means one thing: the trap has gone dry.
Here’s a quick breakdown of what to look for:
- Slow Drains and Clogs: This is the big one. The same curve that’s great at catching a dropped wedding ring is also fantastic at catching debris. For step-by-step solutions, it helps to know how to unclog a kitchen sink using methods that won’t damage your pipes.
- Leaks or Drips: If you see water pooling in the cabinet under your sink, the problem is almost always at one of the two main connection points where the slip nuts are. It’s a dead giveaway.
- Sewer Gas Smell: This is a clear sign that the water barrier inside the trap is gone. It’s incredibly common in guest bathrooms or basement utility sinks that don’t see much action, allowing the water to simply evaporate over time.
A Quick Fix for Smells: Notice a funky odor coming from a sink you rarely use? The fix is often laughably easy. Just run the water for about 30 seconds. This refills the trap, restores the all-important water seal, and immediately blocks the smell.
Step-by-Step Solutions for P-Trap Problems
Once you’ve pinpointed the issue, the fix is usually right around the corner. If you’re dealing with a clog, forget the harsh chemicals. The safest and most effective solution is to place a bucket under the trap, unscrew the slip nuts by hand, and clean out the gunk manually. It’s a bit messy, but it works every time.
For a stubborn leak, start by hand-tightening the slip nuts, then give them a gentle quarter-turn with a pair of pliers. If the drip continues, the washers are likely the culprit. You’ll need to take the trap apart, bring the old washers with you to the hardware store to get an exact match, and then put everything back together.
It’s easy to take this little part for granted, but the P-trap was a massive leap forward in modern sanitation. In the 19th century, major cities were battling deadly diseases like cholera that were directly linked to poor wastewater management. The widespread adoption of plumbing traps became a cornerstone of public health, protecting homes from dangerous sewer gases and the pathogens they carried.
Simple Maintenance to Prevent P-Trap Issues
When it comes to plumbing, an ounce of prevention is truly worth a pound of cure. For P-traps, a few simple, proactive habits can save you a world of trouble from clogs, leaks, and nasty smells. Think of it as easy insurance against a future plumbing headache.
One of the best things you can do is a regular hot water flush. Seriously, it’s that easy. Once a week, just let the hot water run down your sink drain for a solid minute. This simple action helps melt away any light grease or soap scum before it gets a chance to harden into a stubborn blockage.
What Not to Pour Down the Drain
While hot water helps, what you keep out of your drain is even more critical. The U-shaped bend in a P-trap is practically designed to catch things it shouldn’t, and some materials are notorious clog-creators.
To keep your pipes flowing freely, make sure these items never go down your sink:
- Grease, Fats, and Oils: They might be liquid when they’re hot, but these substances cool and solidify inside your pipes. They create a sticky mess that grabs onto every other bit of debris that comes along.
- Coffee Grounds: They don’t dissolve in water. Instead, they clump together to form a dense, heavy sludge that’s incredibly difficult to clear out.
- Fibrous Foods: Think celery strings, eggshells, and even pasta. These items can build up and create a net-like obstruction that catches everything else passing by.
Key Insight: A P-trap clog almost never happens all at once. It’s the result of a slow, steady buildup of materials that never belonged in the drain in the first place. Being mindful of what you wash away is your number one defense.
Finally, don’t forget about the drains you don’t use very often, like the sink in a guest bathroom or a basement utility sink. The water barrier in a P-trap can evaporate over time if it’s not replenished, which breaks the seal and lets sewer gas seep into your home.
The fix is simple: run water in every sink, tub, and shower for about 30 seconds at least once a month. This tops off the trap and keeps that protective water seal intact.
These small habits are the foundation of healthy plumbing. For a more detailed guide to keeping your whole system in great shape, our comprehensive plumbing maintenance checklist offers a complete game plan for your home.
Got Questions About P-Traps? We’ve Got Answers
Even after you get the hang of what a P-trap does, some specific questions always pop up. Let’s tackle some of the most common ones homeowners ask about this little plumbing workhorse.
Should There Be Water in My P-Trap?
Yes, always! A P-trap without water isn’t doing its job. Think of that U-shaped bend as a purposefully designed mini-reservoir.
That small pool of water is what we call the “trap seal.” It creates a physical barrier that literally blocks smelly, and potentially unhealthy, sewer gases from creeping up your drain and into your home. If you peek under the sink and the trap is bone dry, it’s not offering any protection at all.
Pro Tip: A dry P-trap is a useless P-trap. If you have a sink you don’t use often—like in a guest bathroom or basement—make it a habit to run the water for a few seconds every couple of weeks to keep that seal full.
How Often Should I Bother Cleaning My P-Trap?
There’s no strict calendar for this. The best cue is simply a slow drain. If you notice water taking its sweet time to go down, that’s your sign a clog is starting to form and it’s time for a cleanout.
That said, for preventative maintenance, giving it a good cleaning once a year is a fantastic habit. This is especially true for the hardworking sinks in your kitchen and main bathroom, where things like grease, hair, and soap scum build up much faster.
What’s That Gurgling Sound Coming From My P-Trap?
That gurgling noise is the classic sign of a venting problem. Every plumbing system needs vent pipes to allow air to flow in, which helps balance the pressure and lets water drain smoothly without creating a vacuum.
When your P-trap starts to gurgle, it’s basically gasping for air. Instead of pulling air from the designated vent stack (which might be clogged), it’s sucking air right through the water in the trap. This usually points to a partial clog down the line or, less commonly, a blocked main plumbing vent on your roof.
Is It Safe to Use Chemical Drain Cleaners on a P-Trap?
I almost always advise against it. Those harsh, caustic chemicals can do a real number on your pipes. They’re especially rough on older chrome-plated brass traps and can eat away at the rubber seals and gaskets that keep your connections watertight.
On top of that, they’re often not very good at dissolving solid clogs like a tangled mass of hair or food bits. The best and safest approach is to just manually remove the trap and clean it out by hand. A simple drain snake is also a much better option for clearing the line without damaging your plumbing.
If you’re dealing with a plumbing problem that’s more than you want to handle, or you just want a professional to give your system a check-up, don’t hesitate to call in the experts. Professional Plumber Denver is here to help with all your plumbing and drain cleaning needs. Reach out to us today for reliable service you can count on.
