
It's easy to put off replacing a shower head. We often wait until there's a serious leak, but the truth is, a shower head can be failing you long before it starts dripping. Spotting the subtle signs of decline is the first step toward a better daily shower, lower water bills, and a quick bathroom refresh.
So, how do you know if it’s really time for an upgrade?
Is Your Shower Losing Its Punch?
Remember when your shower felt powerful and invigorating? If it's now more of a weak, sputtering mist, that's a classic sign of a problem. The culprit is usually mineral buildup. Over time, limescale from hard water clogs the small nozzles, choking off the water flow. You might be able to clean it once or twice, but heavy, persistent clogging often means the fixture has reached the end of its useful life.
Water efficiency is another big reason to consider a change. Older shower heads are notorious water-wasters. Swapping one out isn't just about getting better pressure; it's one of the simplest, most effective ways to lower your home's water consumption.
From my experience, many people are shocked by the difference a new, water-efficient shower head makes. It's a small investment that often leads to noticeable savings on the next utility bill.
More Than Just Function: Looks Matter, Too
Let's be honest, a corroded, discolored, or just plain ugly shower head can make your whole bathroom feel dated. A fresh fixture, whether it’s a sleek, modern design or a wide rainfall model, can instantly modernize the space. Think of it as a mini-renovation with minimal effort.
This isn't just about vanity; it's part of a bigger trend of turning bathrooms into more comfortable, spa-like retreats. The global market for shower heads is expected to jump from $13.31 billion in 2024 to over $20.41 billion by 2030. This growth is fueled by people wanting better-looking fixtures and smarter, water-saving technology.
Even with all the new options, the standard fixed shower head still holds a massive 57.31% of the market, which shows that a simple, high-quality classic never goes out of style. You can dig into more of these consumer trends on Grand View Research.
Choosing Your New Shower Head and Tools
Any good project starts with getting your gear in order. The good news is that replacing a shower head is one of those wonderfully simple DIY tasks that doesn't require a massive, expensive toolkit. You probably have everything you need lying around the house already.
Before you twist off that old fixture, take a moment to gather your supplies. This little bit of prep work will save you from making a drippy, frustrating trip to the hardware store halfway through the job.
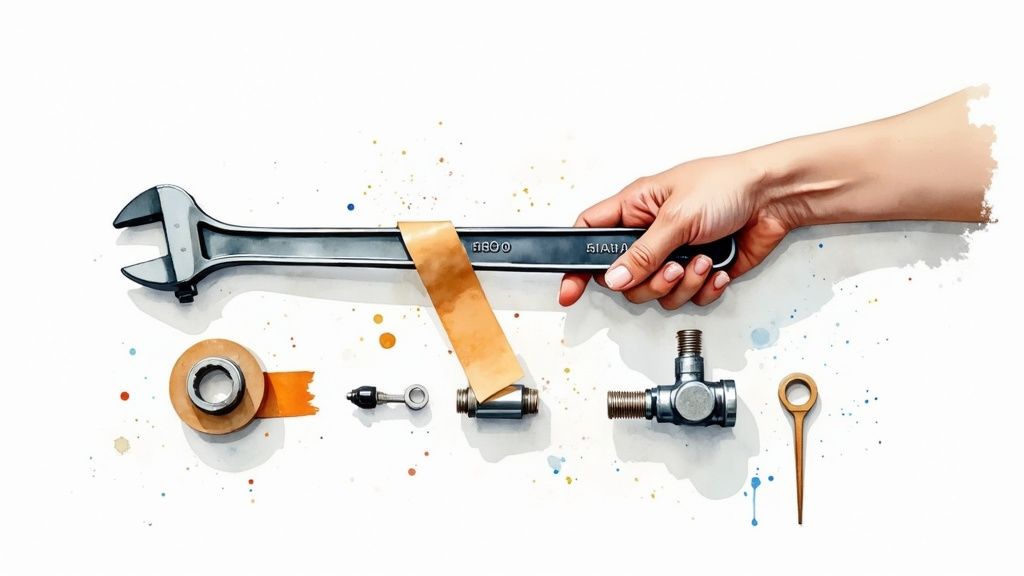
Here’s a quick rundown of what you'll need for a smooth and leak-free installation.
Essential Tools for Shower Head Replacement
| Tool/Material | Purpose | Pro Tip |
|---|---|---|
| Adjustable Pliers or Wrench | To get a firm grip on the shower arm and the base of the old shower head. | Wrap the jaws with electrical tape to avoid scratching the finish on your new fixture. |
| Soft Rag or Cloth | Protects the chrome or other finishes from being scratched by your tools. | A piece of an old t-shirt or a microfiber cloth works perfectly for this. |
| Thread Seal Tape (Teflon Tape) | Creates a watertight seal on the pipe threads to prevent drips and leaks. | This stuff is cheap and absolutely essential. Don't even think about skipping it! |
| Old Toothbrush or Stiff Brush | Scrubs away old tape residue and stubborn mineral buildup from the shower arm. | A brass-bristled brush is great for this, but an old toothbrush will do in a pinch. |
Having these items ready is often the key difference between a five-minute job and a leaky headache. If you're looking to build out your home repair kit, this guide on essential plumbing tools is a great resource for other common projects.
Matching the Shower Head to Your Needs
Now comes the fun part: picking out the new shower head. What works for one person might not be right for another, so the "best" choice really comes down to your personal taste and your home's plumbing.
A common mistake I see is homeowners with low water pressure buying a huge, 12-inch rainfall shower head. They imagine this luxurious downpour, but what they get is a disappointing, weak trickle. Always match the fixture to your home's water system.
Think about what you truly want out of your daily shower.
- Looking for a powerful, invigorating spray to blast you awake in the morning? A classic fixed shower head with targeted jets is probably your best bet.
- Need more flexibility for rinsing your hair, washing the dog, or cleaning the tub? A handheld model is a game-changer you won't know how you lived without.
- Craving that spa-like experience? A rainfall shower head delivers gentle, widespread coverage. Just be sure you have decent water pressure to support it.
Ultimately, you should choose a style that fits your life, not just one that looks cool in a magazine.
Getting the Old Shower Head Off Without Causing Damage
This is where the real work begins. Honestly, getting the old fixture off is often the trickiest part of the whole job, especially if it’s been sitting there for years. Hard water minerals can basically weld the threads together, but with the right technique, you can get it loose without a fight.
First things first, grab your soft rag and wrap it around the base of the old shower head, right where it connects to the pipe coming out of the wall (that's the shower arm). This is a non-negotiable step. It protects the finish from getting scratched or gouged by your pliers—a simple mistake that can leave a permanent eyesore.
Once it's wrapped, get a firm grip on the covered base with your adjustable pliers. Use your other hand to hold the shower arm itself to keep it from twisting in the wall. Now, turn the shower head counter-clockwise with slow, steady pressure. Don't jerk it. You're not trying to rip it off; you're just trying to break that initial seal.
The image below shows you exactly what this looks like in action.
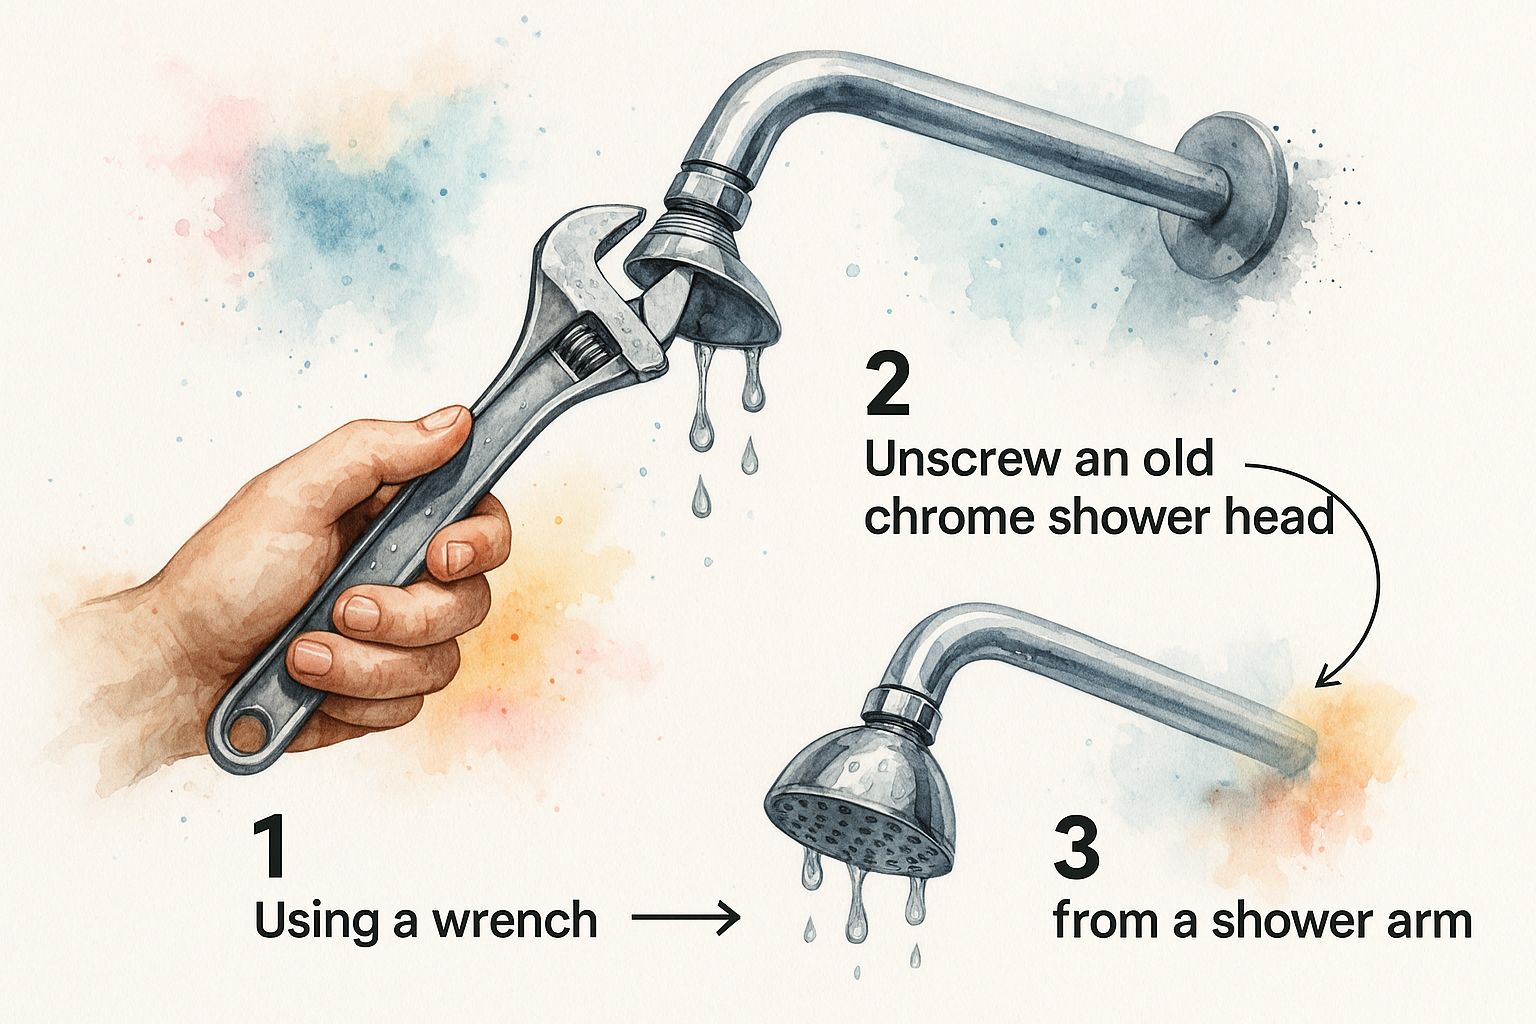
Notice the hand placement and how the pliers are used for leverage, not brute force. This is key to protecting your plumbing.
What to Do If It's Really Stuck
If that shower head won't budge, stop. Whatever you do, don't just apply more muscle. You’ll risk breaking the shower arm or, even worse, the pipe fitting hidden behind your wall—turning a 15-minute project into a call to a plumber.
A common mistake I see is people reefing on the shower arm until it snaps. If it feels cemented on, back off and try another approach. A little penetrating oil or a dedicated limescale remover sprayed right on the threads can make all the difference. Let it soak for 15-20 minutes and then try again.
Once the head finally comes off, you'll be looking at the exposed threads of the shower arm. They’ll almost certainly be caked with old, shredded plumber's tape and mineral gunk. Cleaning this off properly is absolutely essential for a leak-free seal on your new shower head.
- Peel Off the Old Tape: Use your fingernail or a plastic putty knife to scrape away all the old, flaky tape.
- Scrub the Threads: Grab an old toothbrush or a small wire brush and give the threads a thorough scrubbing. Get right into the grooves to clear out any leftover tape, mineral deposits, or other gunk.
Your goal is to get those threads completely clean and bare. A perfectly clean surface is the only way your new thread seal tape can create the watertight connection you need.
Getting the Perfect Seal When Installing Your New Fixture
Alright, the old fixture is out of the way and the shower arm threads are looking brand new. Now for the fun part: installing your shiny new shower head. This is the moment of truth, and the key to preventing annoying drips is all about a little roll of thread seal tape.
Seriously, this stuff is a plumber's best friend for a reason. But there's a trick to it. You have to wrap the tape in the same direction you'll be turning the shower head to tighten it. That means wrapping it clockwise as you look at the end of the pipe. If you go the wrong way, the tape will just bunch up and unspool as you screw on the fixture, making it totally useless.
Get your wrap started about one or two threads back from the very end of the arm. Pull it snug and go around three to five times. You're aiming for a neat, tight wrap where you can still faintly see the shape of the threads underneath.
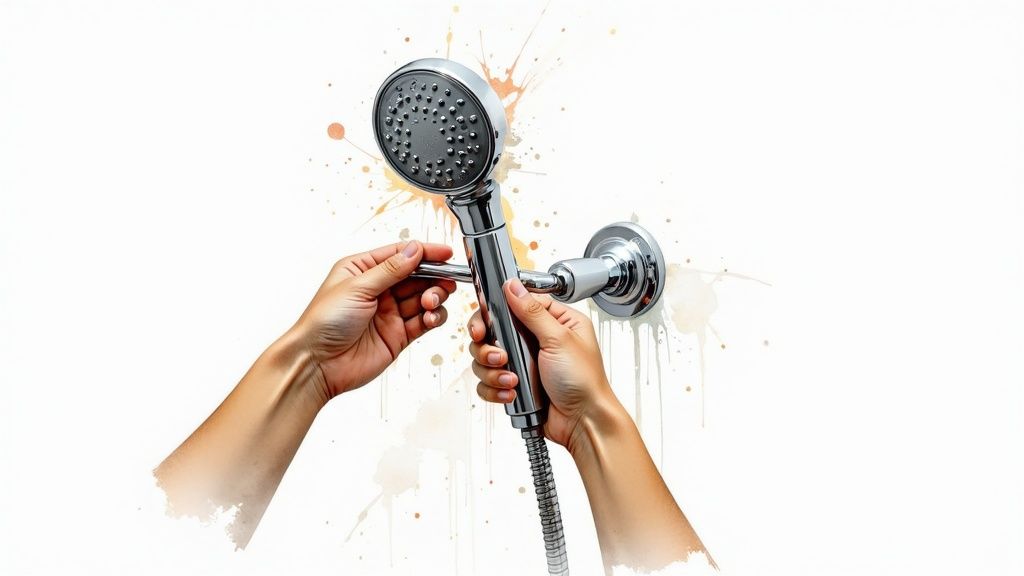
Achieving a Watertight Connection
With the threads prepped, you can now hand-thread your new shower head onto the arm. It should go on easily at first. Keep turning by hand until it feels snug and is pointing down, just how you want it. For most modern fixtures, hand-tight is all it takes.
The single biggest mistake I see homeowners make is cranking down on the fixture with a wrench. It’s so easy to crack the plastic or brass connection on the new shower head, or worse, strip the threads on the pipe coming out of the wall. Remember, the goal is a snug seal, not a test of strength.
If it still feels a little loose after hand-tightening, that's okay. Just grab your soft cloth, drape it over the base of the fixture to prevent scratches, and give it one last, gentle quarter-turn with your pliers. The moment you feel any real resistance, stop.
This is also a great opportunity to think about efficiency. Did you know that switching to a water-saving shower head can cut your water use in the shower by 20% to 60%? These low-flow models are incredibly effective and can save a family thousands of gallons of water each year. You can find more details on these water-saving trends at Market.us.
A solid installation from the start means no headaches later. If you want to dive deeper into the specifics of your home's plumbing, take a look at our guide on mastering shower plumbing in Denver.
Got a Drip? Handling Post-Installation Hiccups
So, you've installed your new shower head, but something's not quite right. Don't sweat it. Even the most careful installation can run into a snag, and thankfully, most are simple fixes you can handle yourself. The usual suspect? A nagging drip right where the shower head connects to the pipe.
Nine times out of ten, a leak at the connection is a thread seal tape issue. Maybe there wasn't quite enough to form a watertight seal, or perhaps it was wrapped in the wrong direction and got mangled when you tightened everything. The solution is easy: just unscrew the head, peel off the old tape, and re-wrap it three to five times clockwise. This ensures the tape tightens as you screw the head on, creating that perfect seal.
What to Do About Weak Water Pressure
Another common complaint after an upgrade is feeling underwhelmed by the water pressure. Before you blame the new fixture, the culprit is often a tiny device inside called a flow restrictor. It’s usually a small plastic disc put there by the manufacturer to meet water conservation standards.
While great for water-saving, a flow restrictor can be a real drag if your home's water pressure is already on the lower side. You can typically pop it out with needle-nose pliers or a small screwdriver to get a stronger spray.
Just be sure to check your local building codes first, as some areas require them. If you’ve removed the restrictor and your shower still feels weak, the problem might be bigger than the fixture itself. Our guide to low water pressure troubleshooting can help you investigate further.
Choosing a new shower head has become about more than just function. With 30%-40% of homeowners prioritizing aesthetics just as much as performance, it's clear that style and experience matter. People are diving into online guides and reviews, influenced by shower head market trends that push for both beautiful design and innovative features.
Frequently Asked Questions About Shower Heads
Even a project as simple as swapping out a shower head can leave you with a few lingering questions. Let's tackle some of the most common ones that come up, so you can finish your project with confidence.
How Often Should I Replace My Shower Head?
While there's no hard-and-fast rule, a good benchmark is every 5-8 years. The real answer, though, often comes down to your water quality.
If you're dealing with hard water, you know the drill—limescale and other mineral deposits will eventually clog the nozzles and ruin your water pressure. Other dead giveaways that it's time for a new one include visible cracks, a stubborn leak right where the head meets the pipe, or maybe you're just ready for an upgrade to a better-looking, more efficient model.
Will Any New Shower Head Fit My Existing Pipe?
More than likely, yes. The plumbing industry in North America made this part easy on us by sticking to a universal standard for this connection. Both the shower arm coming out of your wall and the shower head itself use a 1/2-inch NPT (National Pipe Thread) size.
This standardization is a lifesaver for anyone doing home projects. It means you can walk into just about any hardware store, pick out a shower head you like, and be almost certain it will screw right onto your existing plumbing without any fuss.
Can a New Shower Head Really Increase Water Pressure?
It can absolutely improve the feeling of higher pressure, which is what truly matters for a good shower. If your old head was gummed up with years of sediment, a fresh, clean one will make an immediate and noticeable difference, restoring a much stronger flow.
Modern shower heads are often designed with special features that channel water through smaller, more focused openings. This technology creates a higher-velocity spray that feels way more powerful, even if the actual water pressure from your home's pipes hasn't changed at all.
However, if the water pressure is low throughout your entire house, that's a sign of a bigger plumbing issue that a new shower head alone can't fix.
What Is a Flow Restrictor and Should I Remove It?
A flow restrictor is a small, often colorful plastic disc tucked inside the part of the shower head that connects to the pipe. It’s designed to limit water output to meet conservation standards, usually capping it at 2.5 gallons per minute or less.
Popping it out—which can often be done with a small screwdriver or a paperclip—can definitely give you a more powerful, drenching shower. The trade-off is higher water usage, which will show up on your utility bills. It's also worth checking your local building codes before you remove it, as some areas legally require them to be in place.
If you’ve run through this guide and still feel like you're in over your head, or if you find a more complex problem like a leak behind the wall, don't hesitate to call a professional. For any plumbing challenge, the team at Professional Plumbers Denver is here to help. You can schedule a service by visiting us at https://professional-plumbers-denver.com.
