
Taking on a water softener installation yourself is a fantastic way to tackle Denver's hard water problem head-on and save a good chunk of change—often hundreds of dollars—compared to hiring it out. The whole process really comes down to three main parts: picking the right spot, tying into your plumbing, and setting up the system. Think of this as your complete playbook for getting it done right the first time.
Why a DIY Water Softener Install Is a Smart Move
Hard water is no joke here in the Denver area. It leaves that chalky limescale buildup that wreaks havoc on your plumbing and cuts the lifespan of your big-ticket appliances like dishwashers and water heaters. You can always call a plumber, of course, but there's a real sense of accomplishment (and significant savings) in handling the job yourself. This guide is here to give you the confidence to do just that.
Understanding the Investment
Learning how to install a water softener is about more than just a weekend project; it's a direct investment in your home's future. You’re actively stopping the expensive, long-term damage that mineral buildup causes before it starts. This isn't just a local issue, either. The global market for these systems was valued at around USD 3.3 billion and is climbing as more people see the financial upside of protecting their homes. You can check out more details on the global water softener market to see just how big this trend is.
When you do the installation yourself, you're not just saving on labor. You're getting an up-close-and-personal education on your home’s plumbing, which is priceless for future repairs and troubleshooting.
Here's a quick look at what to expect from your DIY water softener installation, including the time commitment, skill level, and potential savings.
| Project Aspect | Typical Expectation |
|---|---|
| Time Commitment | 4-8 hours, depending on your plumbing experience and setup. |
| Skill Level | Intermediate. You should be comfortable with basic plumbing tasks. |
| Cost Savings | $400 – $1,000+ compared to professional installation. |
Taking the time to understand these aspects helps you decide if a DIY approach is the right fit for you.
The Long-Term Benefits of Soft Water
The immediate cash savings are great, but the real payoff comes down the road. Soft water is like a shield for your entire plumbing system. That same mineral scale that clogs pipes also coats your water heater's heating elements, making it work harder and eventually fail years earlier than it should. This buildup can also impact crucial parts like the anode rod, which is there to prevent corrosion. You can learn more in our guide about what an anode rod is and why it’s so vital for your water heater.
Key Takeaway: Installing a water softener goes way beyond better-lathering soap and spot-free glasses. It's a smart, proactive move to protect your home's entire plumbing ecosystem—from pipes and faucets to major appliances—helping them last longer and saving you from costly replacement bills.
Honestly, this project is well within reach for any homeowner who has some basic plumbing skills and the right set of tools. We’ll guide you through every step with the kind of practical, real-world advice you need to get a professional-quality, leak-free installation.
Choosing Your Tools and the Perfect Installation Spot
Before you even think about cutting into a pipe, a good installation really comes down to two things: having the right tools ready to go and picking the perfect spot for your new water softener. Get these two things right from the start, and I promise the whole project will feel a lot less intimidating.
Let's begin with where you're going to put this thing, because that decision sets the stage for everything else.
Finding the Ideal Installation Location
Picking a spot is more than just finding some open floor space. It’s a strategic choice that affects how well the system works and how easy it is for you to maintain for years to come. Your main goal is to get the softener as close as you can to where your main water line enters your house. This ensures every drop of water gets treated—except for any outdoor hose bibs you intentionally leave on hard water.
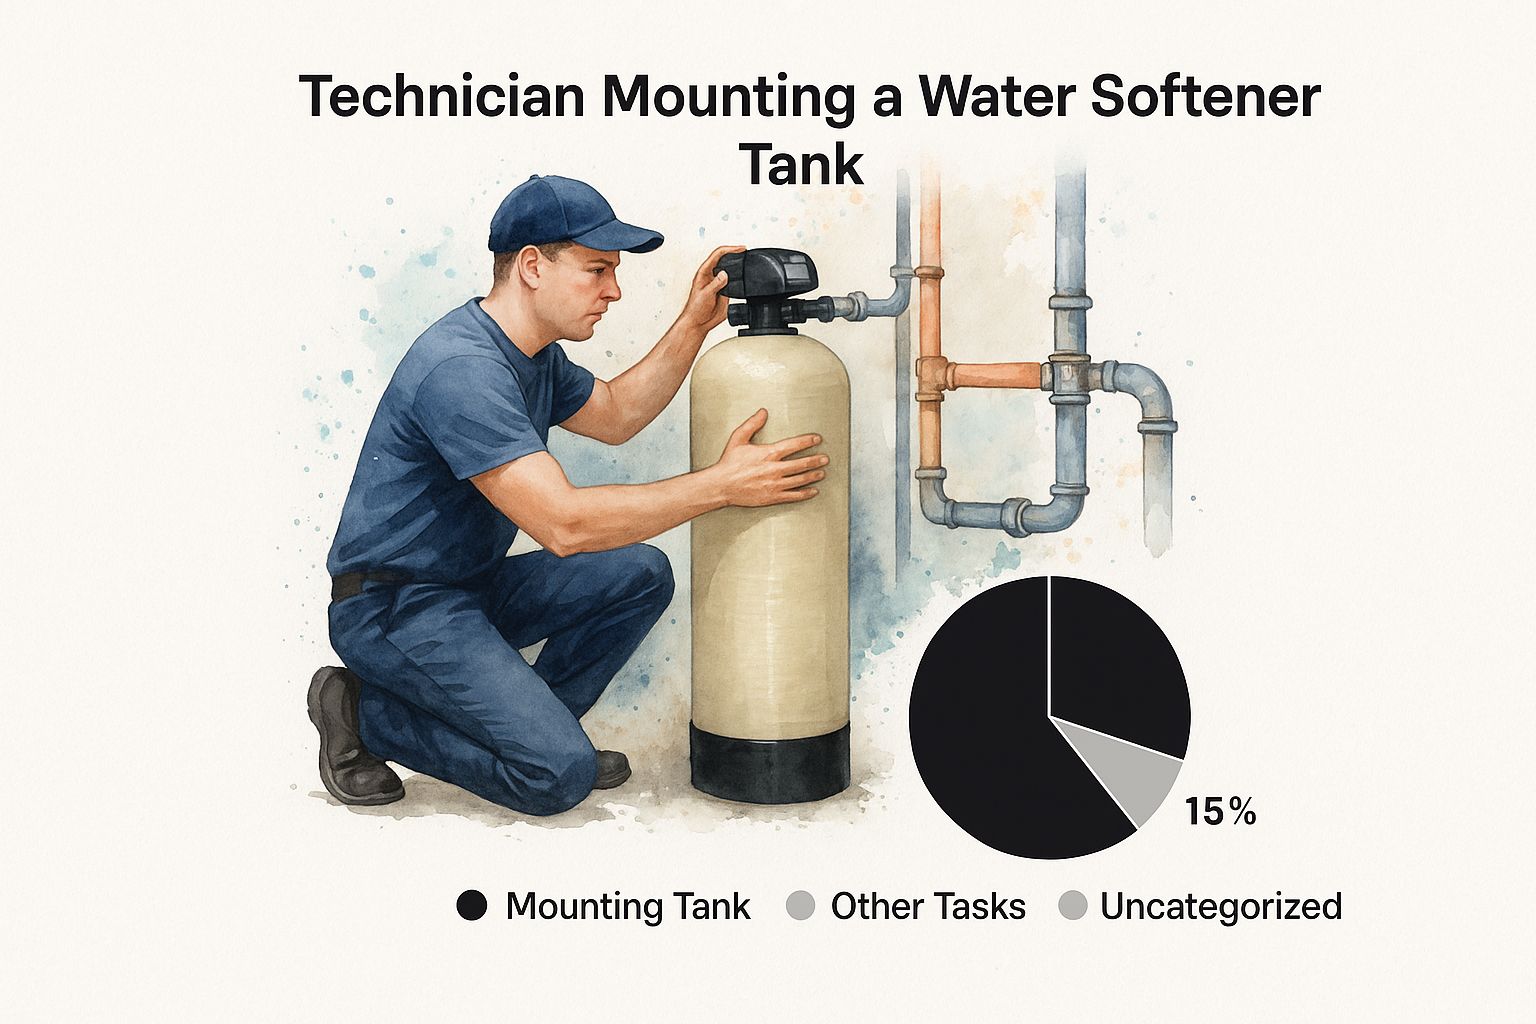
Crucially, the softener must be installed before your water heater. Trying to soften water that's already hot is a waste of energy and can actually cause problems inside your tank. Placing it upstream protects your water heater from the exact mineral scale you’re trying to get rid of in the first place. Most often, the best spots are in a basement, garage, or utility closet right near the main shutoff valve.
You also have to think about three practical needs for any location:
- A Power Outlet: Modern softeners need a 110V GFCI outlet for the control valve and regeneration cycles. Check that one is within reach of the unit's cord, which is usually about 6-10 feet long.
- A Place to Drain: The softener has to flush out salty brine and captured minerals. That means you need a drain line running to a floor drain, utility sink, or a standpipe.
- Enough Room to Work: Don't cram the unit into a tight corner. You'll want a few feet of clearance to get around it for any future service, and more importantly, to comfortably pour those heavy bags of salt into the brine tank.
Pro Tip: Before you finalize the location, put the empty tanks right where you plan to install them. Walk around. Pretend you’re holding a 40-pound bag of salt and trying to pour it in. If it feels awkward now, it’ll be a major headache later.
Assembling Your Essential Tool Kit
Alright, with the perfect spot scouted, let's talk tools. Having everything you need laid out beforehand saves you from those frustrating mid-project runs to the hardware store. The exact tools will depend on what kind of pipes you have in your home, which is typically copper or PEX here in the Denver area.
For any installation, you’re going to need:
- Two adjustable pipe wrenches
- A tape measure
- A bucket and some old towels (trust me, you'll need them for the water that drains out)
- Safety glasses—don't even start without them
Now for the most important part: how you'll connect the softener to your plumbing. This is where your home's pipe material really matters.
| Pipe Type | Recommended Tools & Fittings | Why It Works |
|---|---|---|
| Copper | Pipe cutter, deburring tool, soldering torch, lead-free solder, and flux. | A properly soldered joint is the gold standard for copper. It’s incredibly durable and creates a permanent, leak-proof connection. |
| PEX | PEX tubing cutter, PEX crimp tool, and crimp rings. | PEX is fantastic to work with because it's flexible. Crimping is a fast, reliable method for creating a watertight seal without using a torch. |
| Push-to-Connect | A clean, square pipe cut is all you need. | Fittings like SharkBite are a DIYer's best friend. They work on copper, PEX, and CPVC and just require a firm push—no special tools needed. |
While push-to-connect fittings are definitely the easiest option, many professional plumbers (myself included) prefer the long-term peace of mind that comes from a soldered copper joint or a solid PEX crimp. Think about what you're comfortable with and what materials you're working with to make the right call for your home.
Getting Connected: Tapping Into Your Main Water Line
Alright, this is where the real plumbing work starts. It might seem a little intimidating to cut into your home's main water line, but trust me, with a bit of care and the right approach, you'll create a clean, professional-grade connection for your new water softener. We're going to shut everything down, make a couple of precise cuts, and install the bypass valve that makes future maintenance a breeze.
First things first, and this is non-negotiable: you absolutely have to shut off the water to your entire house. Your main shutoff valve is usually found where the main water pipe enters your home—check the basement, crawl space, or garage first. If you're not 100% sure where it is or how to use it, now's the time to learn. Our guide on how to turn off your water main walks you through it, and it's something every homeowner should know by heart.
With the main valve closed, go open the faucet at the lowest point in your house (like a basement utility sink) and the highest one (maybe a second-floor shower). Gravity will do the heavy lifting, draining most of the water out of the pipes. This simple step will save you from a surprise shower when you make that first cut. Still, keep a bucket and some old towels nearby—there’s always a little water left behind.
Measuring and Cutting the Line
Now that the pipes are drained, it's time to figure out exactly where to cut. You're creating what plumbers call a "softener loop."
Hold the bypass valve assembly right up against the main water line where you plan to install it. Use your tape measure and a marker to carefully mark the two spots on the pipe where you'll be cutting.
A Pro's Advice: Measure it twice, cut it once. I can't stress this enough. An off-kilter cut can turn a straightforward job into a weekend-long ordeal. Take a moment, double-check your marks, and be completely certain before you bring out the cutter.
Your tool of choice will depend on what kind of pipes you have. For copper, a dedicated tubing cutter is your best bet for a clean, square cut. If you're working with PEX, you need a PEX-specific cutter to avoid crushing the tube. No matter the material, a straight cut is critical for getting a secure, leak-free seal. Once you've removed that section of pipe, you'll have two open ends ready for the next step.
Prepping the Pipe Ends for a Perfect Seal
This is a step many DIYers get impatient with, but it’s what separates a temporary patch from a permanent, pro-level installation. The edges of your freshly cut pipes will have tiny, rough burrs left over from the cutting process. You have to get rid of them.
Use a deburring tool or even a small round file to smooth out the inside and outside of both pipe ends. If you're working with copper, you also need to scuff up the outside of the pipe ends (about an inch back) with emery cloth or sandpaper until they're bright and shiny. This prep work is essential for a solid connection, whether you’re soldering or using modern push-to-connect fittings.
Clean pipes guarantee a perfect seal. Any bit of grime, oil, or a lingering burr can create a microscopic channel for water to escape, leading to one of those frustratingly slow leaks you won't find for months. Skipping this 30-second step is probably the single most common mistake I see in DIY plumbing projects.
Assembling the Bypass Valve
Your water softener should have come with a bypass valve. This handy piece of hardware lets you route water around the softener without having to shut off the main supply to the house again. It’s a lifesaver for maintenance tasks, like servicing the unit, or if you want to water your garden with untreated hard water.
Most bypass valves simply clip or screw onto the back of the softener's control head. Go ahead and attach it now, making sure any O-rings are seated correctly to head off any leaks.
From there, you'll connect the valve to the pipe ends you just prepped. Your connection method will vary:
- Soldering: Applying flux and using a torch to solder new fittings onto your copper pipes.
- PEX Crimping: Sliding on crimp rings and using a special crimp tool to secure PEX-to-threaded adapters.
- Push-to-Connect: The simplest method—just push the fittings firmly onto the clean, deburred pipe ends until they audibly click into place.
Once that bypass valve is securely connected to your main line, you're on the home stretch. The most difficult part of the plumbing is done. You've successfully tapped into your main line and built the loop that will soon be delivering soft water all through your home.
Alright, with the main water line prepped and ready, it's time to get to the heart of the project. This is where we’ll physically tie the softener into your plumbing and run the lines that let it do its job. Nailing these connections is crucial—getting it right now saves you from a world of headaches later.
This part of the job might seem intimidating, but as you can see, it's a pretty logical process once you understand where everything goes.
With careful work, the main connections are more straightforward than most people think.
Making the Inlet and Outlet Connections
Here’s one of the most common rookie mistakes I see: hooking up the water lines backward. Your softener's control valve will have ports clearly stamped "IN" and "OUT." It sounds simple, but it’s surprisingly easy to mix up when you're crouched in a tight space.
The "IN" port is for the hard water coming from your main supply. The "OUT" port sends the newly softened water back into your home’s pipes. If you reverse them, you’re just sending hard water through your house and could even damage the sensitive resin bed inside the softener. So, take a moment, trace the lines with your finger, and double-check before you tighten anything.
Now for the fun part: actually joining the pipes. You've got a few great methods to choose from, and your decision will likely come down to your existing pipe material and what you’re comfortable with.
Comparing Plumbing Connection Methods
To help you decide, let's break down the most common ways to connect your softener. Each one has its place, and knowing the pros and cons will set you up for a solid, leak-free installation.
| Connection Type | Pros | Cons | Best For |
|---|---|---|---|
| Sweat Soldering | This is the gold standard. It creates an incredibly strong, permanent seal that pros trust. | It has a real learning curve. You'll need a torch, flux, and solder, and you need to know what you're doing. | Anyone with copper pipes and some plumbing experience who wants a bomb-proof, professional-grade connection. |
| Push-to-Connect | You can't beat the speed and simplicity. No special tools, just push the pipe into the fitting. | They're the most expensive option per fitting, and some old-school plumbers are skeptical about their lifespan inside a wall. | Beginners or anyone who wants the fastest, easiest install on copper, PEX, or CPVC pipes. |
| Threaded Fittings | These are easy to work with using basic wrenches and can be taken apart later if needed. | The seal depends entirely on how well you apply thread sealant (like Teflon tape), which can be finicky. | Jobs where you might want to disconnect the softener in the future without having to cut any pipes. |
No matter which method you pick, the key is clean, secure joints. A tiny, slow drip today can cause major water damage over time. If you turn the water back on and see any moisture, it's a red flag. That little drip could be a symptom of a bigger issue, so it's smart to understand the basics of mastering water line leak repair before a small problem becomes a catastrophe.
Running the Drain and Overflow Lines
Your water softener isn't just a filter; it's a machine that has to clean itself. This cleaning cycle, called regeneration, flushes all the hard minerals it has collected out of the resin beads using a salty brine solution. All that mineral-heavy, salty water has to go somewhere, and that's the job of the drain line.
You’ll run a flexible tube from the softener's control valve to a proper drain. Your best bets are:
- A nearby utility sink
- A standpipe, like the one for your washing machine
- A floor drain
Keep the drain line as short and straight as you can. A good rule of thumb from manufacturers is to keep the total length under 20-30 feet and not to raise it more than 8 feet above the floor. Secure it so it doesn't kink or pop out of the drain.
This Is a Must-Do: You are required by plumbing code to install an air gap on the drain line. This is a simple fitting that creates a physical separation between the end of your drain tube and the wastewater in the drain. It’s a critical safety feature that prevents nasty drain water from ever being siphoned back into your fresh water supply. Don't skip this.
Last but not least is the brine tank overflow tube. Think of this as your emergency backup. If the valve that fills the salt tank ever malfunctions and overfills it, this second tube will safely carry the excess water to the drain instead of all over your floor. It’s your final defense against a salty flood, and it usually connects right alongside the main drain line.
Programming the System and Checking for Leaks
You’re in the home stretch now. All the tough plumbing work is behind you, but don't just crank the water on and call it a day. These last few steps—the final checks and programming—are what turn that collection of pipes and tanks into a hardworking appliance. Rushing this part is a classic rookie mistake that can lead to frustrating leaks and a softener that doesn't actually soften.
First things first, let's get water flowing again, but we'll do it slowly and carefully. That bypass valve you just installed is about to become your best friend. Make sure the handles are in the "bypass" position. This lets water flow through your home’s main pipes, completely skipping the softener for now.
Now, head over to your main water shutoff and open it just a little—about a quarter turn is perfect. You’ll hear the pipes start to fill. This is a good time to walk over to the farthest faucet in your house and turn it on. You’re just letting the air sputter out until you get a small but steady stream. Once the air is gone, you can open the main valve all the way. Before you do anything else, take a quick walk around and check all your existing plumbing for any drips, just to be sure nothing was jostled during the install.
The Slow-Fill and Leak Test
With your home's main line back under pressure, it's time to introduce water to the softener itself. Go back to the bypass valve and slowly, very slowly, crack open the inlet side. You want water to trickle into the media tank, not blast in. This gentle fill allows the air inside to escape through the drain line without causing a "water hammer" that could damage the sensitive internal parts of the control valve.
After a couple of minutes of slow filling, you can open the inlet valve the rest of the way. Follow that by doing the same for the outlet side. Your entire system, softener included, is now under full pressure.
This is the moment of truth. Grab a good flashlight and a dry paper towel—the paper towel is non-negotiable. Meticulously inspect every single connection you made:
- The fittings on the bypass valve.
- The connections where the bypass ties into your main water line.
- The large threads where the bypass connects to the softener's control head.
- The smaller drain line and overflow hose connections.
Wipe each and every joint with that dry paper towel. Even a pinhole leak that your eyes might miss will show up as a damp spot on the towel.
My Two Cents: Don't get discouraged if you find a small drip. It happens to everyone. For threaded fittings, the fix is usually as simple as shutting off the water, taking the joint apart, and adding a few more wraps of thread seal tape. For push-to-connects, it often means the pipe wasn't cut perfectly square or wasn't pushed in all the way. A few extra minutes now will save you from a major water damage headache later.
Programming for Denver’s Hard Water
Once you are 100% positive that every joint is bone-dry, it's time to bring the system to life. Plug the control head's power cord into your GFCI outlet. The display will light up, and now you have to tell the machine how to do its job. Your owner's manual is your ultimate guide here, but almost every softener needs the same basic info.
First, you'll set the current time of day. This is vital because the system needs to know when to run its cleaning cycle (regeneration), which is best scheduled for 2:00 AM or so when nobody is using water.
Next, and this is the most important setting for us here in Denver, you need to program the water hardness. This is measured in grains per gallon (GPG). Denver’s water isn't the hardest in the country, but it’s definitely hard enough to cause problems, typically falling between 120 to 180 mg/L. That translates to about 7 to 11 GPG. You can find a more precise number on your local water district's website or by using a simple water hardness test kit. Don't guess on this number—getting it right is the key to an efficient system that doesn't waste salt.
Finally, the system will likely ask for the number of people in your home. It uses this, along with the hardness level, to figure out how many gallons of water it can treat before it needs to clean itself. Setting this correctly prevents it from regenerating too often (wasting salt and water) or not often enough (letting hard water get into your home). With the programming done, go ahead and pour salt into the brine tank, and then start the first manual regeneration to get the resin beads charged and ready for action.
Common Questions About Installing a Water Softener

Even with a solid guide, questions are bound to pop up, especially when you’re elbow-deep in a project like this. It's totally normal. Let's tackle some of the most frequent questions I hear from folks learning how to install a water softener. Getting these answers straight will help you finish the job with confidence.
Can I Install a Water Softener on Any Type of Pipe?
Yes, you can. Water softeners today are built to work with just about any pipe you'll find in a home—copper, PEX, even PVC. The material isn't the tricky part; the secret is using the right fittings to make the connection.
For instance, if you're working with classic copper pipes, you’ll either be soldering or using modern push-to-connect fittings. For PEX, which is common in newer Denver homes, you'll be using crimp rings or those same handy push-to-connects. It all comes down to choosing the correct adapter to match what's already there.
How Close Does the Softener Need to Be to a Drain and Power Outlet?
This is one of the most practical things to figure out, as it dictates exactly where your unit can live. For an ideal setup, you’ll want the softener located within 10-20 feet of both a standard 110V GFCI outlet and a drain.
- Drain: A nearby floor drain, laundry sink, or standpipe for a washing machine works perfectly.
- Power: Most units have a power cord that's about 6-10 feet long. Plan your placement so you don't have to rely on an extension cord, which is never a good idea for permanent appliances.
You can run longer drain lines if you have to, but they often need to be supported along their length. If they sag, they won't drain properly during the regeneration cycle, which can cause a real headache. Always double-check the manufacturer's manual for their maximum recommended length.
What Is a Bypass Valve and Do I Really Need It?
A bypass valve is a simple set of handles that lets you route water around the softener instead of through it. And to answer the second part of the question: yes, you absolutely need one. You should never install a system without it. Thankfully, most new softeners include one right in the box.
Key Insight: Think of the bypass valve as your master control. It's essential for maintenance, troubleshooting, or even if you just want to water your garden with hard water. Softened water can harm some plants, so this valve lets you bypass the system without shutting off water to your entire house.
Do I Need to Sanitize a New Water Softener?
This is a step that many DIYers skip, but I strongly recommend it. Sanitizing your new softener gets rid of any bacteria or other gunk that might have settled in during manufacturing or shipping.
It’s a really simple process:
- Just pour a small bit of plain, unscented household bleach into the brine well. Your manual will tell you the exact amount, but it’s usually just a few tablespoons.
- Then, you'll start a manual regeneration cycle.
- The system does the rest, pulling the sanitizing solution through the resin beads and flushing itself clean.
Taking ten minutes to do this ensures the water your family uses from day one is as clean as possible. It’s a small detail, but it provides some serious peace of mind.
Feeling a bit out of your depth or just want the job done right the first time? The team at Professional Plumbers Denver has the local know-how for any plumbing project, big or small. We understand the specific challenges of Denver's hard water and can get your system installed flawlessly. Contact us today for a professional, worry-free installation.
