
If your toilet is running nonstop, chances are the problem is a simple, faulty part inside the tank. It's almost always one of two things: either the flapper is worn out and not sealing correctly, or the fill valve float is set too high, letting water spill into the overflow tube.
The Real Cost of a Running Toilet
That constant hissing isn't just annoying; it's the sound of money and water circling the drain. It's easy to put off what seems like a small problem, but ignoring a running toilet has a bigger impact than you might think, both on your wallet and the environment.
A running toilet means water is flowing from the tank to the bowl without stopping, long after the flush is over. This kicks the fill valve into a never-ending cycle of trying to refill a tank that will never be full.
Why You Should Fix It Immediately
The waste adds up surprisingly fast. Even a moderately running toilet can waste hundreds of gallons of water every day. That puts a strain on your local water supply and can lead to a shocking utility bill.
Believe me, this is an incredibly common problem. A leaky flapper or a faulty flush valve is one of the most frequent sources of household leaks. In fact, leaking toilets are estimated to waste about 1 trillion gallons of water every year in the United States alone. A single running toilet can be responsible for up to 200 gallons of that waste each day. You can learn more about the impact of toilet efficiency from industry reports.
Here's the good news: most of these fixes are cheap and straightforward. You don't need to be a pro plumber to handle the most common culprits, and the parts usually cost less than $20.
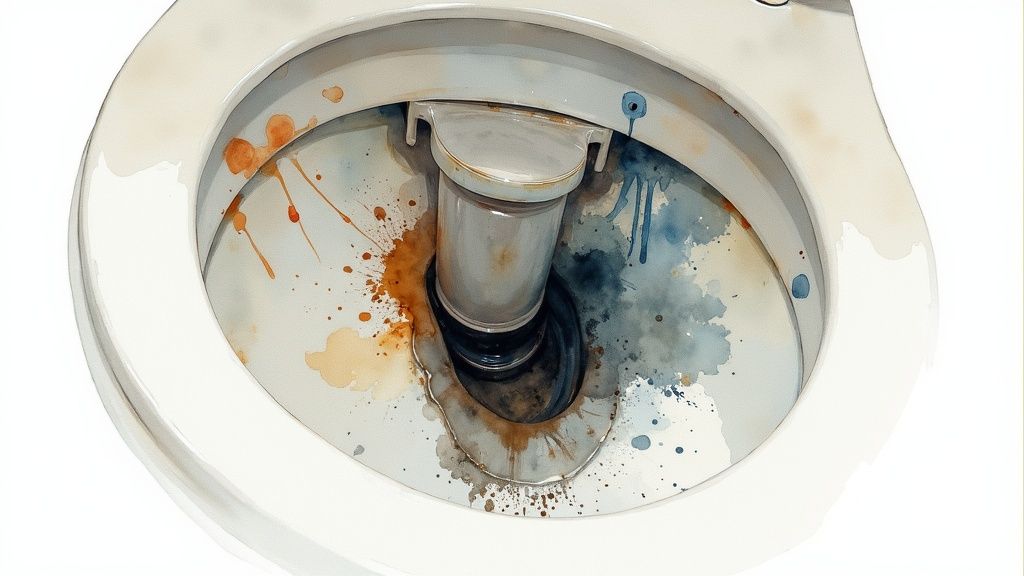
Identifying the Problem
Before you can get to fixing, you need to know what you’re looking at. The parts inside a toilet tank are constantly submerged and eventually wear down from water and mineral buildup. Here’s a quick rundown of the usual suspects.
To make things easier, I've put together a quick diagnosis table. It covers the most common reasons a toilet runs, what to look for, and how easy the fix is for a typical homeowner.
Quick Diagnosis: Common Running Toilet Causes
| Common Cause | What to Look For | DIY Difficulty Level |
|---|---|---|
| Worn-Out Flapper | The rubber seal is warped, brittle, or has mineral buildup. | Easy |
| Improper Float Height | Water in the tank is high enough to spill into the overflow tube. | Easy |
| Tangled/Incorrect Flapper Chain | The chain is too short, too long, or caught on something. | Easy |
This table should help you narrow down the issue in just a few minutes, so you can get on with the fix.
Here are those common causes in a bit more detail:
- Worn-Out Flapper: This is the big rubber or plastic seal at the bottom of your tank. Over time, it can crack, warp, or get gunked up with minerals, which keeps it from forming a tight seal.
- Improper Float Height: If the float is set too high, the tank overfills. That excess water has to go somewhere, so it drains into the overflow tube, which tells the fill valve to just keep on running.
- Tangled or Incorrectly Sized Flapper Chain: This one's a classic. A chain that's too short will hold the flapper open permanently. If it's too long, it can get tangled or caught underneath the flapper, breaking the seal.
Once you know what you’re dealing with, the solution is usually just a quick trip to the hardware store and a few minutes of your time. For more in-depth instructions, check out our guide on how to fix a running toilet.
What You'll Need to Fix That Running Toilet
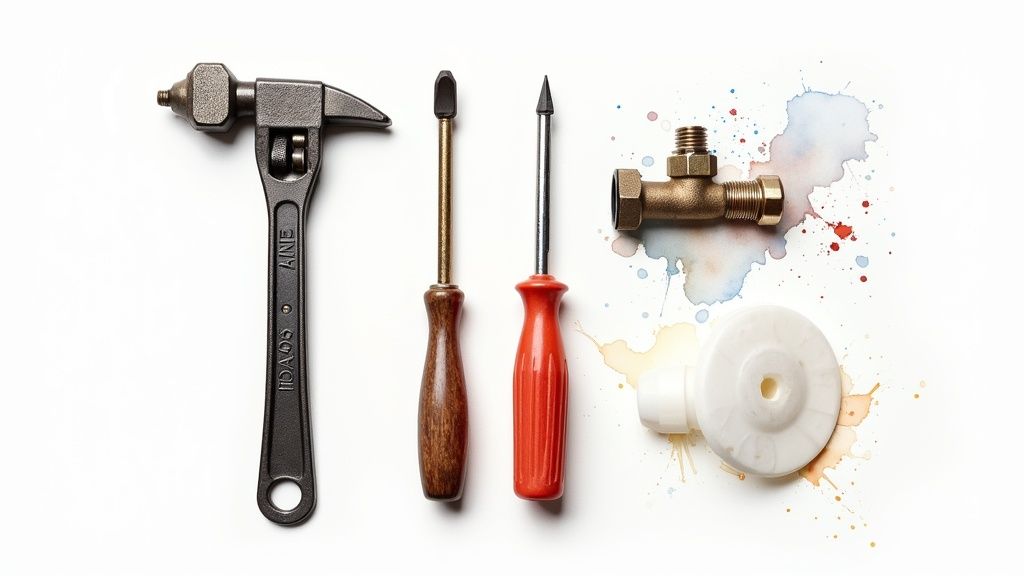
Before you roll up your sleeves and dive into the toilet tank, let's get your gear in order. Nothing is more frustrating than having to stop mid-repair for an emergency run to the hardware store. A little prep work now will make the whole process go much smoother.
For most of these common toilet repairs, you won’t need a specialized plumbing kit. A few basic tools and the correct replacement part are usually all it takes to get the job done right and in one go.
The Must-Have Tools
You probably have most of these lying around the house already. The trick is to use the right one to avoid turning a simple fix into a costly replacement. You want to be careful with the plastic and metal fittings, as they can be surprisingly delicate.
Here’s your short list:
- Adjustable Wrench: This is your best friend for loosening or tightening the nuts on the water supply line. Please, don't use pliers for this—they can easily strip the soft metal or crack the plastic nuts.
- Sponge and Bucket: For some fixes, you’ll need to get all the water out of the tank. After shutting the water off and flushing, a big sponge and a bucket are perfect for soaking up that last bit of water.
- Old Towels: Lay a few of these around the base of the toilet before you start. They’re a lifesaver for catching any drips and preventing a slippery mess on the bathroom floor.
If you're looking to build out a more complete DIY plumbing kit, we put together a guide on the essential plumbing tools that every homeowner should have.
Finding the Right Replacement Parts
This is where many people get stuck. While plenty of parts at the store are labeled "universal," toilets aren't one-size-fits-all. Getting a part that fits your specific model perfectly is absolutely critical for a lasting repair.
A $10 part feels like a million bucks when it stops a toilet from wasting 200 gallons of water a day. But it has to be the right part.
Most of the time, the problem is either the flapper (that rubber or plastic stopper at the bottom of the tank) or the fill valve (the tall column that refills the tank).
My best tip? Before you go anywhere, snap a few clear photos of the inside of your toilet tank with your phone. It makes matching things up at the store a whole lot easier.
How to Diagnose the Problem in Minutes
Alright, let's play detective inside your toilet tank. When your toilet is running, the problem is almost always hiding in plain sight with one of three components: the flapper, the fill valve, or the little chain connecting them. The good news? You don't need any special tools to figure this out—just a few minutes and a good look.
We'll start with the most common culprit and work our way down the list. It’s a simple process of elimination that saves you from guessing and buying parts you don’t need.
The Foolproof Food Coloring Test
This is my go-to trick and the fastest way to see if you have a leaky flapper, which is hands-down the number one cause of a running toilet. When a flapper gets old and worn, it lets water sneak from the tank into the bowl. This slow leak forces the fill valve to keep turning on to top off the tank.
Grab some dark food coloring (blue or green is perfect). Pop the lid off the tank, add a few drops to the water, and put the lid back on.
Now for the hard part: wait. Do not flush the toilet. You want to see if that colored water can escape the tank all on its own. Give it about 15-20 minutes, then come back and peek into the toilet bowl.
- Colored water in the bowl? Bingo. You've got a flapper leak. The seal isn't holding, and it’s time for a replacement.
- Water is still clear? Your flapper is probably fine. The real issue is somewhere else, so we can move on to the next check.
There's a reason every plumber uses this test—it gives you undeniable proof of a bad seal. It completely removes the guesswork.
Inspecting the Fill Valve and Water Level
If the food coloring test came back clear, the next place to look is the water level inside the tank. If the fill valve's float is set too high, the tank will overfill, and the excess water will spill constantly down the overflow tube. This is a classic cause for a toilet is running non-stop, as opposed to cycling on and off.
Lift the tank lid again and check out the water level. Most tanks have a waterline mark stamped on the inside wall or printed on the overflow tube itself.
As a rule of thumb, the water should stop about one inch below the top of the overflow tube. If you see water trickling into that tube, you’ve found the problem. The float is set too high and needs to be adjusted down. Don't worry, we'll get to how to do that in the next section.
Examining the Flapper and Chain
Even if your flapper passed the dye test, it's smart to give it and its chain a quick visual once-over. Sometimes the problem isn't the flapper's seal but the chain that lifts it.
Take a look at the chain that runs from the flush handle's arm down to the flapper.
- Is the chain too short? If it’s pulled tight with no slack, it could be tugging the flapper up just enough to let water seep out.
- Is the chain too long? Too much slack is just as bad. The extra links can get tangled or caught underneath the flapper, preventing it from sealing properly after a flush.
- Is the flapper itself warped or brittle? After years in the water, the rubber can degrade. Touch it—if it feels stiff, has bubbles, or leaves black residue on your fingers, it’s shot and needs replacing.
By checking these three key spots—the flapper seal, the water level, and the chain—you can figure out exactly why your toilet is running in less than half an hour. Once you’ve nailed down the cause, the fix is usually just a few simple steps away.
Tackling the Most Common Toilet Repairs
Alright, you've pinpointed the problem. Now it's time to roll up your sleeves and get this thing fixed. Don't worry, the three most common culprits behind a running toilet—the flapper, the fill valve float, and the flapper chain—are surprisingly simple to handle. Most of the time, you can have the whole job done in less than an hour.
Let’s go through each repair. I’ll give you the straightforward steps and throw in a few tips I've learned over the years to make sure your fix actually lasts.
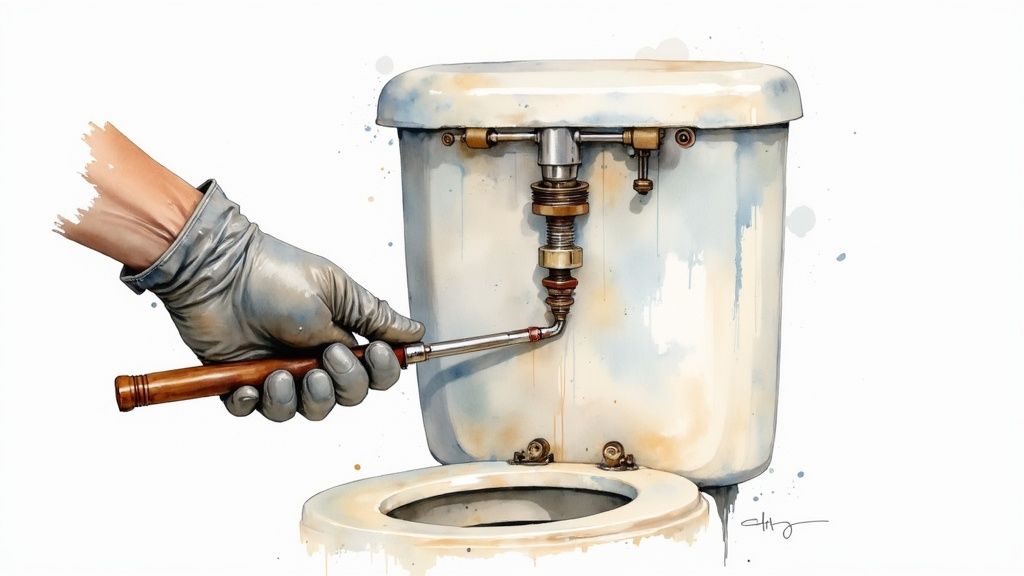
H3: Replacing a Worn-Out Flapper
If that food coloring test showed a leak, you can bet your bottom dollar the flapper is the problem. Think of it as the drain plug for your toilet tank. When it gets old and brittle, it can't create a tight seal, and water constantly seeps into the bowl. This is, by far, the most frequent reason a toilet is running.
First things first, shut off the water. You'll find a small valve on the wall or floor behind your toilet; give it a gentle turn clockwise until it stops. Now, flush the toilet to drain all the water out of the tank. A little bit will remain at the bottom, and that's perfectly normal.
Getting the old flapper out is usually a snap. Most have two little "ears" that hook onto small pegs at the base of the overflow tube.
- Start by unhooking the chain from the flush lever arm inside the tank.
- Next, carefully unclip the old flapper's ears from the pegs.
- Line up the new flapper and clip it onto the same pegs.
- Finally, connect the new chain to the flush lever arm.
My Two Cents: Before you pop that new flapper on, take a second to run your finger around the rim of the flush valve seat—that's the plastic ring the flapper sits on. Feel any grit or mineral buildup? Wipe it clean with a sponge. A perfectly smooth surface is non-negotiable for a watertight seal.
H3: Adjusting the Fill Valve Float
What if the flapper is in great shape, but the water in the tank just keeps rising until it spills into the overflow tube? This is a classic case of a misadjusted float. The fill valve simply doesn't know when to quit.
Your goal is to get the water level to stop about one inch below the top of that overflow tube. Many newer toilets even have a convenient "waterline" mark stamped right inside the tank to show you where it should be.
You'll run into one of two float types:
- Ball Floats: The old-school kind. It’s a buoyant ball attached to a long metal arm. To lower the water level, you just need to gently bend that arm downward a bit.
- Column Floats: These are standard in modern toilets and slide up and down a vertical tube. Look for a small adjustment screw or a plastic clip on the side. Turning the screw or pinching the clip will let you lower the float’s shut-off position.
Make a small adjustment, turn the water back on, and let the tank fill up. Give it a flush and see where the water stops. You might have to do this a couple of times to dial it in perfectly.
This image shows just how these quick checks can prevent that phantom running sound from ever starting.
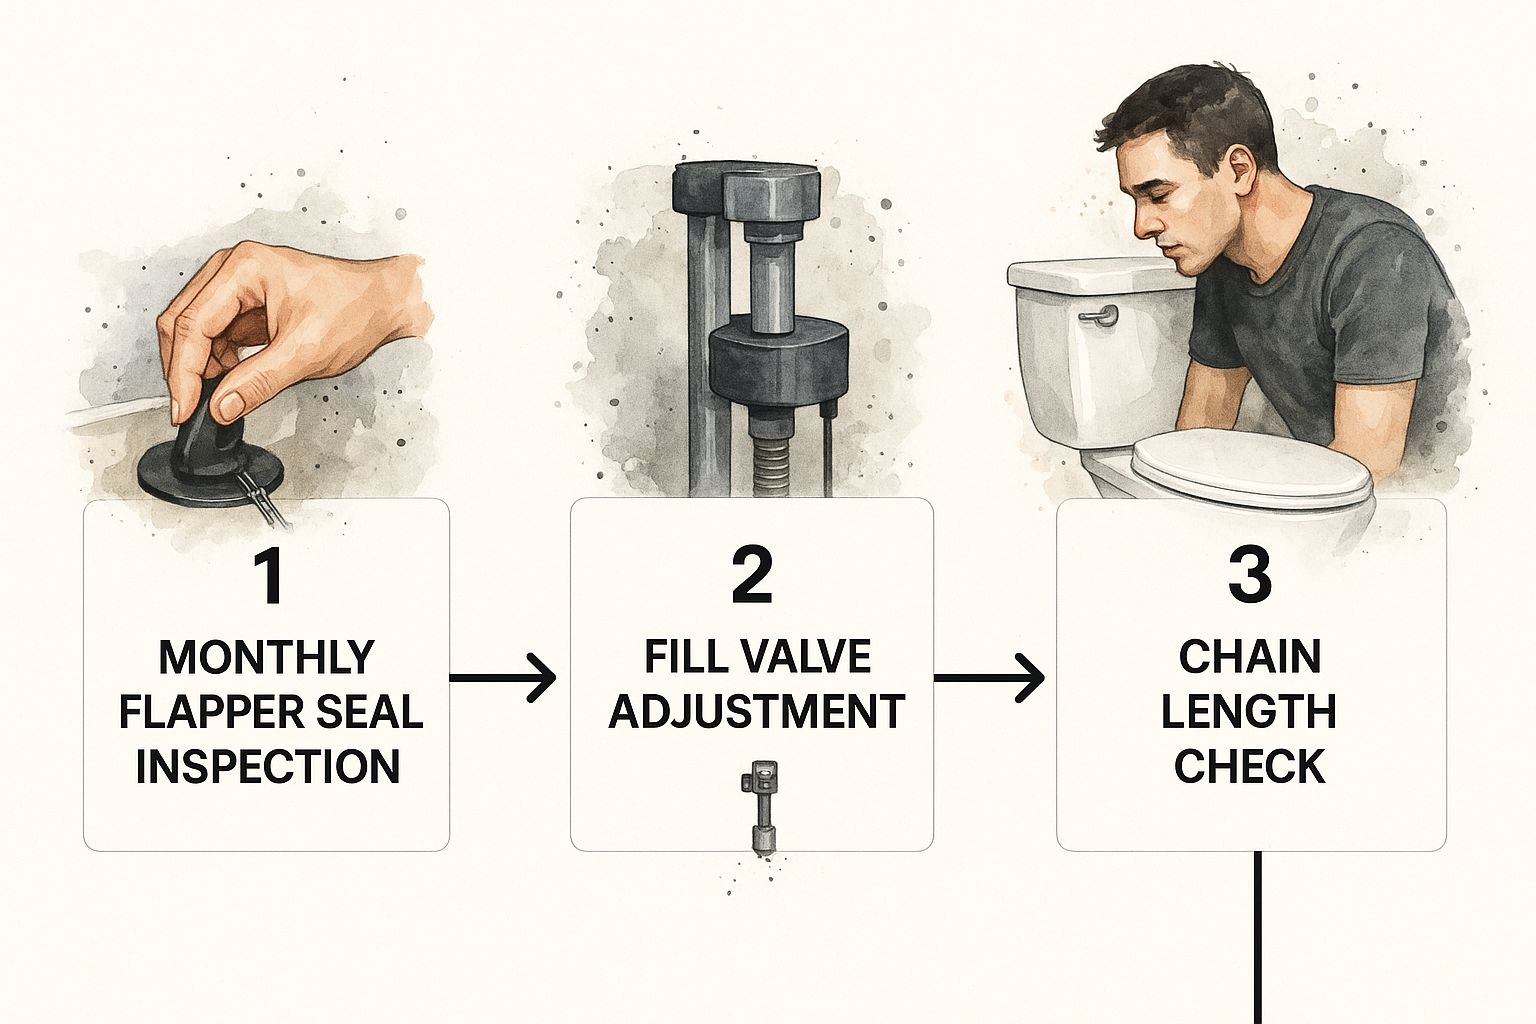
As you can see, a little preventative maintenance, like checking these parts every few months, can save you a lot of headaches (and water).
H3: Fine-Tuning the Flapper Chain
Sometimes the problem isn't the flapper or the float, but the little chain that connects them. If the chain is too short, it pulls up on the flapper, never letting it seal completely. If it's too long, it can get tangled or caught underneath the flapper, with the same leaky result.
The sweet spot is just a little bit of slack—about half an inch is the perfect amount when the flapper is closed.
Fixing this is a breeze. Just unhook the clip from the flush lever arm and move it up or down a few links. Once you think you have it right, flush the toilet. The handle should feel smooth, and the flapper should lift cleanly and drop straight back down without getting hung up. It’s amazing how such a tiny tweak can solve such an annoying problem.
Comparing Flapper and Fill Valve Replacements
While we've focused on adjustments, sometimes a part is just broken and needs to be replaced. A new flapper or a whole new fill valve assembly are the two most common replacement jobs. Here’s a quick look at how they stack up.
| Repair Step | Replacing the Flapper | Replacing the Fill Valve |
|---|---|---|
| Primary Tools | None! Just your hands. | Adjustable wrench or channel-lock pliers |
| Time Estimate | 5-10 minutes | 20-30 minutes |
| Key Challenge | Ensuring a clean flush valve seat for a good seal. | Properly tightening the locknuts without over-torquing. |
| Cost | $5 – $10 | $15 – $25 |
| Water Shut-Off | Required | Required |
As you can see, neither repair is particularly daunting. The flapper is an incredibly quick and cheap fix, while the fill valve takes a little more time and a basic tool but is still well within reach for most DIY-ers.
When to Call a Professional Plumber
Look, most running toilet fixes are perfect for a weekend DIY warrior. But there are definitely times when throwing in the towel and calling a pro is the smartest move you can make. It can save you from turning a small leak into a full-blown, floor-warping disaster.
If you’ve already tried replacing the flapper and fiddling with the fill valve and that ghost flushing just won't quit, it's a sign that the problem is deeper than a simple part swap.
Signs You Need an Expert
Some issues go way beyond a worn-out flapper and signal a more serious problem that really needs a plumber's touch. If you spot any of these, don't wait—ignoring them is a recipe for expensive water damage.
- Visible Cracks in the Porcelain: Even a tiny, hairline crack in the tank or bowl is a major problem waiting to happen. It's a structural failure, and you're one flush away from a catastrophic leak. Don't risk it.
- Water Pooling at the Base: See a puddle on the floor? The leak isn't inside your tank. This is usually a bad wax ring seal or loose bolts connecting the tank to the bowl. Both are messy, involved repairs that are easy to get wrong.
- A Corroded or Damaged Flush Valve Seat: That rim where the flapper rests has to be perfectly smooth. If it’s chipped, rough, or warped from years of use, a new flapper will never be able to create a watertight seal. This often means the whole flush valve assembly needs to be replaced.
Here's a solid rule of thumb I always share: if the repair requires you to completely lift the toilet tank off the bowl, it’s probably time to call for backup. It’s just not worth the risk of putting it back together incorrectly.
Knowing the difference between DIY plumbing projects vs. when to call a professional is key. When you do make that call, give the plumber a clear picture. Simply saying, "My toilet keeps running even after I put in a new flapper," gives them a huge head start and helps them come prepared to fix it right the first time.
Common Questions About a Running Toilet
So, you've wrestled with the toilet and hopefully declared victory. But you might still be wondering what went wrong in the first place, or what other issues could be lurking. Let's tackle some of the questions I hear all the time from homeowners.
How Much Does a Plumber Cost for This Fix?
If you've hit a wall and are thinking about calling in a professional, cost is probably top of mind. The good news is that a running toilet is one of the more affordable house calls a plumber makes. Generally, you can expect to pay somewhere in the ballpark of $100 to $250.
Of course, this can shift based on where you live and what the plumber finds. That price range usually covers the basics: diagnosing the problem and swapping out a bad flapper, a worn-out fill valve, or the whole flush mechanism. If the root cause is more serious—like a cracked overflow tube or a bad seal at the floor—the cost will naturally go up.
Keep in mind, the price of a plumber is almost always cheaper than letting the problem go. A single running toilet can waste hundreds of gallons of water a day, which will show up as a nasty surprise on your next utility bill.
Can a Running Toilet Cause Serious Water Damage?
It's a fair question. While most of the wasted water stays inside the bowl, a running toilet isn't completely harmless. Think of it as a ticking clock—the constant cycling puts a ton of stress on old plastic and rubber parts. A fill valve that finally breaks can cause a non-stop flood into the tank, and if the overflow tube is blocked for some reason, you've got a bathroom flood on your hands.
The bigger, sneakier threat is when a leak at the base of the toilet is mistaken for a simple running issue. If you see water pooling on the floor, that's a red flag. It often points to a failed wax ring or loose tank bolts, which can lead to slow, hidden rot in your subfloor. That's a repair you want to avoid.
Why Does My Toilet Run Intermittently?
This one drives people crazy. You haven't flushed the toilet in hours, yet you hear it magically refill for a few seconds. This phenomenon is often called a "phantom flush," and it's almost always the sign of a slow, silent leak from the tank into the bowl.
The usual suspect is an old, stiff flapper that isn't creating a perfect seal anymore. Water seeps out so slowly you'd never notice, but over time, the water level in the tank drops just enough to trigger the fill valve. It kicks on, tops off the tank, and the cycle repeats. The food coloring test we talked about earlier is your best bet for catching this culprit in the act.
It's interesting to see how technology is starting to solve these old problems. The smart toilet market, which was valued at around USD 10.11 billion in 2024, is booming. Many of these newer toilets have built-in sensors that can detect these tiny leaks and sometimes even shut off the water automatically. You can explore the latest trends in smart toilet technology to see what's coming next.
If you’ve gone through all the steps and that toilet is still running, it might be time to tag in a pro. For folks in the Denver Metro area, Professional Plumber Denver offers fast, reliable service for any plumbing headache you're facing. https://professional-plumbers-denver.com
