
A frozen outdoor faucet is more than just an annoyance; it’s a ticking time bomb for a burst pipe. That single outdoor spigot can lead to a massive indoor flood if you’re not careful. Before you do anything else, your first and most critical move is to find and shut off the dedicated water valve inside your home. This one action is what stands between you and a potential disaster.
What to Do When Your Outdoor Faucet Is Frozen
We’ve all been there. You go to turn on the hose on a cold day, and… nothing. Just a stiff handle and an unnerving silence. That’s the classic sign of a frozen spigot. But before you start grabbing tools or worrying about repair bills, the top priority is to take the pressure off.
Is It Really Frozen? How to Be Sure
First, let’s confirm what you’re dealing with. A frozen faucet usually gives you a few clear clues. Don’t brush these off—they’re your early warning system.
- No Water Comes Out: This is the most obvious sign. You turn the handle, and you get either a tiny dribble or absolutely nothing.
- The Handle Won’t Budge: If the handle feels stuck or incredibly stiff, it’s likely because ice has locked up the mechanism inside.
- You Can See Ice: A layer of frost or visible ice on the faucet itself, or on the pipe where it enters your house, is a dead giveaway.
To help you act fast, here’s a quick-glance table to diagnose the situation and know exactly what to do first.
Frozen Faucet Triage Immediate Action Plan
| Symptom | What It Means | Immediate Action Required |
|---|---|---|
| Handle is stiff, no water flows | Ice has formed inside the faucet or the attached pipe, blocking water. | Locate and shut off the interior water valve for this faucet immediately. |
| Visible frost/ice on the faucet | The faucet body is frozen solid. There is a high risk of pressure buildup in the pipe behind it. | Close the interior shut-off valve NOW. Do not attempt to thaw yet. |
| A tiny trickle of water appears | An ice blockage is partially formed but hasn’t completely sealed the pipe. | Shut off the interior valve. The pipe could freeze solid at any moment. |
This table covers the most common scenarios. Your immediate goal is always the same: cut off the water supply to prevent a burst.
Take Immediate Protective Action
Once you’re pretty sure it’s frozen, what you do next is everything. Don’t try to thaw it just yet. The real danger isn’t the ice itself; it’s the incredible pressure it generates inside your plumbing.
When water freezes, it expands. That expansion can exert pressure over 2,000 psi—more than enough to split a copper pipe wide open. A simple frozen outdoor faucet can quickly spiral into one of the most common and costly residential water damage claims.
The number one priority is to stop water from feeding into the frozen pipe. This turns a potential emergency into a manageable repair.
Find the shut-off valve for that faucet. It’s almost always located inside your house, directly inland from the spigot—look in the basement, a crawlspace, or a utility closet. You’re looking for a small, often oval-shaped handle or a lever handle. Turn it clockwise until it stops.
This simple step isolates the problem, protecting your home from a devastating indoor flood while you figure out how to safely thaw the pipe.
Safely Thawing a Frozen Spigot Without Damage
Alright, with the water supply shut off, it’s time to gently coax that ice blockage to melt. I can’t stress this enough: this is a job for patience, not power. Trying to rush it with extreme heat is a surefire way to crack your pipes, turning a minor inconvenience into a major headache. The goal here is to apply gradual, consistent warmth.
This gentle approach is all about preventing thermal shock. It’s the same reason you wouldn’t pour boiling water into an ice-cold glass—the sudden temperature change can make it shatter. Your home’s plumbing is just as vulnerable to that rapid expansion and contraction.
The Warm Towel Wrap: A Tried-and-True Method
One of the safest and most effective ways I’ve seen homeowners handle this involves nothing more than some towels and warm water. It’s simple, you already have everything you need, and it delivers the slow, steady heat that works best.
- Grab Your Gear: All you need are a few old towels or rags and a bucket of hot water from your tap. Make sure the water is hot, but not boiling. A good rule of thumb is if it’s too hot for your bare hands, it’s definitely too hot for the pipes.
- Soak, Wring, and Wrap: Dunk a towel in the hot water, wring it out so it isn’t dripping everywhere, and wrap it snugly around the entire frozen spigot.
- Keep It Warm: That towel will get cold pretty fast, especially if it’s windy. You’ll need to swap it out for a fresh, warm one every 5 to 10 minutes.
This method slowly transfers heat into the metal, melting the ice from the outside in without putting any stress on the pipe itself. Just be prepared to hang out for a bit—it can easily take 30 minutes or more to fully thaw, depending on how frozen solid it is.
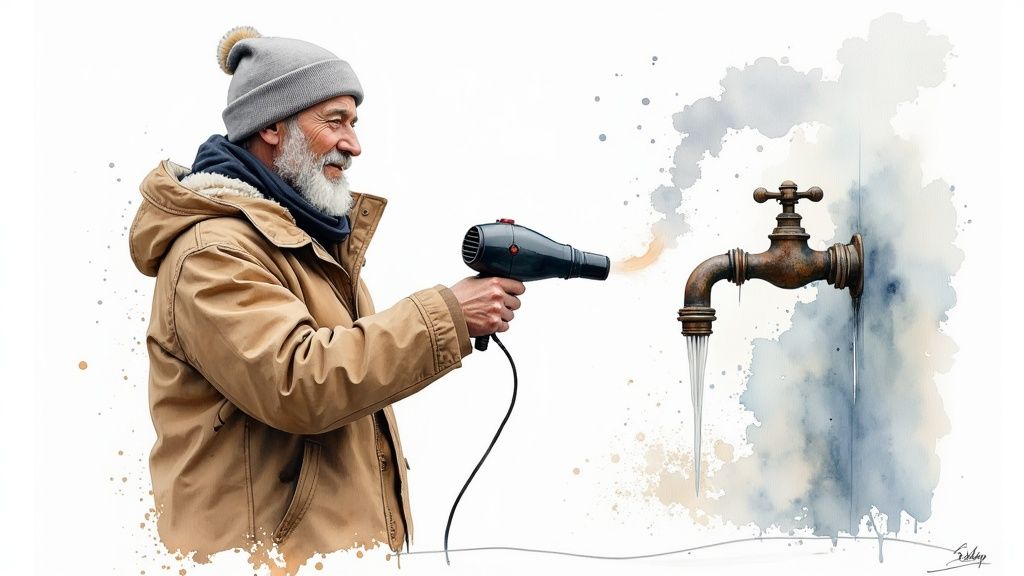
The Hairdryer Technique: Controlled Heat
If you’ve got access to an outdoor outlet, a hairdryer is another great tool for the job. It gives you a constant source of controlled heat, but you have to use it correctly.
The idea is to warm the faucet, not to cook it. Set the hairdryer to low or medium heat and keep it moving. Sweep the warm air back and forth across the faucet and the bit of pipe coming out of the wall. Never hold it still in one spot. Concentrating that much heat can easily melt the internal rubber seals and plastic parts, creating a whole new leak for you to deal with.
Pro Tip: Before you start either method, open the outdoor faucet handle all the way. As the ice begins to melt, this gives the water a place to go. It not only relieves pressure inside the pipe but also gives you the victory signal you’re looking for—that first little trickle of water.
Whatever you do, resist the urge to use a quick fix. I’ve seen the aftermath of people using blowtorches and propane torches, and it’s never pretty. Beyond being a serious fire hazard, that intense, focused heat is almost guaranteed to crack the pipe.
Taking the time to thaw the ice correctly is the smartest thing you can do. For more professional advice, take a look at our guide on essential winter plumbing tips.
How To Winterize Your Plumbing and Prevent Freezes
When it comes to plumbing, an ounce of prevention is truly worth a pound of cure. This is never more true than with a frozen outdoor faucet. Taking a few proactive steps to winterize your spigots is the single best way to avoid the headache of burst pipes and expensive water damage. It’s a simple process, but it involves more than just unscrewing the garden hose.
The first and most important step for any standard faucet is cutting off its water supply from inside your house. You’ll need to find the dedicated shut-off valve, which is usually in a basement or crawlspace on the pipe leading directly to that exterior wall. Give the valve a clockwise turn until it’s completely closed.
Once the indoor valve is shut, head back outside and open the spigot. This simple action drains all the water trapped between the valve and the faucet. That trapped water is what freezes, expands, and ultimately cracks the pipe. I always recommend leaving the outdoor faucet open for the entire winter just to be safe.
Choosing Your Level of Protection
After you’ve drained the line, adding a layer of physical protection is a really smart move. What you choose depends on your local climate and your budget.
- Foam Faucet Covers: These are the most common solution for a reason. They’re cheap, incredibly easy to install, and they work. The insulated dome fits right over the spigot and traps radiant heat escaping from your house, which is often just enough to keep the faucet above freezing.
- Insulating Pipe Wrap: If you have exposed pipes leading to the faucet, especially in an unheated crawlspace, foam pipe wrap is a must. It slows down heat loss and acts as a crucial buffer against the cold air.
- Heat Tape: For those of us in brutally cold climates, electric heat tape is the heavy-duty option. You wrap it around the pipe, and its built-in thermostat kicks on automatically when the temperature plummets, actively warming the pipe to prevent a freeze.
This image gives a great visual breakdown of how these common winterization methods stack up.
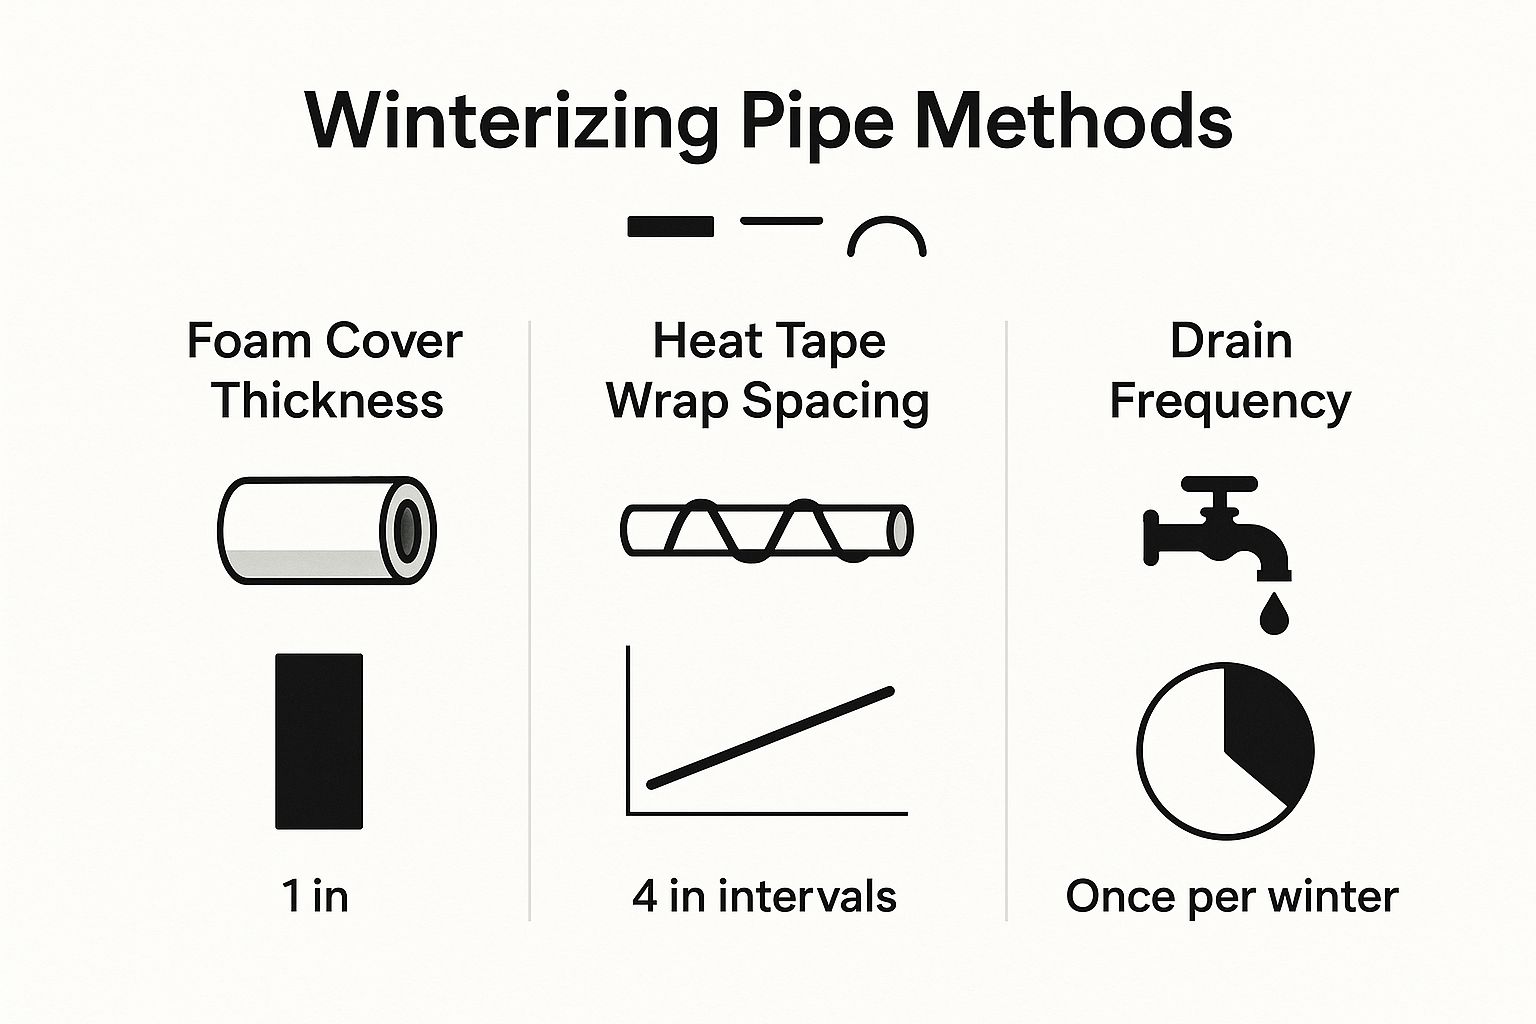
As you can see, even simple, consistent measures—like draining the line and using a standard foam cover—are remarkably effective for most winter conditions.
To help you decide what’s best for your home, it’s useful to compare the old-school standard faucets with their modern, frost-proof counterparts.
Winterization Method Comparison Standard vs Frost-Proof Faucets
| Feature | Standard Faucet | Frost-Proof Faucet |
|---|---|---|
| Winterization Steps | Requires shutting off indoor valve and draining the line annually. | No indoor shut-off needed; simply disconnect the hose. |
| Installation Cost | Lower initial cost. | Higher upfront cost for the faucet and professional installation. |
| Annual Maintenance | Requires manual steps every fall and spring. | Virtually zero maintenance beyond disconnecting the hose. |
| Effectiveness | Highly effective if done correctly, but prone to human error. | Extremely effective and reliable, as the design is inherently freeze-resistant. |
| Long-Term Peace of Mind | Depends on remembering to winterize it each year. | Offers a “set-it-and-forget-it” solution for years. |
This comparison makes it clear: while standard faucets work just fine with diligent care, frost-proof models offer a much simpler and more reliable long-term solution.
Upgrading to a Frost-Proof Sillcock
If you’re looking for a permanent, hands-off solution, upgrading to a frost-proof sillcock is the way to go. The genius of this design is its simplicity. Unlike a standard spigot where the valve sits right at the exterior wall, a frost-proof model has a long stem that moves the valve 6 to 12 inches inside, into the heated part of your home.
When you turn off a frost-proof faucet from the outside, the water flow stops deep inside the house, and any water left in the long stem automatically drains out. This design makes it physically impossible for water to sit where it can freeze. It’s a fantastic investment, especially as faucet technology continues to improve.
The global faucet market is projected to reach USD 36.69 billion by 2030. In colder regions, manufacturers are pouring resources into freezing resistance, developing advanced anti-freeze valves and using more durable materials specifically to prevent the kind of pipe bursts we all dread.
One critical rule remains, even with a frost-proof faucet: always, always disconnect your hose before the first freeze. If you leave it attached, water gets trapped in the long stem, completely defeating the purpose of the frost-proof design and setting you up for a frozen outdoor faucet.
For a more comprehensive look at protecting your entire home, our guide offers more great tips to prevent frozen pipes.
Finally, don’t overlook the bigger picture. A drafty home allows cold air to reach pipes you might not even think about. Learning how to seal air leaks in your home is another powerful layer of defense against the winter cold.
Checking for Damage After a Thaw
Getting the water flowing again from a frozen faucet feels like a win, but don’t celebrate just yet. This is actually the most important part of the whole process. The real trouble isn’t the ice itself, but the damage it can leave behind once it’s gone.
As water freezes, it expands with incredible force—enough to create tiny, hairline cracks in the pipe. You won’t even see them until the water is back on and under pressure. That’s why the next step is to restore the water, but you have to do it carefully.
The Slow and Steady Inspection Process
Head back to the indoor shut-off valve you turned off earlier. Don’t just crank it all the way open. Instead, turn the handle counter-clockwise just a quarter turn to start. This lets water back into the pipe gently, preventing a sudden surge that could turn a small, hidden crack into a full-blown burst.
Now, you need to use your eyes and ears to do a little detective work. This is your final check to make sure a small drip doesn’t become a disaster.
- Listen for Trouble: In a quiet house, get close to the interior pipe that feeds the outdoor faucet. Can you hear anything unusual? A faint hissing or dripping sound from inside the wall is a dead giveaway that the pipe is leaking.
- Check for Drips Outside: Go back to the outdoor spigot. Look closely for any water dripping from the handle, the spout, or the spot where the faucet connects to your house. Even one slow drip means a seal is broken or there’s a crack somewhere.
- Inspect the Pipe Inside: Now for the final interior check. Look at the pipe in your basement or crawlspace and the wall around it. Are there any new water spots, damp drywall, or little beads of water forming on the pipe?
If you’ve listened and looked everywhere and it’s all dry and quiet, you can go ahead and open the interior valve the rest of the way.
Don’t underestimate a minor leak. Even a small, persistent drip from a damaged faucet can waste thousands of gallons of water over time and lead to mold growth and foundation damage if it’s near the house.
If you do find a leak—no matter how small—you need to deal with it right away. Our guide to https://professional-plumbers-denver.com/blogs/hose-bib-leak-repair/ walks through the common culprits and how to fix them.
In a worst-case scenario where a frozen pipe bursts and causes major water damage, knowing how to properly document everything is critical. For anyone facing that situation, consulting a homeowner’s guide to property damage assessment is a great next step. Finding the damage early is what separates a quick fix from an expensive, months-long repair.
When You Need to Call a Plumber
Knowing when to step back and pick up the phone is the most important part of any home repair project. This is especially true with frozen pipes. While you can often handle minor freezes yourself, pushing a DIY fix too far can turn a small problem into a very expensive, water-logged disaster.
If you’ve been patiently applying gentle heat and the faucet just won’t budge, that’s a good sign the ice blockage is deep inside the pipe. It’s likely far beyond where your hairdryer or heat tape can safely reach. Plumbers have specialized tools that can pinpoint and thaw these deep freezes without having to tear open your wall.
Non-Negotiable Signs of Trouble
Some signs aren’t just suggestions to call for help—they’re giant, waving red flags. If you see any of the following, stop what you’re doing immediately and call a professional.
- Visible Cracks or Bulges: Look closely at the faucet and the pipe leading into the wall. If you see any cracks, splits, or weird bulges, the metal has already been compromised by the pressure of the expanding ice.
- Persistent Leaks After Thawing: So you got the water flowing again, but now there’s a steady drip from the spout or a leak around the handle. This means a seal, or even the pipe itself, has been damaged.
- A Sudden Drop in Home Water Pressure: This is the big one. If you turn the water back on and the pressure throughout your entire house suddenly drops, you likely have a major pipe burst inside a wall. That water isn’t just disappearing; it’s flooding the inside of your home.
A professional plumber can see what you can’t. They can assess the full extent of the damage, which is often hidden from view. Trying to patch a cracked pipe on your own is a recipe for a future leak. A pro will properly replace the damaged section, giving you a secure repair that lasts.
It’s also worth noting that outdoor plumbing is getting more complex. As outdoor kitchens become more popular—with a market projected to hit USD 58.8 billion by 2034—we’re seeing more integrated sinks and complex water lines outside. This makes professionally installed, frost-proof systems more critical than ever to avoid the headache of a frozen outdoor faucet.
If the job feels bigger than you can handle or you suspect there’s serious damage, don’t hesitate. For those in the local area needing reliable plumbing services in Highcliffe, getting an expert on-site can save you from thousands in water damage. Think of it less as a repair bill and more as an investment in protecting your home.
Your Top Frozen Faucet Questions Answered
When you’re staring at a frozen outdoor spigot, a lot of questions can race through your mind. It’s easy to feel uncertain, and that uncertainty can lead to mistakes that cost you big time. Let’s tackle some of the most common things homeowners worry about so you can handle the situation like a pro.
This is your go-to guide for those nagging “what if” scenarios that pop up when you’re in the thick of it.
Can a Frozen Faucet Really Damage My House?
Absolutely, and this is the single biggest reason to take a frozen spigot seriously. When the faucet freezes solid, it forms an ice plug. The real trouble starts behind that plug, as immense pressure builds up in the pipe that runs back into the warm parts of your house.
That pressure can spike to over 2,000 psi—more than enough force to burst a copper pipe wide open inside a wall, your basement, or a crawlspace. This is why the first thing you must do is find and close the interior shutoff valve for that line.
Think of the frozen faucet outside as just the tip of the iceberg. The real danger is the pressurized pipe hidden in your walls. By shutting off the water, you turn a potential catastrophe into a simple plumbing repair.
Is It a Good Idea to Pour Boiling Water on It?
No, this is a huge mistake. While it feels like a fast solution, pouring boiling water on a frozen faucet or pipe is one of the worst things you can do. The sudden, extreme temperature change creates something called thermal shock.
This rapid expansion can easily crack the faucet’s metal body or the pipe itself. Instead, you need to use gentle, gradual heat.
A couple of safe bets are:
- Wrapping the spigot in towels and soaking them with warm (not boiling) tap water.
- Using a hairdryer on a low or medium setting, making sure to keep it moving back and forth.
These methods warm things up slowly, letting the ice melt without stressing the plumbing. A little patience now can save you a world of hurt later.
I Have a Frost-Proof Faucet. Can It Still Freeze?
It’s definitely more resistant, but yes, even a frost-proof faucet can freeze. Almost every time this happens, the cause is the same: a garden hose was left connected over the winter.
Frost-proof spigots are designed with a long stem so the shutoff valve sits deep inside the heated part of your home. This allows all the water in the exposed part of the pipe to drain out after you turn it off. But if a hose is attached, it traps that water, giving it nowhere to go. When that trapped water freezes and expands, it can wreck the very faucet that was supposed to prevent the problem.
The number one rule is simple: always disconnect your hoses before the first freeze hits, even with a frost-proof model.
How Do Those Faucet Insulation Covers Work Anyway?
Those simple dome-shaped foam caps you see on outdoor spigots are surprisingly effective. A faucet insulation cover works by trapping the tiny bit of heat that naturally radiates from your home out through the water pipe.
It creates a small pocket of air around the spigot that’s just warm enough to keep the metal above freezing. It’s a cheap and easy way to add a layer of protection, and it works best when you also shut off the interior valve and drain the line.
If you’re dealing with a faucet that just won’t thaw or you think a pipe might have burst, don’t wait. A small problem can turn into a disaster fast. The experts at Professional Plumber Denver offer fast, reliable service across the Denver Metro area. Visit us at https://professional-plumbers-denver.com or give our 24/7 emergency line a call for immediate help.
