
That wobbly toilet handle isn’t just annoying—it’s a sign that something inside the tank has worked its way loose. Fortunately, this is one of the easiest home repairs you’ll ever do. In most cases, the fix is as simple as tightening a single nut inside the tank.
It’s a problem that comes from simple, everyday use, and you can almost always sort it out in less than 5 minutes with just one tool.
Diagnosing Your Loose Toilet Handle in Seconds
Before you even lift the tank lid, it helps to know what you’re looking for. A quick diagnosis will point you straight to the problem, saving you from fumbling around inside the tank. The good news? Almost all loose handle issues come from just a handful of predictable culprits.
Let’s break down what’s likely going on in there.
Common Causes of a Loose Handle
- The Loose Mounting Nut: This is the undisputed champion of wobbly handle problems. Inside the tank, a plastic or metal nut secures the handle assembly. Over time, the constant push-and-pull of flushing can cause it to loosen its grip.
- A Disconnected or Slack Flapper Chain: Ever push the handle and get… nothing? If the handle moves but the toilet doesn’t flush, the chain connecting the handle’s arm to the rubber flapper at the bottom of the tank has probably slipped off or has too much slack.
- Worn-Out Handle Components: Let’s face it, most toilet handles are made of plastic. After years of service, those plastic parts can crack, the threads can strip, and they simply lose their ability to stay tight.
The parts inside a toilet tank are built to be workhorses, but nothing lasts forever. The global market for toilet tank fittings, including handles, was valued at a massive USD 7.49 billion in 2023. Think about it—commercial properties like hotels and offices account for over half of that demand, which shows just how often these parts are put to the test. You can find more details on this growing market and its components.
Pro Tip: When you lift the tank lid, place it on a towel on the floor. Setting it on the edge of the tub or the toilet bowl is asking for a cracked lid, and those are surprisingly difficult to replace.
To make things even easier, I’ve put together a quick cheat sheet. Just match your handle’s symptom to the likely cause and you’ll know exactly what to tackle first.
Quick Diagnosis for Your Loose Handle
| Symptom | Likely Cause | Primary Solution |
|---|---|---|
| Handle jiggles or feels wobbly | Loose mounting nut | Tighten the nut on the inside of the tank. |
| Handle moves but doesn’t flush | Disconnected or slack chain | Reattach the chain or reduce its slack. |
| Handle feels “gritty” or won’t tighten | Worn-out or stripped parts | Replace the entire handle assembly. |
This little table should get you pointed in the right direction. Once you’ve identified the likely troublemaker, you’re ready to get in there and fix it.
Your Toolkit and a Tour of the Tank
Before you roll up your sleeves and dive into the tank, let’s talk about prep. The great news is you won’t need a sprawling, professional-grade toolkit for this one. Most of what you need is probably already rattling around in your toolbox or a kitchen drawer.
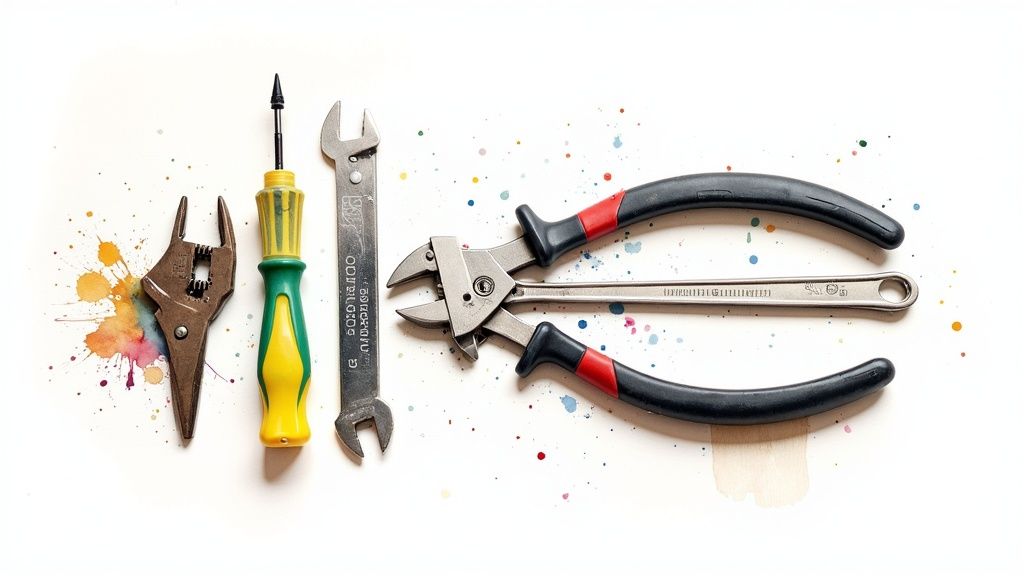
All you really need to fix a wobbly toilet handle are two simple tools. An adjustable wrench is your best friend here—it’ll give you the grip you need on the mounting nut without stripping the plastic. A basic pair of pliers will also come in handy if you need to fiddle with the small clip on the flapper chain.
Get to Know Your Tank’s Interior
Lifting the lid off the toilet tank can feel like peering into a strange, watery machine. But once you know what you’re looking at, it’s all surprisingly straightforward. Getting familiar with the key players makes the whole process much less intimidating.
Let’s break down what’s happening inside:
- The Flush Lever and Lift Arm: This is the whole handle assembly. The part you press on the outside is connected to a long arm on the inside, which is usually made of plastic or metal.
- The Mounting Nut: This is the culprit we’re looking for. It’s a plastic nut that screws onto the handle’s threads from inside the tank, clamping it tight against the porcelain.
- The Flapper Chain: This little beaded chain is the link between the lift arm and the rubber flapper covering the drain at the bottom of the tank.
Your job is pretty simple: make sure these parts are all securely connected and can move without getting stuck. A loose mounting nut or a disconnected chain is the root cause of 90% of all toilet handle problems.
Having the right gear is half the battle in any home repair. It’s always a good idea to have the essential tools for homeowners ready to go, as this kind of prep work can turn a potential weekend-wrecker into a quick ten-minute fix.
The Right Way to Tighten and Adjust Your Handle
Alright, now that you’ve got a good look inside the tank, it’s time to roll up our sleeves and fix that wobbly toilet handle. In my experience, most of the time this is a quick fix—usually just a loose mounting nut that needs a little attention.
Before you do anything else, find the water supply valve on the wall behind your toilet and turn it clockwise to shut it off. Safety first.
With the water off, carefully lift the tank lid and place it on a towel or rug on the floor where it won’t get cracked. Now, peer inside the tank, right behind where the handle is on the outside. You’ll spot a mounting nut, which is usually plastic, holding the handle assembly in place. That little nut is almost always the cause of the problem.
This image shows you exactly what to do to prep the area safely before you start tinkering.
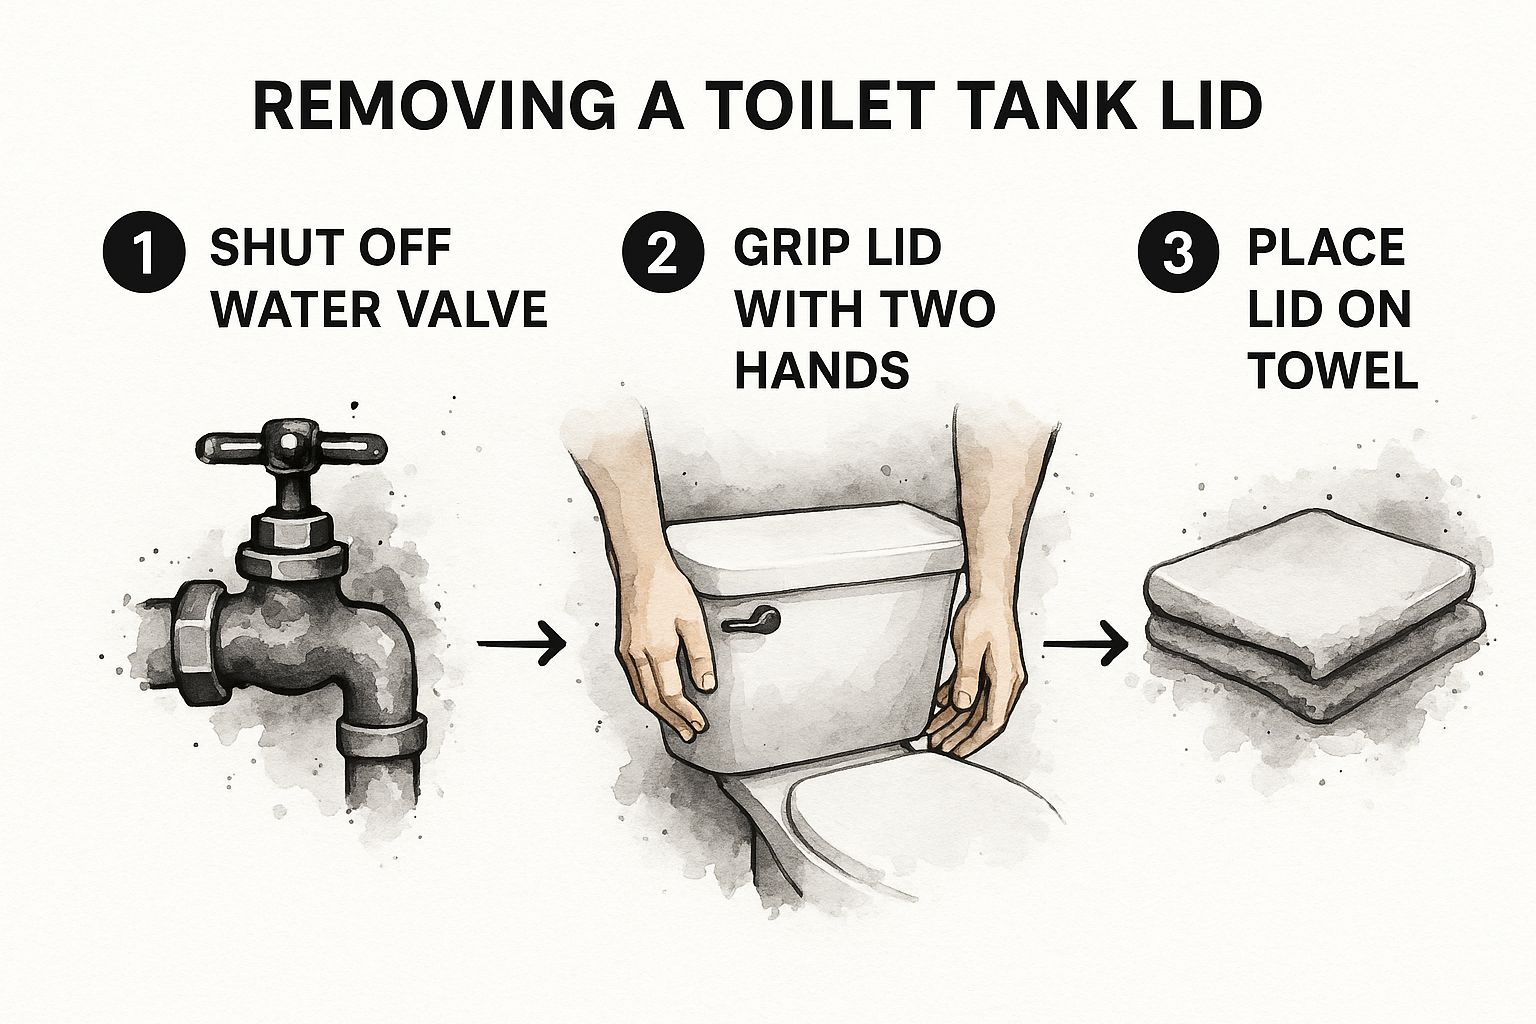
Taking these few seconds to prep will save you from a potential mini-flood or a shattered porcelain lid.
Securing the Handle Nut
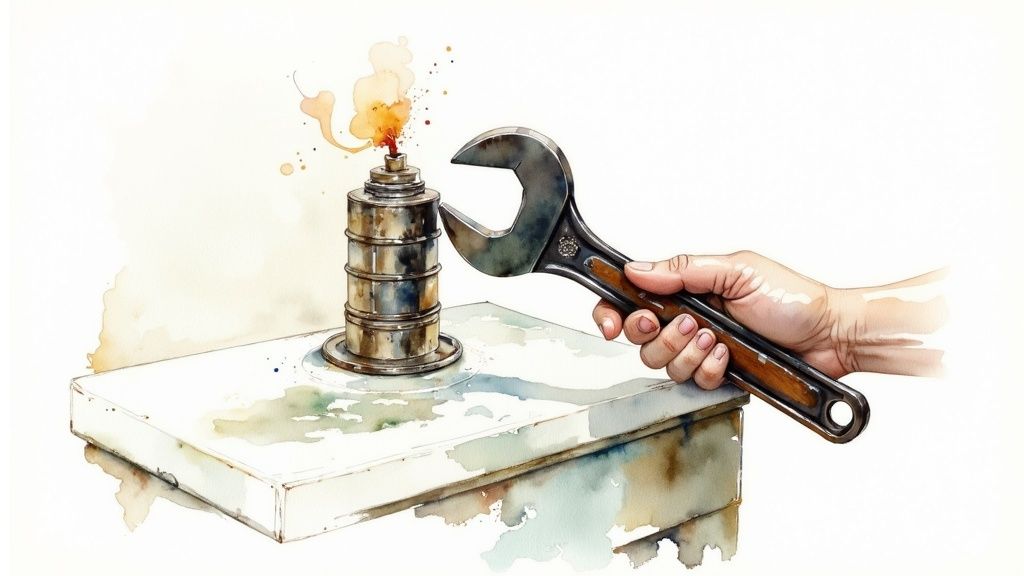
You might need an adjustable wrench for this part, but honestly, you can often get it done by hand. Use one hand to hold the flush handle steady on the outside of the tank. With your other hand, reach inside and turn the mounting nut clockwise to tighten it. Remember the old saying: righty-tighty.
Get it snug, but don’t go overboard. This is the single most important piece of advice I can give you for this job.
Crucial Tip: Never over-tighten the mounting nut. The porcelain on a toilet tank is surprisingly fragile and can easily crack if you apply too much force. That turns a simple five-minute fix into a trip to the hardware store for a brand-new toilet. Just tighten it until the handle feels firm and no longer wobbles.
Once it’s secure, give the handle a test flush or two. It should move freely without any of that annoying jiggling.
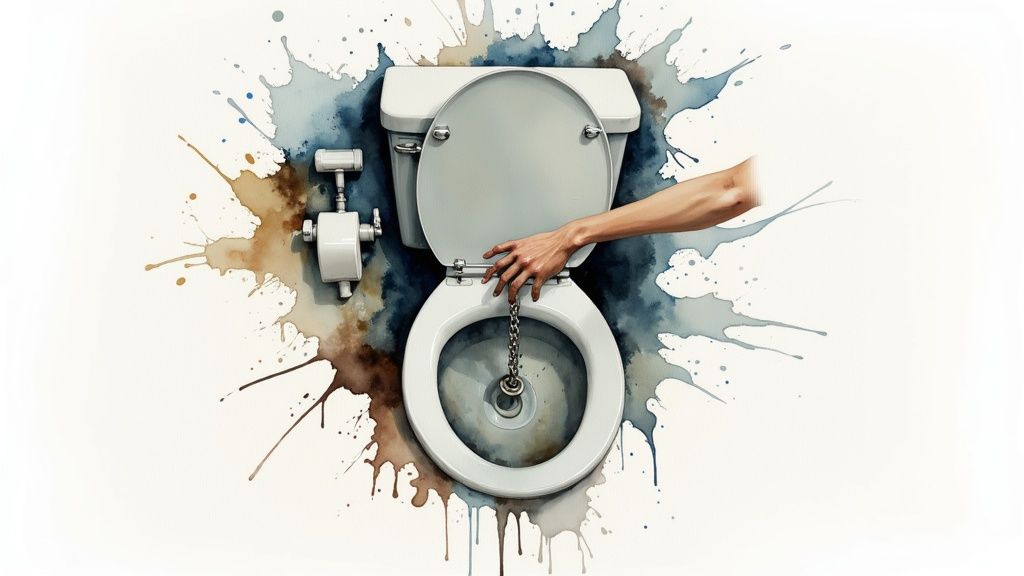
Checking and Adjusting the Flapper Chain
While you’re in there, take a look at the flapper chain. This little chain connects the flush handle arm to the flapper at the bottom of the tank, and if it’s not set right, it can cause all sorts of flushing headaches.
Here’s what you should be looking for:
- Too much slack: A chain that’s too long and droopy won’t lift the flapper high enough. This leads to a weak, incomplete flush where you have to hold the handle down.
- Too little slack: A chain that’s pulled taut won’t let the flapper seal properly after a flush. You’ll hear water constantly running, which is a sure sign of a leak.
The sweet spot is just a tiny bit of slack—about a half-inch is usually perfect. You can easily adjust it by unhooking the clip and moving it up or down a few links. If you’ve tightened the handle but it still feels stiff or hard to push, there might be another issue at play. You can find more troubleshooting tips in our guide on what to do when your toilet handle is hard to flush.
This kind of repair is incredibly common. Think about how many times a day that handle gets used—it’s no wonder these parts wear out. In fact, the global market for toilet parts and repairs was valued at around USD 3.2 billion in 2023 and is expected to keep growing. It just goes to show how often people everywhere are dealing with these exact same issues.
When Tightening Your Handle Is Not Enough
So, you’ve tightened the mounting nut, and it felt snug, but the handle is still wobbly. Or maybe it felt secure for a day or two before coming loose all over again.
When a quick turn of the wrench doesn’t provide a lasting fix, it’s a telltale sign that a part has simply worn out. It’s time to stop tightening and start replacing.
Don’t sweat it—this is still a very manageable DIY project. The problem is usually that the plastic threads on the handle or mounting nut have been stripped after years of use, making a tight grip impossible. On older metal handles, corrosion can eat away at the parts until they just can’t hold on anymore.
It’s a surprisingly common issue. The global market for toilet repair services was valued at around USD 8.5 billion in 2024, and a big reason for that is aging plumbing parts like handles giving up the ghost. It just goes to show you’re not alone in dealing with a worn-out flusher.
Choosing and Installing a New Handle
Swapping out the old handle for a new one is a simple and satisfying upgrade. The first thing you’ll need to do is get the old one out. Just unscrew the mounting nut inside the tank all the way, and then unhook the little chain that connects the handle’s arm to the flapper at the bottom of the tank.
With the old handle in hand, head to the hardware store. The main thing you need to know is where the handle is located on your tank.
- Front-Mount: The handle is on the face of the tank, pointed toward you.
- Side-Mount: The handle is on the left or right side of the tank. This is very common.
- Angle-Mount: A less common style that sits on the corner between the front and side.
Pro Tip: Before you leave for the store, just snap a quick picture of your toilet with your phone. It’s the easiest way to show a store employee exactly what you have, ensuring you grab the right part on your first trip.
Installing the new one is just doing those steps in reverse. Thread the new handle through the hole, screw on the mounting nut until it’s snug, and re-clip the flapper chain. Easy as that.
If the faulty handle was causing other issues, like a constantly running toilet, you might need to look at other components. You can learn how to https://professional-plumbers-denver.com/blogs/toilet-keeps-running-fix/ in our other guide. Of course, if the situation gets out of hand and you’ve got water that won’t stop, it’s probably time to call an emergency plumber.
Common Mistakes That Can Worsen the Problem
Fixing a wobbly toilet handle seems straightforward, but a few simple missteps can turn a quick fix into a weekend-long headache. I’ve seen it happen countless times—a well-meaning homeowner tries to solve one small problem and accidentally creates a much bigger, wetter one.
The absolute biggest mistake you can make is over-tightening the mounting nut. I get the impulse; you want that handle to be rock solid. But here’s the thing: that toilet tank is made of porcelain, and porcelain is incredibly brittle. A little too much muscle on that wrench, and crack. You’ve just turned a $10 fix into a $200+ tank replacement.
Other Pitfalls to Sidestep
Beyond the cardinal sin of cracking the tank, there are a few other common trip-ups that can leave you frustrated. Keep these in mind to get the job done right the first time.
- Buying the wrong handle: It happens all the time. You grab a standard front-mount handle off the shelf, only to get home and realize yours is mounted on the side of the tank. Always check your setup before heading to the hardware store.
- Ignoring the chain length: After you’ve got the handle installed, it’s easy to forget about the flapper chain. If it’s too loose, you’ll get a weak, unsatisfying flush. If it’s too tight, the flapper won’t seal properly, and your toilet will run constantly.
- Not testing your work: Don’t just give it one flush and call it a day. Flush it three or four times. Watch to make sure the handle returns to its resting position smoothly and that the flapper creates a perfect seal every single time.
A cracked toilet tank is an expensive, non-negotiable replacement. When tightening that mounting nut, go for “snug,” not “stuck.” Just tight enough to stop the wobble is perfect. Honestly, hand-tightening is often all you need.
Avoiding these simple mistakes is what separates a successful five-minute repair from a major plumbing project. If your toilet troubles seem to go beyond a simple loose handle, our guide on common plumbing problems and how to fix them has more tips to help you out.
Your Toilet Handle Questions Answered
Even the simplest DIY repair can throw you a curveball. When you’re dealing with a loose toilet handle, a few common problems tend to pop up that aren’t always covered in the basic instructions.
I’ve put together answers to the most common questions I hear from homeowners. These are the “what if” scenarios that can stall an otherwise easy fix.
My Handle Is Tight but Will Not Flush
So, you’ve tightened the handle, and it feels solid, but pushing it does absolutely nothing. I see this all the time. The problem is almost certainly inside the tank.
Pop the lid off and take a look. More often than not, the culprit is the flapper chain—it’s probably just slipped off the lift arm. All you have to do is find the little chain and hook it back on. If the chain itself is broken, don’t worry. It’s a cheap and easy part to grab on your next hardware store run.
How Do I Choose the Right Replacement Handle?
When it comes to buying a new handle, the most important thing is its location on the tank. You’ll find they generally fall into one of three types:
- Front-Mount: Right on the front face of the tank.
- Side-Mount: On the left or right side.
- Angle-Mount: Sits on the corner where the front and side of the tank meet.
Pro Tip: Before you head to the store, just snap a quick photo of your toilet handle with your phone. It’s a simple trick that takes the guesswork out of buying the right part and saves you from making a second trip.
If you’re tackling other toilet troubles, this comprehensive toilet repair guide is a great resource.
Why Does My Toilet Handle Stick After Flushing?
A handle that stays down after you flush is usually getting stuck somewhere. The first thing to check is the mounting nut inside the tank—it might be a little too tight, causing the whole mechanism to bind. Try loosening it just a quarter-turn and see if that frees it up.
Another common cause, especially with hard water, is mineral buildup. Those deposits can make parts sticky over time. A quick scrub with an old toothbrush and some white vinegar will usually dissolve the gunk and get things moving smoothly again.
If you’ve tried these tips and are still stuck with a plumbing headache, the experts at Professional Plumbers Denver are ready to help. Our team has seen it all and can tackle any plumbing challenge, big or small, across the Denver Metro area. https://professional-plumbers-denver.com
