
A new laundry room hookup involves more than just connecting a few hoses. You’re looking at a complete system: hot and cold water supply lines, a dedicated drainpipe, and a proper vent to keep everything flowing smoothly. Getting this right from the start comes down to solid planning, especially when you factor in Denver’s local building codes.
The core of the system is pretty straightforward—you’ll have a washer outlet box with shut-off valves, a P-trap to block sewer gases, and a 2-inch drain line to handle all that wastewater. But how you put those pieces together makes all the difference.
Planning Your Laundry Room Plumbing Project
Honestly, the real work for a laundry room plumbing job happens before you even think about cutting pipe. I always tell homeowners to treat this planning stage like you’re drawing up a blueprint. A good plan will save you from those “oops” moments that cost a lot of time and money, and it’s your best tool for navigating local building codes. This is where you map out the entire system, from the water source all the way to the drain.
This isn’t just about picking a convenient corner. You have to think like a plumber and consider what’s behind the drywall. Is that wall clear of electrical wiring and structural beams? How far are you from the main water and drain lines? The answers to these questions will determine if this is a straightforward weekend project or a major undertaking.
Choosing the Ideal Location in Your Home
Picking the right spot for your laundry setup is easily the most important decision you’ll make. The closer you are to existing plumbing, the better. Tapping into nearby water and drain lines is a whole lot easier—and cheaper—than running new pipes clear across your basement.
Here’s what I look for when scouting a location:
- Easy Water Access: An unfinished basement wall near where the main water line enters your house is perfect. A wall that backs up to a bathroom or kitchen is a close second. This makes it much simpler to tee off the existing hot and cold lines.
- A Clear Path for Drainage: You need a direct route to a main drain stack. Every drain also needs a vent to prevent siphoning and gurgling, so you have to plan how you’ll tie into your home’s main vent system, which usually goes up through the roof.
- A Solid Foundation: Modern washers can be heavy and vibrate a lot, especially on the spin cycle. You need to be sure the floor can handle it. In some of Denver’s older homes, I’ve had to reinforce the floor joists to prevent shaking.
Sketching Your Plumbing Layout
Once you’ve found the perfect spot, it’s time to put pencil to paper. A simple sketch of your plumbing layout is an invaluable guide. It forces you to think through every valve, fitting, and piece of pipe you’ll need.
I can’t tell you how many times a homeowner has called me midway through a project because they hit a snag. A detailed sketch helps you see the whole picture—supply, drain, and vent—so you can spot problems before you’ve got holes in your walls.
On your drawing, mark the exact placement of the washer outlet box, the height of the standpipe, and the path for every pipe. Don’t forget to factor in the slope for the drain line. The standard is ¼ inch of drop for every foot of horizontal pipe. This ensures gravity does the work and your drain doesn’t back up.
The plumbing industry, which handles crucial home systems like this, is a massive part of the U.S. economy—projected to reach nearly $169.8 billion in revenue by 2025. This growth is fueled by renovations and new builds where a well-thought-out laundry room is a must-have. A lot of the same planning principles apply to other wet areas in the house; for instance, insights from planning a bathroom renovation can be really helpful for budgeting and managing your project. Getting your plan locked in is the first real step to a successful installation.
Here’s a simple checklist to keep your planning on track from start to finish. It breaks down the process into manageable phases and highlights a few things to keep in mind for Denver-area homes.
Laundry Room Plumbing Project Checklist
| Phase | Key Task | Considerations for Denver Homes |
|---|---|---|
| 1. Discovery & Location | Identify the best location for the laundry room. | Check proximity to main water/drain lines. In older homes, ensure floor joists can support a heavy, vibrating washer. |
| 2. Layout & Design | Create a detailed sketch of the plumbing layout. | Map out supply, drain, and vent lines. Mark the exact height of the washer box (42-48 inches from the floor is common). |
| 3. Code & Permits | Research local Denver plumbing codes. | Confirm requirements for pipe sizes (2-inch drain minimum), trap placement, and proper venting. Apply for a permit if required. |
| 4. Materials & Tools | List all necessary pipes, fittings, valves, and tools. | Choose appropriate pipe material (PEX, copper, PVC). Ensure you have tools for cutting, joining, and securing pipes. |
| 5. Pre-Installation Check | Shut off the main water supply and drain the lines. | Double-check that your work area is clear and you have all materials on hand before making the first cut. |
Following a checklist like this helps ensure you don’t miss a critical step. It transforms a big project into a series of smaller, more manageable tasks, setting you up for a smooth and leak-free installation.
Getting Water to Your Washer
Alright, with the plan in place, it’s time to get our hands dirty and bring the water supply lines to your new laundry area. This is where the magic happens, running both hot and cold lines to feed your washing machine. Getting this part right is everything—it prevents leaks down the road and makes sure you have solid water pressure when you need it.
The first choice you’ll have to make is what kind of pipe to use. For decades, copper was the go-to, but we have some fantastic modern options that are often a much better fit, especially if you’re tackling this yourself.
Choosing the Right Pipe Material
The material you pick affects everything from the cost and installation difficulty to how long your setup will last. Here in Denver, with our specific water chemistry, choosing a pipe that stands up to corrosion is a smart move.
- PEX (Cross-linked Polyethylene): This is the stuff most pros, including myself, reach for these days. It’s a flexible plastic tubing that’s a dream to work with. You can snake it around corners without needing a dozen different fittings, and it’s incredibly resistant to bursting if it freezes—a huge bonus during our Colorado winters.
- Copper: The classic. Copper is tough, naturally antibacterial, and has a proven track record. The big drawback? You have to solder the joints, and that’s a skill that takes real practice to get right. It’s also more expensive and rigid than PEX.
- CPVC (Chlorinated Polyvinyl Chloride): This is a rigid plastic pipe that you glue together with a special solvent. It’s affordable, but I’ve seen it get brittle over time, especially when dealing with very hot water.
Honestly, for most homeowners today, PEX is the clear winner. Its flexibility alone cuts down on the number of connections you need, and fewer connections mean fewer potential spots for a leak to start.
Tapping Into Your Home’s Water Lines
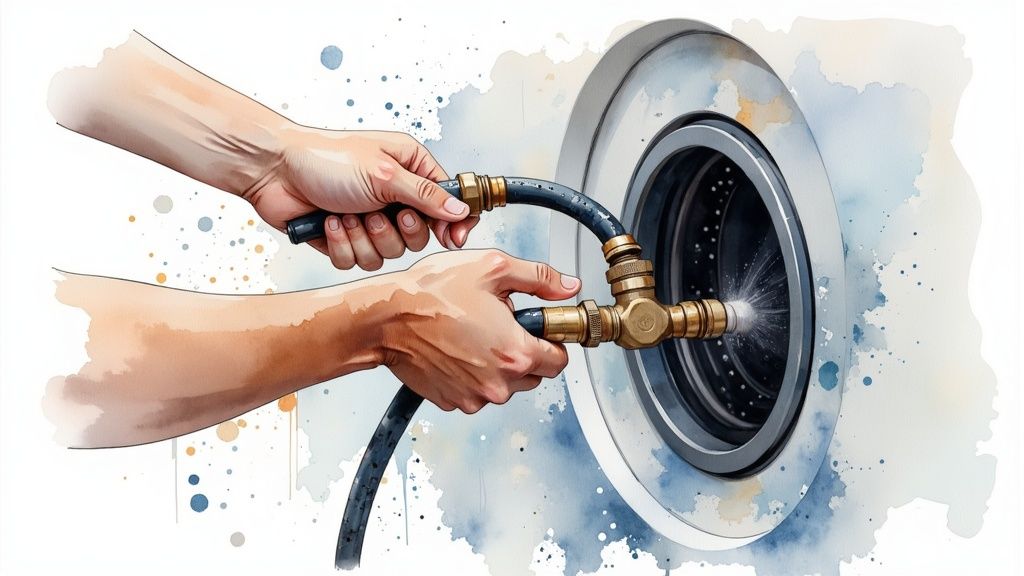
Once you’ve got your PEX tubing, you need to connect it to your home’s main water supply. This usually means finding the closest existing hot and cold water pipes and “teeing” into them to create a new branch for the laundry room.
The process involves shutting off the main water to your house, draining the lines, and carefully cutting into the existing pipes to install a T-fitting. This is a moment where you want to measure twice and cut once. A sloppy cut or a poorly sealed joint is a leak waiting to happen.
I can’t tell you how many times I’ve seen new pipes held in place with flimsy plastic straps. Do yourself a favor and use proper metal pipe clamps screwed securely into wall studs. This simple step stops that loud “water hammer” banging noise and takes the stress off your fittings, making everything last longer.
Installing a Washer Outlet Box
This is a non-negotiable part of any modern laundry setup: the washer outlet box. It’s a simple plastic box that gets installed right between the wall studs. It neatly houses the hot and cold water shut-off valves and the drainpipe connection all in one clean, contained spot.
Putting one of these in is a game-changer for a few reasons:
- It’s a lifesaver. If a hose ever bursts, you have one easy-to-reach spot to kill the water to the washer instantly.
- It just looks better. All the plumbing is recessed, so your washer can sit flush against the wall. No more ugly pipes and hoses sticking out.
- It’s required by code. Most areas, Denver included, mandate accessible shut-off valves for appliances like washing machines.
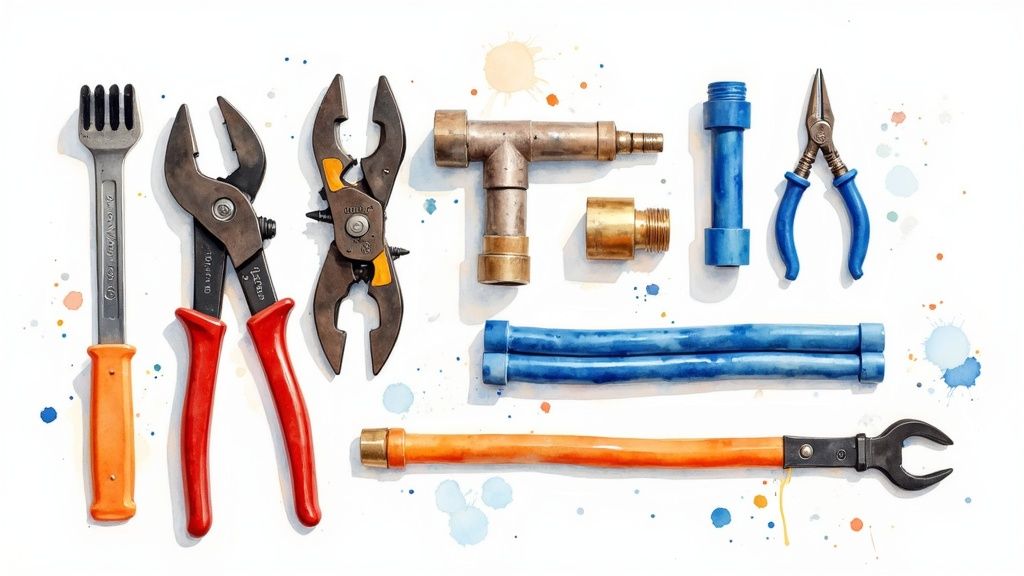
You’ll run your new PEX lines right up to the valves in the box. This is where having the right tools—a good pipe cutter, a PEX crimper, and a couple of wrenches—makes all the difference.
This graphic is a great little cheat sheet for keeping an eye on your laundry hookups.

A quick look-over every few months can help you spot a small drip before it turns into a disaster.
The most important part of this whole step is getting those shut-off valves installed correctly. They’re your primary defense against a flood. If you’re new to this, you should learn more about how to install a shut-off valve to make sure every connection is rock-solid. After everything is connected, turn the main water back on slowly and check every single joint for any sign of moisture.
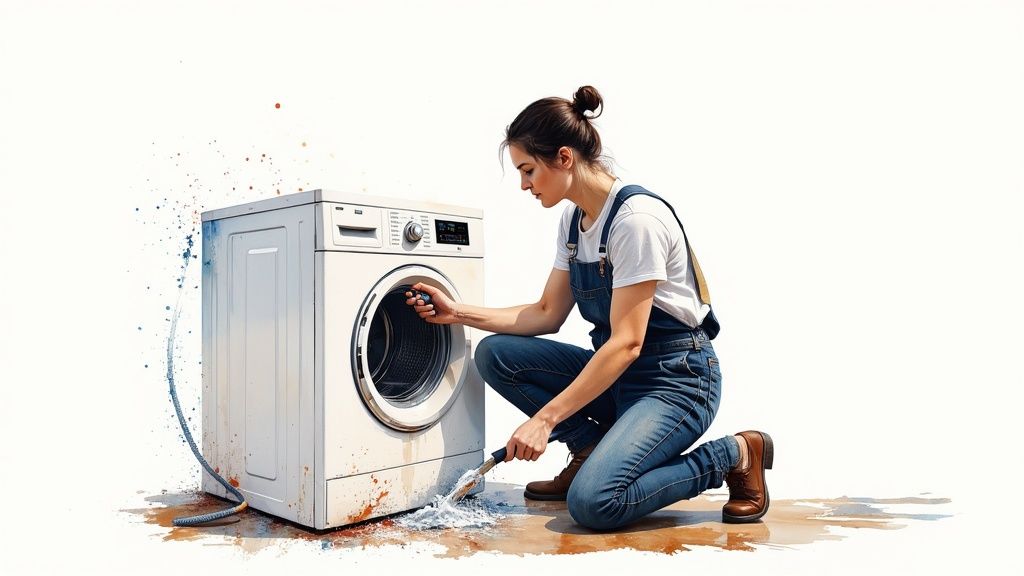
Getting fresh water to your washer is only half the battle. The real trick, and where a lot of DIY projects go off the rails, is getting all that dirty water out. This is where the drain, waste, and vent (DWV) system comes in. It’s a beautifully simple trio working behind your walls, using gravity and air pressure to get rid of wastewater without a second thought. Get it wrong, and you’re not just looking at a slow drain—you’re risking backups, serious water damage, and even hazardous sewer gases seeping into your home.
The plumbing fixtures market is massive for a reason—it was valued at around $89.8 billion globally in 2023. That growth comes from new homes and, just as importantly, people upgrading their existing setups for better performance. It shows how much we all value plumbing that just works. Getting the drain and vent system right is a huge part of that reliability.
The Unsung Heroes: Your Standpipe and P-Trap
Let’s talk about the two gatekeepers of your laundry drain: the standpipe and the P-trap. The standpipe is simply the vertical pipe your washer’s drain hose dumps into. Just below it, you’ll find the P-trap, that distinctive U-shaped bend in the pipe. They might look simple, but together, they do some heavy lifting to protect your home.
The main job of the P-trap is to hold a little bit of water all the time. This water creates a seal that physically blocks nasty sewer gases from coming up the drain and into your laundry room. Seriously, without it, your house would smell awful. If you want to dive deeper into how this critical piece works, our guide on P-traps in plumbing breaks it all down.
The standpipe, meanwhile, provides the right height and an essential air gap so your washer’s powerful pump can shoot water out without causing a sudsy overflow. Denver’s local codes are very specific about the dimensions here, and for good reason.
- Drain Pipe Diameter: Your washing machine drain needs to be at least 2 inches in diameter. Anything smaller just can’t keep up with the volume of water a modern washer expels, and you’ll get overflows.
- Standpipe Height: Measure from the finished floor to the top of the standpipe—it needs to be between 18 and 30 inches. Too low, and you risk siphoning water out of the wash tub. Too high, and you can burn out your washer’s pump.
- Trap Arm Length: The trap arm is the horizontal pipe running from the P-trap to the main drain. It must have a gentle downward slope of ¼ inch per foot to keep water flowing smoothly.
Why Venting Is Not Optional
If the P-trap is the gatekeeper, the vent is the system’s set of lungs. Every single drain in your house needs a vent to breathe, and the laundry room is no exception. A vent pipe allows air to get into the drain line behind the rushing water. This equalizes the pressure and stops a vacuum from forming.
Without a proper vent, that powerful gush of water from your washer creates a suction force that can literally suck the water right out of the P-trap. Once that water seal is gone, there’s nothing stopping sewer gas from coming in. It’s also the number one reason for slow, gurgling drains.
I see this all the time in older Denver homes, especially those built before codes got really strict. You’ll find laundry drains with no vent at all, or worse, with an S-trap. An S-trap is an old, now-illegal configuration that’s notorious for siphoning itself dry. If you see one in your house, it’s a code violation and needs to be replaced with a properly vented P-trap.
The standard way to fix this is to tie your new drain into an existing vent stack in the wall, which usually runs up through the roof. Sometimes, though, that’s not practical. In those tricky spots, an air admittance valve (AAV) can sometimes be a solution, but you absolutely have to check with Denver’s building department first to make sure they allow it for your specific situation. Don’t skip this—proper venting is the secret to a quiet, efficient, and smell-free laundry room.
Navigating Denver Plumbing Codes and Permits
Getting your laundry room plumbing working is one thing, but making sure it’s up to code is what really matters. For any homeowner in Denver, this means getting familiar with the rules from the Community Planning and Development department before a single pipe gets cut.
Cutting corners on local codes isn’t just about dodging a fine; it’s about protecting your home and family. These regulations are there for a reason—to prevent catastrophic water damage from a failed drain and to keep dangerous sewer gas out of your air. A failed inspection is the least of your worries. It could force you to tear out brand-new drywall and start all over again.
When Do You Actually Need a Permit?
So, what’s the magic line? When does a simple plumbing job turn into something that needs a permit?
Here in Denver, the rule of thumb is pretty clear: if you are adding, altering, or replacing any part of the plumbing system—that’s your water lines, drains, or vents—you’re going to need a permit. That covers just about every scenario where you’re putting in a new laundry room from scratch.
Of course, not every little fix requires a trip downtown. You’re in the clear for minor repairs like:
- Stopping a drip: Fixing a small leak on an existing pipe or valve is just basic maintenance.
- Clearing a clog: Snaking a drain is not considered an alteration.
- A simple swap: If you’re just replacing an old washer with a new one and hooking it up to the existing plumbing, you don’t need a permit.
But the second you start running new pipe, even if it’s just moving the hookups a few feet, you’ve crossed into permit territory. The whole point of the permit is to trigger an inspection, which ensures a professional set of eyes signs off on your work, confirming it’s safe and built to last.
I’ve seen it happen too many times: a homeowner thinks a “small” project can fly under the radar. The real headache comes years later when they try to sell the house and the unpermitted work gets flagged. Or worse, a drain fails, and the insurance company denies the claim because the work wasn’t up to code. When in doubt, make the call.
Key Code Requirements You Can’t Ignore
The full Denver Plumbing Code is a beast, but for a laundry room, there are a handful of non-negotiable rules that inspectors look for every single time. Getting these details right is the difference between passing with flying colors and getting a dreaded correction notice.
Most of the focus will be on your drain and vent lines. This is where most DIY projects go wrong because the rules are incredibly specific. They’re designed to keep your drain flowing freely and, most importantly, to protect your P-trap’s water seal from getting siphoned out, which would let sewer gas seep into your home.
To make it easier, I’ve put together a quick reference table with the core requirements you’ll encounter for a laundry setup in Denver.
Denver Laundry Plumbing Code Quick Reference
This table breaks down the most critical plumbing codes you’ll need to follow. Think of it as your cheat sheet for a successful inspection.
| Plumbing Component | Denver Code Requirement | Reason for the Rule |
|---|---|---|
| Drain Pipe Diameter | A minimum of 2 inches is required. | Modern washers dump a huge amount of water fast; anything smaller will back up. |
| Standpipe Height | Must be between 18 and 30 inches above the trap. | Prevents water from siphoning out of the wash basin and protects the pump. |
| Venting | Every trap needs its own vent. | Allows air into the pipe, breaking any vacuum that could suck the P-trap dry. |
| Cleanouts | You must install a cleanout on the drain line. | Provides easy access to clear future clogs without taking the wall apart. |
Getting these local codes right is the final piece of the puzzle. It’s what turns a job that looks done into a job that’s done right, giving you total peace of mind that your new laundry room is safe, sound, and built to last.
Eco-Friendly Laundry Room Plumbing Solutions
When you’re planning your laundry room plumbing, thinking beyond just “hot and cold” can make a massive difference. For us here in Denver, where water is a precious resource, this is your chance to build a smarter, more sustainable home. Going green isn’t just a trend; it’s a practical way to lower your utility bills and significantly shrink your environmental footprint.
The whole game is changing. We’re moving away from a “use and discard” mentality with water and toward actively managing it. This shift is why we’re seeing a huge demand for plumbing tech that conserves water, protects your home, and frankly, just makes life easier.
Put Your Laundry Water to Work with Greywater Recycling
One of the smartest upgrades you can make is a greywater recycling system. It’s a brilliant concept: the system captures the lightly-used water from your washing machine’s rinse cycle and redirects it for other purposes, like irrigating your lawn and garden. Think about it—instead of dumping hundreds of gallons of usable water down the drain every month, you’re using it to keep your landscape thriving.
A greywater system is a game-changer, especially in a dry climate like ours. The initial setup is an investment, but it pays for itself over time through lower water bills. Plus, it’s a tangible way to reduce your household’s demand on Denver’s water supply.
These systems are becoming a big deal in plumbing. Greywater recycling can slash a home’s potable water consumption by up to 40,000 gallons a year when fully implemented. It’s a powerful tool for conservation.
Stop Disasters Before They Start with Smart Leak Detectors
Saving water isn’t just about using less—it’s also about not wasting a single drop. A tiny, hidden leak behind your washing machine can silently cause rot, mold, and thousands of dollars in damage before you even know it’s there. That’s why smart leak detectors have become an absolute necessity for any modern laundry room.
These small, Wi-Fi-connected sensors are simple to install. You just place them on the floor near your water supply lines or behind the washer. The second they sense moisture, you get an alert sent straight to your phone.
Here’s why I recommend them to every homeowner:
- Immediate Alerts: You get a notification the moment a leak begins, whether you’re in the next room or on vacation.
- Automatic Shut-Off: The best systems can even trigger an automatic shut-off valve on your main water line, preventing a minor drip from turning into a full-blown flood.
- Total Peace of Mind: They’re a set-it-and-forget-it solution for one of the most common sources of water damage in a home.
By building these smart and sustainable technologies into your laundry room plumbing, you transform it from a basic utility into a highly efficient, self-protecting system. To see what else is out there, take a look at our complete guide on eco-friendly plumbing solutions for Denver residents. These aren’t just upgrades; they’re smart investments that add real, long-term value to your home.
Answering Your Final Laundry Plumbing Questions
Even with a solid plan, a few questions always pop up during a laundry room plumbing project. It’s perfectly normal. Let’s tackle some of the most common ones I hear from homeowners right here in Denver.
Think of this as your final checklist—the little details that make the difference between a project that just works and one that’s done right for the long haul.
What’s the Best Pipe to Use in a Denver Home?
This is the big one, and the answer has changed over the years. While copper was the old standard, for new water supply lines in Denver, my money is on PEX (cross-linked polyethylene) every time. It’s flexible, which means fewer connection points and a lower chance of leaks. Plus, it has a little give, making it far more resistant to bursting if it freezes—a very real possibility during our cold Colorado winters.
For the drain side, you’ll be using 2-inch PVC or ABS plastic pipe. This is the standard required by code, and for good reason. It’s tough, easy to cut and fit, and more than capable of handling the heavy discharge from modern washing machines.
Can I Just Use an S-Trap for the Washer Drain?
In a word: no. This is a common mistake I see in older DIY jobs, and it’s a serious one. S-traps, the kind that loop down and then straight into the floor, are completely illegal under modern plumbing codes. They have a nasty habit of siphoning all the water out of the trap, which breaks the seal and allows sewer gas to seep right into your home.
You absolutely must use a P-trap that connects into a properly vented standpipe. Every single inspector in the Denver area will be looking for this—it’s a non-negotiable for health and safety.
A proper P-trap and vent are the only things standing between your laundry room and the main sewer line. Getting this part wrong is one of the most frequent—and dangerous—DIY missteps. It might seem like a small detail, but it’s critical for a safe, odor-free home.
How Do I Stop My Washing Machine Hoses from Bursting?
A burst washer hose is a homeowner’s nightmare. It can dump hundreds of gallons of water into your home in a matter of minutes. Those cheap rubber hoses that come with the machine are usually the culprit, as they get brittle and crack over time.
Here’s how to prevent that disaster:
- Go with Braided Steel: The first thing you should do is swap the factory hoses for a set of high-quality, braided stainless steel ones. They’re built to handle high pressure and last for years.
- Give Them a Quick Check: Every six months or so, take a peek behind your washer. Look for any kinks, bulges, or rust on the metal fittings.
- Don’t Crank Down on the Fittings: When you connect the hoses, tighten them by hand first. Then, use pliers for just a final quarter-turn. Overtightening can actually crush the rubber washer inside and create a slow leak.
What If My Drain Starts to Smell?
A stinky drain usually means something is wrong. It could be a simple buildup of lint and soap scum, but it can also point to a much bigger problem, like a P-trap that has run dry or an issue with your vent system.
Sometimes, the smell is actually coming from the machine itself. If you’re dealing with a funky washer, a good place to start is troubleshooting washing machine odors with some specific cleaning methods. But if you’ve cleaned the machine thoroughly and the smell is still coming from the drain, it’s a clear sign your plumbing needs a professional look.
At Professional Plumber Denver, we’ve handled every laundry room scenario you can imagine. We’re here to help you get your project across the finish line, whether it’s answering a final question or coming out to make sure everything is safe, secure, and up to code.
Don’t let a small plumbing uncertainty become a major headache. Contact us today at https://professional-plumbers-denver.com to schedule a consultation and make sure your new laundry room is perfect from the pipes up.
