
Installing a floor drain isn’t a small job. It means cutting into your concrete slab, digging a trench, tying new PVC pipe into your main drain line, and then pouring fresh concrete to finish it off. To get it right, you have to nail the details—slope, P-traps, and local codes are non-negotiable for preventing water damage and nasty sewer gas leaks.
Why a Floor Drain Is a Smart Home Investment
A floor drain is more than just another fixture; it’s your home’s first line of defense in areas prone to water. Too many people wait until after a disaster to think about installing one. By then, it’s a costly repair. When you get ahead of the problem, it becomes a smart, long-term upgrade that buys you serious peace of mind.
Picture this: your water heater in the basement gives out, dumping 50 gallons of water onto the floor. Or think about the slush and snow melting off your car all winter, leaving a permanent grimy puddle in the garage. These aren’t just headaches; they’re the start of real, expensive damage. This guide will take you through the entire process, from breaking concrete to the final water test.
Beyond Preventing Puddles
The true benefit of a floor drain goes way past just getting rid of puddles. It’s a key part of keeping your home healthy and safe. Constant dampness from concrete “sweating,” small leaks, or melting snow is a perfect recipe for mold and mildew. That stuff ruins air quality and can even lead to wood rot over time.
A well-placed drain also makes cleanup a breeze. Hosing down a dusty garage or a messy utility room becomes a quick, five-minute job instead of a battle with mops and buckets that takes hours to dry. That kind of practical feature is a real selling point if you ever decide to move.
A floor drain is an investment in prevention. Every gallon of water it diverts is a potential insurance claim avoided, a mold remediation project sidestepped, and a weekend saved from cleanup duty.
Understanding the Full Scope
So, the benefits are clear, but what does the job actually entail? It’s a mix of heavy-duty construction and detail-oriented plumbing. You’ll be working with concrete, dirt, and pipes, so it’s good to know the major steps before you start.
Here’s a breakdown of the process:
- Strategic Planning: You need to pick the perfect spot for the drain and get familiar with your local plumbing codes.
- Demolition: This involves carefully cutting the concrete and digging out the trench for the new pipe.
- Plumbing Assembly: You’ll connect the drain body, a P-trap, and the pipes, ensuring you have the perfect slope for drainage.
- Finishing Work: The final step is pouring new concrete and troweling it smooth so water flows right where you want it to.
Viewing this project as a proactive move against water damage helps put the work into perspective. For homeowners in flood-prone areas, figuring out how to prevent basement flooding is essential, and a floor drain is a fundamental piece of that strategy.
Gathering Your Tools and Materials for the Job
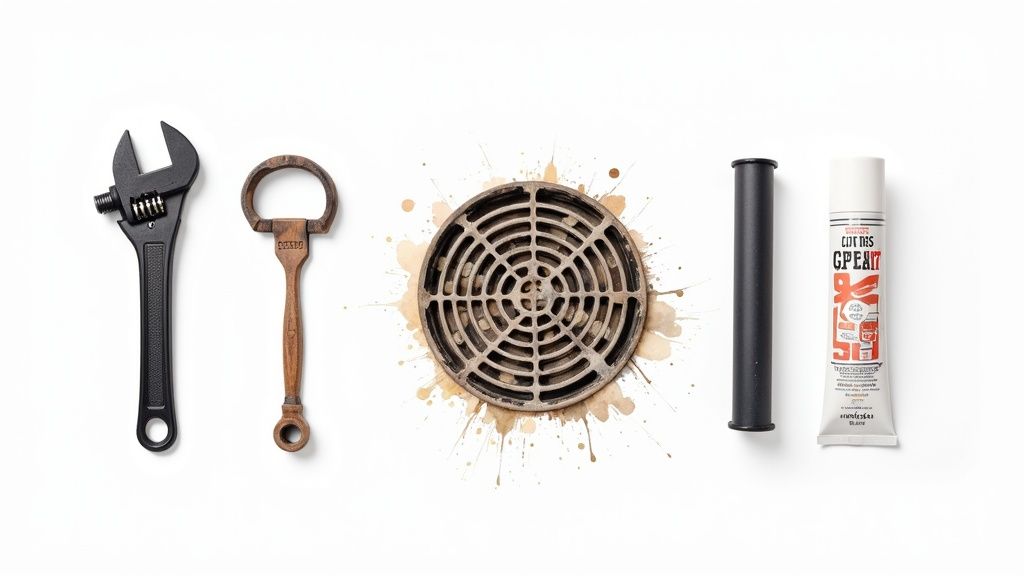
Any seasoned pro will tell you that a smooth installation starts long before you ever fire up a concrete saw. The key is having every last tool, pipe, and fitting ready to go. Nothing kills momentum faster than a frantic, mid-project run to the hardware store.
Think of it this way: the time you spend organizing now is time you won’t spend searching for a fitting later. A clean, prepped workspace just makes every single step feel more controlled and efficient. Before you even think about cutting into that slab, let’s get you set up for success.
Heavy-Duty Hardware for Concrete Work
First things first, you’ll need the right equipment to tackle the concrete slab. This isn’t the time for shortcuts.
- Concrete Saw: You’ll want to rent or borrow one of these to score clean, precise cuts. A sharp blade is non-negotiable—it minimizes chipping and saves you a ton of effort.
- Jackhammer: Once the slab is scored, a jackhammer makes quick work of breaking out the concrete. The goal is to remove it in small, manageable sections to avoid causing any uncontrolled cracks in the surrounding floor.
- Shop Vacuum: Don’t underestimate the dust. A good shop vac is essential for keeping the air breathable and your work area clean, which is critical for getting accurate pipe fittings later on.
The Essential Tools vs Materials Checklist
It helps to think about what you use versus what you consume. The tools go back on the truck, but the materials become a permanent part of the installation. I always separate my list this way to make sure I don’t mix up a one-time purchase with a long-term tool investment.
Here’s a quick breakdown to help you organize your shopping and packing list.
| Tool Category | Specific Item | Pro Tip |
|---|---|---|
| Heavy Equipment | Concrete Saw | Always double-check that the blade type matches the thickness and aggregate of your concrete. |
| Plumbing Tools | PVC Cutter | A good ratcheting cutter is worth its weight in gold. It gives you clean, square cuts on thick-walled pipe without a struggle. |
| Safety Gear | Dust Mask & Goggles | Go for N95-rated masks and ANSI-rated safety glasses. Your lungs and eyes will thank you. |
With your tools ready, it’s time to double-check your consumable supplies.
Plumbing Supplies You’ll Need
- PVC Pipes and Elbows: Before you even open the glue, dry-fit every single segment. This is your chance to confirm the slope is correct and everything lines up perfectly.
- PVC Primer and Cement: The purple primer isn’t just for show. It actually softens the surface of the PVC, allowing the cement to create a permanent, molecularly-welded joint.
- Drain Body and Grate: You’ve got options here. A classic round drain is great for a utility room, but a wider channel drain might be better for a garage where you’ll get a lot of snowmelt.
- Gaskets and Couplings: Grab a few extras. Trust me, you’ll be glad you did if a fitting gets damaged or a measurement is slightly off.
- Gravel and Sand Mix: A solid two-inch bed of gravel under the pipe trench is crucial for creating stable, long-lasting support.
A bit of wisdom from the field: Always buy 10–20% more fittings and pipe than you think you need. It’s a cheap insurance policy against miscalculations or last-minute changes.
Choosing the Right Floor Drain for Your Space
The drain you choose really depends on where it’s going. For a laundry or utility room, a small, unobtrusive round drain often works best. But in a two-car garage, a long channel drain does a much better job of catching water across a wider area.
If you’re looking for a top-tier solution, consider stainless steel. These drains are incredibly durable, resist corrosion, and just look cleaner, especially in workshops or commercial-style spaces. There’s a reason the global market for stainless steel drains is projected to hit USD 1.64 billion by 2025. You can dig into the market trends and benefits of these high-end drains on ArchiveMarketResearch.
And if you’re building out your toolkit, our guide on Essential Plumbing Tools is a great resource for finding quality brands that will last.
A Few Personal Tips for Staying Organized
Over the years, I’ve learned a few tricks to keep job sites from turning into chaos:
- Group items by task. Use labeled bins to keep your demolition tools separate from your delicate plumbing parts.
- Use clear bags for small fittings. This lets you see exactly what you have without tearing everything open.
Having everything in one spot before you begin is the best way to prevent project-killing bottlenecks.
To Rent or To Buy?
The classic DIY dilemma: should you rent or buy the heavy equipment? If this is a one-and-done project, renting is a no-brainer. But if you have more concrete work in your future, buying might make sense.
- Rent from a hardware store: This is your lowest upfront cost. A floor saw rental can run you about $50/day, which is perfect for a weekend job.
- Purchase used equipment: You can often find decent gear for half the price of new, but be sure to inspect it carefully for wear on the motor and blades.
- Invest in new tools: This is the most expensive option, but you get a warranty and the peace of mind that comes with reliable, brand-new performance.
Don’t Forget Safety and Cleanup
Finally, let’s talk about protecting yourself and your home. A little prep here goes a long way.
- Wear work gloves and knee pads. You’ll be on the ground digging and fitting pipes, and this will save your hands and joints.
- Seal off the area with plastic sheets. Concrete dust gets everywhere. Taping plastic over doorways will keep it from migrating into the rest of your house.
- Keep a trash bin nearby. Get rid of concrete chunks and pipe offcuts as you go. A clean site is a safe site.
Once all your gear and materials are lined up and ready, you can move on to the next critical stage: preparing the site and understanding the local codes.
Site Prep and Navigating Local Plumbing Codes
Alright, with your tools and materials gathered, we’re moving from the drawing board to the real world. This prep phase is where the project truly takes shape. I’ve seen it time and again: the care you take now directly impacts how well that drain works for the next twenty years.
Proper site prep is more than just clearing out a workspace. It’s about thinking ahead, being precise, and knowing the rules. Get the location right and understand your local codes, and the rest of the job will feel a whole lot easier.
Finding the Ideal Drain Location
First thing’s first: find the absolute lowest point on the floor. Go to the spot where water already wants to puddle after a spill. That’s your ground zero. If you’re working with a relatively flat slab, you’ve got some more options, but the goal is always to make gravity your best friend. A drain that sits even slightly higher than the surrounding area is just a fancy grate in the floor—completely useless.
Once you’ve scouted the general area, think about the plumbing. How will the new pipe get from your drain to the main sewer line? You’re looking for the path of least resistance. The shortest, straightest route means less concrete to break up and fewer fittings to connect. Every bend and joint is a potential spot for a future clog, so keep it simple.
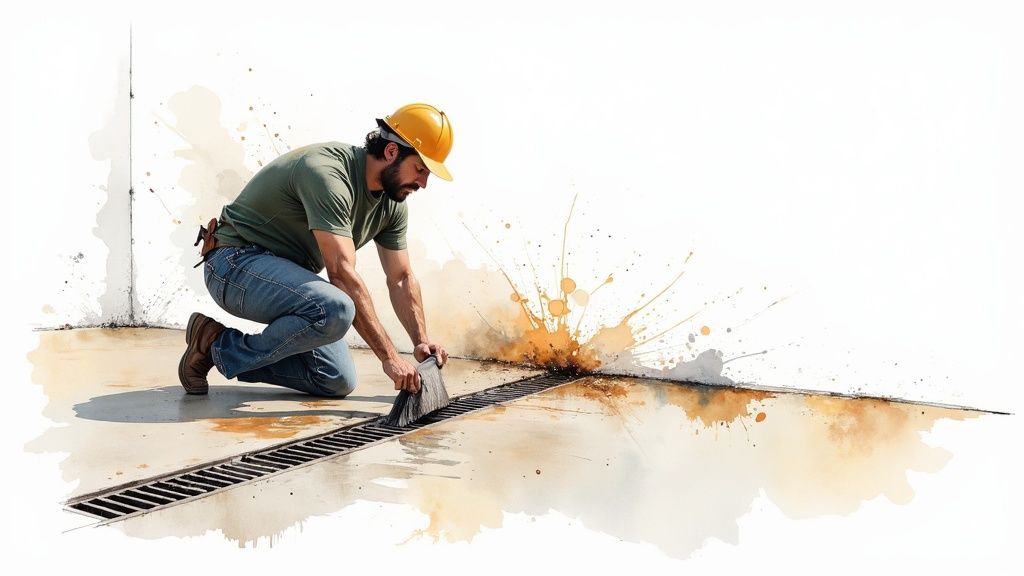
Marking and Cutting the Concrete
Now, grab your chalk line. Snap a straight line for the pipe trench and mark out a clean square where the drain assembly will sit. Take your time with this. These lines are your only guide for the concrete saw, so accuracy is everything.
And before you even think about starting that saw, let’s talk about dust. Concrete dust isn’t like regular dust; it’s fine, abrasive, and gets everywhere.
- Seal the Area: Use plastic sheeting and painter’s tape to quarantine the work zone. Seal off doorways and cover anything you can’t move.
- Use Water: This is an old-school trick that works wonders. Have a helper spray a fine mist of water right on the cut line as you go. This “wet cutting” keeps the vast majority of the dust out of the air.
- Wear a Respirator: Don’t skimp here. A simple paper mask won’t cut it. You need a properly fitted N95 respirator to protect your lungs.
When you start cutting, don’t try to go all the way through at once. Make a shallow scoring cut first, maybe half an inch deep. Then, bring in the jackhammer to break up the concrete inside your lines. This process creates a lot of debris. Knowing what can go in a skip will help you get rid of the old concrete and soil responsibly.
Demystifying Local Plumbing Codes
This brings us to the most critical part of your prep work: your local plumbing codes. These aren’t just friendly suggestions—they’re the law. A quick call to your local building authority or a visit to their website is the single most important thing you’ll do before digging.
Pro Tip: Never assume you know the code. I’ve worked in neighboring towns where the plumbing requirements were completely different. What’s standard procedure in one place could be a major violation just a few miles down the road. Always, always verify.
This is especially true in commercial settings, where codes can get even more complex. A simple drain retrofit in an older building often has to meet a whole host of modern standards. While your home project is simpler, the core principle is the same: do it by the book.
The Non-Negotiables of Plumbing Code
While the fine print can vary, some rules are universal. When an inspector shows up, they’ll be looking for a few key things to make sure your how to install floor drain project is safe and functional.
- The P-Trap Requirement: Every single drain needs a P-trap. No exceptions. This U-shaped section of pipe is designed to hold water, creating a barrier that stops nasty—and dangerous—sewer gases from venting into your home. A drain without a trap is a serious health hazard.
- Minimum Pipe Slope: Water doesn’t flow uphill. Your drainpipe needs a steady, continuous downward slope all the way to the sewer line. The gold standard is ¼-inch of fall for every one foot of pipe. This slope is what keeps water and waste moving, preventing blockages.
- Proper Venting: Depending on your setup, you might need a vent pipe. A vent allows air to get behind the draining water, preventing a vacuum effect that could suck the water right out of your P-trap and render it useless.
Getting any of these wrong won’t just mean a poorly performing drain. It will mean a failed inspection, which could force you to rip everything out and start from scratch. That initial call to the building department is the best 15 minutes you can possibly spend on this project.
Getting the Drain and Pipes in Place
Alright, with the prep work done and your plan squared away, it’s time to get your hands dirty. This is where all that careful planning starts to pay off. You’re about to build the hidden guts of your drainage system, and the precision you use here will determine how well it works for years to come.
First things first: excavation. Following the lines you marked out, you’ll dig a trench from the drain’s location all the way to your main sewer line tie-in. The depth is key. It’s a simple calculation: the depth of your gravel bed, plus your pipe’s diameter, plus the total drop you need for the slope. I always tell people to dig an inch or two deeper than they think they need. It’s a lot easier to add a little gravel to bring a pipe up than it is to re-dig a trench that’s too shallow.
Building a Solid Foundation for Your Pipes
Once the trench is dug, don’t just toss the pipes in there. The ground can shift over time, which will completely mess up your carefully set slope. This is why a solid gravel bed isn’t just a suggestion—it’s essential.
Pour about two inches of pea gravel or similar crushed stone along the bottom of the trench. Rake it out nice and smooth to create a stable, level base. This gravel does two really important things:
- It creates a firm, consistent platform that stops the pipe from sagging or creating low spots where clogs can form.
- It makes fine-tuning a breeze. You can easily scoop a little out or add a little in to get the height and slope of your pipes just right.
This simple step is the secret to a drain line that lasts and doesn’t give you trouble. Skipping it might save you half an hour now, but it can cause major headaches down the road.
Dry-Fit the Entire System First
Before you even think about opening a can of PVC cement, you absolutely must dry-fit the entire plumbing assembly. This is probably the most critical sanity check in the whole project. Lay out your PVC pipes, elbows, and other fittings, starting from where you’ll tie into the sewer and working back toward the drain.
The P-trap is a central piece of this puzzle. It’s that U-shaped pipe that holds a little bit of water to block smelly sewer gas from coming into your space. Understanding what is P-trap plumbing is non-negotiable for a safe, code-compliant job. As you piece everything together, grab your level and make sure you’re keeping that crucial ¼-inch drop for every foot of pipe. Now is the time to make adjustments while it’s still easy.
Measure twice, cut once. It’s an old saying for a reason, and it’s the golden rule of plumbing. One bad cut on a piece of PVC can throw your whole alignment off and force you to start a section over. Double-check every single measurement before you cut.
This visual guide breaks down the process of cutting the concrete and setting the new drain.
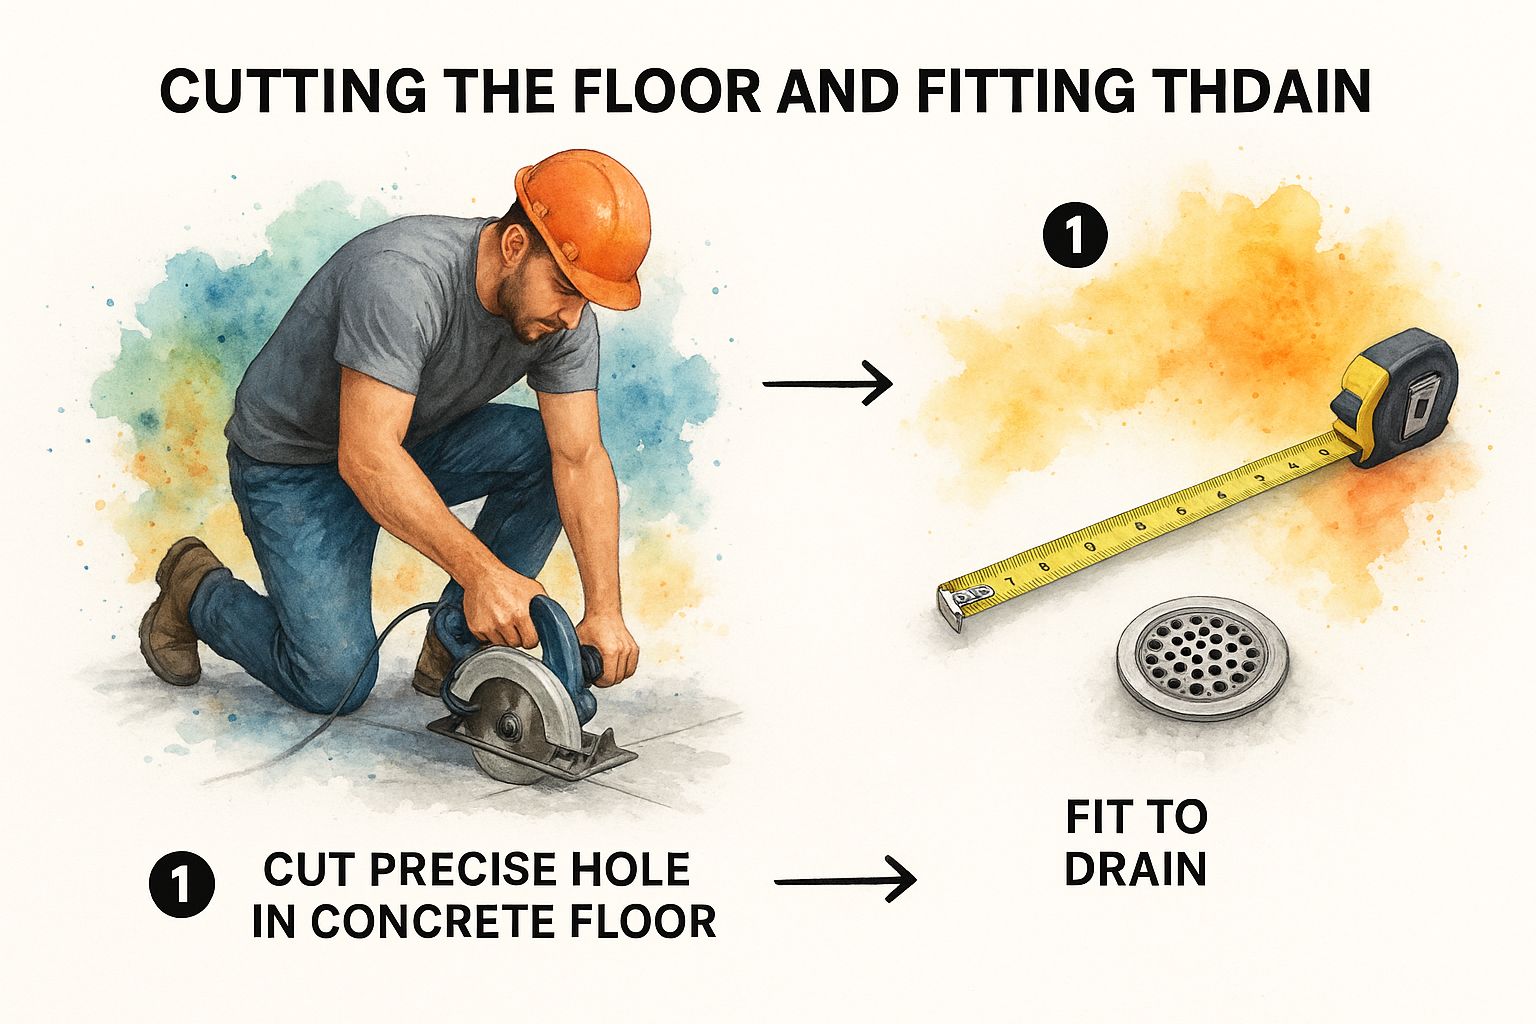
As the image shows, it’s all about precision—from making that initial clean cut to carefully positioning the drain body itself.
Making Permanent, Leak-Proof Connections
Once your dry-fit looks perfect and you’ve triple-checked your slope, it’s go-time. You’re about to create a solvent weld, which chemically fuses the pipe and fitting into one solid piece of plastic.
You’ll need two things: primer and cement. The purple primer is a cleaner, but it also softens the plastic. You’ll want to apply it generously to both the outside of the pipe end and the inside of the fitting. This etches the surface so the cement can create a strong bond.
Right after priming, apply an even layer of PVC cement to both surfaces. Don’t be shy with it. Push the pipe firmly into the fitting with about a quarter-turn twist. That twist helps spread the cement evenly for a perfect seal. You have to hold it tight for about 30 seconds as the weld sets. It happens fast, so you need to work with confidence. Just work your way down the line, one joint at a time.
Setting the Floor Drain Assembly
With your pipeline glued and sitting securely in the trench, the last plumbing step is attaching the drain assembly itself. This is the piece that gets locked into the concrete, so getting its final height right is critical.
The top of the drain body needs to sit perfectly flush with your finished floor. If it’s too high, it’s a tripping hazard. Too low, and you’ll have a permanent puddle around it. Lay a level across the drain top and check it against the surrounding concrete to get it spot-on. Once it’s perfect, pack some dirt or gravel tightly around the drain body to hold it steady for the concrete pour.
While you’re focused on this installation, it’s smart to think about other water management solutions. For instance, knowing the typical drainage tile installation cost can help you budget for a more complete system to keep your basement or garage bone dry.
Tying into the Main Sewer Line
Connecting your new drain into the main sewer line is a make-or-break moment. How you do it depends entirely on what your main line is made of.
- Connecting to PVC: This is the easy scenario. You can either use a PVC saddle tee that glues onto the outside or cut a section out of the main line to install a proper wye fitting. Both use the same primer-and-cement technique you’ve already mastered.
- Connecting to Cast Iron: You’ll see this in older homes. The tool for this job is a shielded mechanical coupling, often called a Fernco coupling. It’s a tough rubber sleeve with stainless steel band clamps that creates a super durable, leak-proof seal between the new PVC and the old cast iron.
Whichever method you use, make absolutely sure that connection is watertight and secure. All the water from your new drain is going to pass through this one point, so there’s no room for error. With the plumbing now fully installed and connected, you’re ready to mix some concrete.
Pouring Concrete for a Professional Finish
Alright, you’ve swapped your plumber’s hat for a mason’s trowel. With the pipes all snug and secure, it’s time to bring the floor back together. This isn’t just about filling a hole; it’s about crafting a durable, perfectly sloped surface that will channel water exactly where you want it to go for years to come.
The secret to a rock-solid finish starts with the mix. You could play chemist with your own sand, cement, and aggregate, but for a job like this, a high-quality, pre-mixed bag of concrete is your best bet. It takes the guesswork out and guarantees a strong, consistent result every time.
Mixing and Pouring Your Concrete
You’re aiming for a consistency like thick pancake batter. It needs to be fluid enough to work into every nook and cranny but not so soupy that it weakens the final product. Grab a wheelbarrow or a mixing tub and add your water slowly—you can always add more, but you can’t take it out.
Start pouring the concrete into the trench, beginning at the far end and working your way back toward the drain. Use a shovel or a spare piece of 2×4 to gently nudge the concrete under and around the pipe. You want to eliminate any air pockets, which can create weak spots and lead to sagging or cracks down the road.
Mastering the Art of the Trowel
With the trench filled, the real craftsmanship begins. This is where you shape the surface around the drain, and your attention to detail will make all the difference. Using a good steel trowel, your goal is to create a subtle, seamless slope from the existing floor down to the drain itself.
- Work from the outside in. Start where the new concrete meets the old floor and smooth your way toward the drain.
- Use long, sweeping strokes. Keep steady, even pressure on the trowel to work out any bumps and create that gentle gradient.
- Check your slope constantly. Lay a level from the old concrete edge to the drain body to make sure you’re maintaining that crucial ¼-inch per foot slope.
A perfect finish is one you can’t really see. Done right, the transition from old floor to new concrete should be nearly invisible, with a slope so gradual you won’t notice it underfoot—but water definitely will.
Don’t Skip the Curing Process
Now for the step that 90% of DIYers get wrong: curing. Concrete doesn’t just “dry out.” It goes through a chemical reaction called hydration, and for that to happen properly, it needs to retain moisture. If the water evaporates too fast, the reaction stalls, and the concrete never gets as strong as it should be.
The fix is simple. Lightly mist the new concrete with a spray bottle a few times a day for at least three to five days. Covering it with a plastic sheet also works wonders for trapping that essential moisture. This one small step is your best defense against surface cracks and a weak floor.
The Final Test
After the concrete has cured for a few days and feels hard as a rock, you can finally install the drain grate. Most just drop right in, while some might have a couple of screws to secure them.
With the grate in place, it’s time for the moment of truth. Grab a couple of buckets of water and pour them onto the floor around the drain. Watch it flow. If it all makes its way to the drain without leaving any puddles behind, you’ve nailed it. Your how to install floor drain project is a success, and you’ve got a professional installation ready to protect your space.
It’s a small project with a big impact. The global floor drain market was valued at around USD 2.7 billion in 2023, showing just how critical these components are. If you’re curious about the industry trends, you can learn more about this growing market’s dynamics at Verified Market Reports.
Common Questions About Floor Drain Installation
https://www.youtube.com/embed/RsE16rm_qn4
Even with a perfect plan laid out, questions always come up in the middle of a project. You might find yourself second-guessing a measurement or wondering if you’ve missed a specific code requirement. It happens to everyone.
This section is all about tackling those common uncertainties head-on. Getting these details right is the difference between a drain that works flawlessly for decades and one that becomes a recurring headache. Let’s clear up the confusion so you can move forward with confidence.
Is a P-Trap Really Necessary for a Floor Drain?
Yes, a P-trap is 100% non-negotiable. Every plumbing code in the country demands it for one critical reason: sewer gas.
That simple U-shaped pipe holds a small amount of water that creates a seal. This water plug is the only thing stopping foul—and potentially hazardous—gases from the city sewer from backing up into your home. Installing a drain without one is like leaving a direct, open highway for those gases right into your basement or garage.
If you’re putting the drain in a spot that won’t see much water, like a utility room, you should also think about installing a trap primer. This is a small device that automatically trickles a bit of water into the trap to keep it from drying out and letting those gases through.
How Deep Should I Dig the Trench for the Pipe?
Figuring out your trench depth isn’t just guesswork; it’s a simple calculation based on three things: your gravel base, the pipe’s diameter, and the all-important slope.
You need to dig deep enough to accommodate:
- A Solid Gravel Base: You’ll want at least two inches of gravel under the pipe. This creates a stable, supportive bed that prevents it from shifting or settling over time.
- The Pipe Itself: The trench needs to be wide and deep enough for the pipe and its fittings. The P-trap is almost always the deepest part of the whole assembly, so base your depth on that.
- The Required Slope: You absolutely must maintain that consistent downward slope of ¼-inch per foot from the drain all the way to its connection point.
Here’s a tip from experience: always dig an inch or two deeper than your math tells you. It’s far easier to add a little more gravel to bring the pipe up to the perfect height than it is to stop everything and re-dig a trench that’s too shallow.
The most common mistake I see is an incorrect slope. A pipe that’s too flat will hold water and debris, guaranteeing a clog. A pipe with a back-slope won’t drain at all. Triple-check your slope before you even think about mixing concrete.
What Is the Difference Between a Floor Drain and a Floor Sink?
People often use these terms interchangeably, but they’re built for different jobs. A standard floor drain (sometimes called an area drain) is designed to handle water from the surrounding floor surface. Think of a garage or basement where the concrete is sloped toward the drain to catch spills or runoff.
A floor sink, on the other hand, is a much deeper, basin-style drain. It’s designed to take on indirect waste from a specific piece of equipment, like the drain line from a commercial ice machine or an HVAC condensate line. The floor usually isn’t sloped towards a floor sink because its job is to catch a sudden, high volume of water from a single pipe, not from the entire room.
What Are the Biggest Mistakes People Make?
I’ve seen a few common slip-ups turn a straightforward project into a major problem. Steer clear of these, and you’ll be in good shape.
- Incorrect Slope: I can’t say it enough. Getting the slope wrong is the number one issue. A back-sloped pipe is completely useless and means you’re tearing out fresh concrete.
- Forgetting a Vent: Depending on where the drain is and what your local codes say, a vent is often required. A vent lets air into the system, allowing water to flow out quickly and smoothly without gurgling or creating a vacuum.
- Bad PVC Joints: Just slapping some cement on a PVC joint isn’t enough. The purple primer is essential for cleaning the pipe and creating a true solvent weld. Skipping it leads to weak joints that will eventually leak.
- Wrong Drain Height: This one is crucial for the final finish. If you set the drain body too high, it becomes a tripping hazard. Set it too low, and you’ll have a permanent puddle around the drain because water can’t get over the lip.
If this project starts to feel like more than you want to handle, or if you uncover a bigger issue with your existing plumbing, don’t hesitate to call in the experts. Professional Plumber Denver has years of experience handling every type of drain and sewer line project in the Denver Metro area.
