
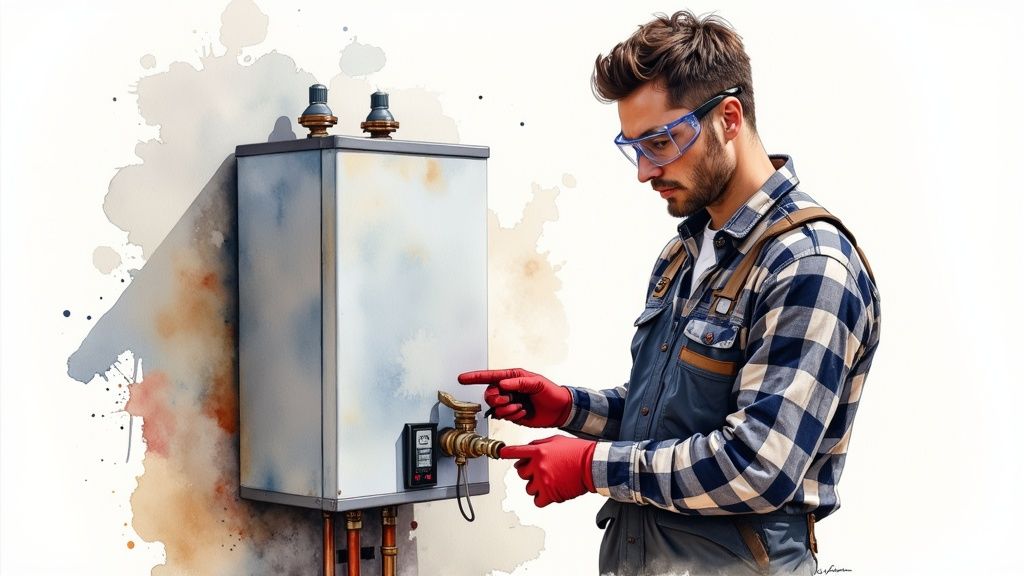
There’s nothing quite like a blast of ice-cold water mid-shower to ruin your morning. When that happens, the first suspect is almost always an extinguished pilot light. The good news? You can often get to the bottom of the problem with some basic water heater pilot light troubleshooting. The fix is usually simpler and cheaper than you’d expect.
Why Your Pilot Light Went Out and What to Check First
A water heater’s pilot light is a small, constant flame that’s ready to fire up the main burner the moment you turn on a hot water tap. If that little flame goes out, your heater can’t do its job. Before you even think about relighting it, you need to play detective and figure out why it went out. Otherwise, you’ll just be relighting a flame that’s doomed to go out again.
Initial Diagnostic Checks
More often than not, the culprit is something simple in the heater’s environment or a hiccup in the gas supply.
A strong draft is a surprisingly common reason for a pilot light to go out. If your water heater is tucked away in a basement, garage, or utility closet, a sudden gust of wind from an open door or even a nearby dryer vent can be enough to snuff out that tiny flame. First thing’s first: close any nearby windows or doors to eliminate drafts.
Another potential cause is a fluctuation in your gas pressure. While it’s usually steady, work being done by the gas company or other issues down the line can temporarily disrupt the flow and kill the pilot. If you find yourself relighting the pilot over and over, it could point to a more serious gas supply issue that needs a professional’s touch.
Key Takeaway: Start by ruling out the easy stuff. A drafty room or a temporary interruption in your gas service are two of the most frequent and easily identifiable reasons a pilot light suddenly goes out.
Before diving deeper, run through this quick checklist. These simple checks can often solve the problem without you having to touch a single tool.
Quick Pilot Light Troubleshooting Checklist
| Symptom | Potential Cause | Quick Check |
|---|---|---|
| Pilot won’t light at all | No gas supply | Confirm the gas valve on the main line and on the heater itself are fully open. |
| Pilot lights but goes out | Strong draft | Check for open windows, doors, or vents near the water heater and close them. |
| Pilot won’t stay lit after holding the button | Faulty thermocouple | Ensure the thermocouple tip is directly in the pilot flame and hasn’t been bent. |
| Main burner doesn’t ignite | Thermostat set too low | Turn the temperature dial to a higher setting to see if it triggers the burner. |
Once you’ve ruled out these common issues, it’s time to look at one of the most critical components.
The Critical Role of the Thermocouple
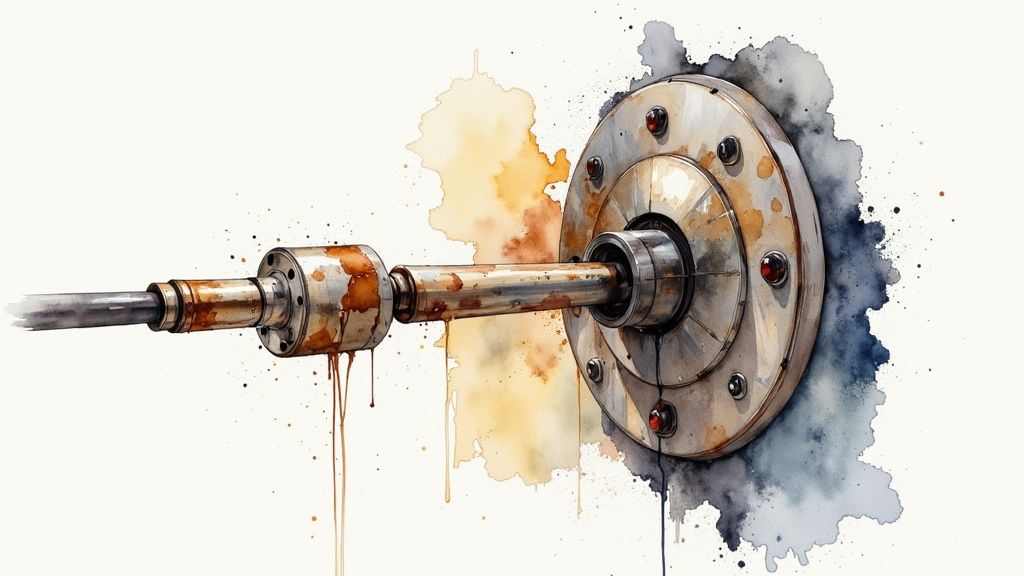
If the room isn’t drafty and the gas seems fine, your next stop is the thermocouple. This is a small copper sensor that sits right in the path of the pilot flame. Its entire job is to sense the heat from the pilot and tell the main gas valve, “It’s safe, keep the gas flowing.”
But if that thermocouple is dirty, bent out of position, or has simply worn out, it can’t get hot enough. It will then mistakenly signal that the pilot is out, and as a safety precaution, it will shut down the gas supply. This is an incredibly common point of failure, especially when you consider the average water heater lifespan and the constant wear on its parts.
Interestingly, many of the principles for troubleshooting gas appliances are similar. If you’ve ever dealt with a furnace problem, you might find some of these diagnostic steps familiar. In fact, many of these furnace troubleshooting tips for when it’s not blowing hot air involve checking similar components, just on a different machine.
Essential Safety Checks Before You Begin
Before you even think about touching that water heater, let’s talk about safety. I can’t stress this enough: getting a hot shower an hour sooner is not worth risking your safety. Working with gas appliances requires your full attention and a healthy dose of caution. We need to create a secure environment before we try to figure out what’s wrong with the pilot light.

First things first: shut off the gas. Find the gas line that runs to your water heater and locate the shutoff valve—it usually has a red or yellow handle. To turn it off, the handle needs to be perpendicular to the pipe, forming a “T” shape. This one simple step stops any new gas from flowing into the unit while you’re working.
Now, let’s get some air moving. Open up any nearby doors and windows to create a good cross-breeze. This is crucial for clearing out any gas fumes that might have collected. It’s a common scenario: someone tries to relight the pilot a few times, it fails, and a small amount of gas builds up inside the combustion chamber. That’s a recipe for a dangerous flare-up on the next attempt.
Recognizing Immediate Dangers
Your nose and ears are your best friends here. They’re your built-in safety detectors, so pay close attention to what they’re telling you. If you notice either of the following, stop immediately.
- A strong “rotten egg” smell: Natural gas itself is odorless. Utility companies add a chemical called mercaptan to give it that unmistakable sulfuric smell. A faint whiff when you’re first trying to light the pilot is one thing, but a strong, lingering odor means you’ve got a leak somewhere.
- A hissing or whistling sound: Any sound coming from your gas lines or the heater is a major red flag. This is the classic sign of gas escaping under pressure.
If you smell strong gas or hear a hissing sound, do not touch anything that could create a spark—no light switches, no phones, no unplugging appliances. Just get everyone out of the house immediately and call your gas company or 911 from a safe distance, like a neighbor’s house or down the street.
Crucial Safety Insight: I’ve seen it happen—people get impatient and don’t wait long enough after a failed lighting attempt. You absolutely must let the area ventilate for at least 15-60 minutes to allow any built-up gas to dissipate. This simple act of patience dramatically reduces the risk of a dangerous flashback when you try to ignite the pilot again.
Once the area is well-ventilated and you’re confident there’s no active leak, you can move forward. If you have even the slightest doubt, it’s time to call in a professional. Your safety is paramount. For more tips on keeping your unit running smoothly and safely, take a look at our guide on hot water heater maintenance.
A Practical Guide to Relighting Your Water Heater’s Pilot Light
Okay, you’ve done your safety checks and there’s no lingering smell of gas. Now it’s time to actually get that pilot light relit. This part can feel a little nerve-wracking if you’ve never done it before, but it’s usually pretty simple. Everything you need is right there on the gas control valve—that box on the front of your tank with the temperature dial and the main control knob.
That control knob is your mission control for this operation. It almost always has three settings, and understanding them is crucial.
- OFF: This is the safest position. It completely stops gas from flowing to both the main burner and the pilot light assembly. We’ll always start here.
- PILOT: Turning the knob to this setting and pushing it down manually opens a valve, sending a small, controlled flow of gas only to the pilot light itself.
- ON: This is the normal operating mode. Once the pilot is lit and stable, this setting lets the main gas valve do its job, firing up the burner whenever the water needs heating.
Getting the Flame Started
How you spark the flame depends on your water heater’s age. Older models are a bit more hands-on and need a long lighter, while newer units often have a convenient push-button igniter.
First, find the burner access cover, usually a small metal plate near the bottom of the tank. Pop that off. Peer inside, and you’ll see a couple of small metal tubes running toward the main burner. One carries the gas for the pilot, and the other is the thermocouple.
Now, turn the control knob to the PILOT position.
Press the knob down and keep it held down. This is what starts the gas flowing to the pilot. While you’re holding it:
- If you have an igniter: Start clicking the red or black igniter button. You’re looking for a small spark inside, near the tip of the pilot tube, accompanied by a sharp click-click-click sound.
- If you have an older unit: You’ll need to do this manually. Carefully reach a long-reach barbecue lighter or a match held with pliers into the access area and bring the flame to the end of the pilot tube.
You’ll know it worked when you see a small, steady blue flame pop into existence. But don’t celebrate just yet!
The Mistake Almost Everyone Makes
This is, without a doubt, the most common reason people fail when trying to relight their pilot: they let go of the control knob too quickly. You have to remember that thermocouple we mentioned. It’s a safety device that needs to get hot to tell the gas valve, “Hey, there’s a flame here, it’s safe to keep the gas on.”
My Pro Tip: You have to keep holding that pilot knob down for a solid 30 to 60 seconds after you see the flame ignite. Be patient. This gives the thermocouple enough time to heat up and generate the tiny electrical current that keeps the pilot valve open. Let go too soon, and the safety feature will cut the gas, killing the flame you just worked to light.
After holding it for about a minute, slowly release the knob. Watch the flame. If it stays lit, you’ve done it! Turn the knob over to the ON position, put the access cover back on, and listen for the satisfying “whoosh” of the main burner firing up.
If the pilot flame goes out as soon as you let go, don’t panic. Wait five minutes for any gas to clear out, then try the whole process again. This time, hold the knob down for a bit longer. If it still refuses to stay lit after a couple of tries, it’s a sign that something else is wrong—and we’ll dig into what that could be next.
What to Do When the Pilot Light Won’t Stay Lit
It’s one of the most common frustrations with a gas water heater: you go through the steps, get the pilot lit, see a nice, steady flame… and the moment you let go of the knob, it dies. You try again, and the same thing happens. When a pilot light refuses to stay on, it’s almost always a sign that something is wrong with a specific safety component—the thermocouple.
Think of the thermocouple as the water heater’s vigilant little guard. This thin copper probe sits right in the pilot flame. As it heats up, it creates a tiny bit of electricity, which sends a signal to the gas valve saying, “Everything’s okay, stay open.” If the flame ever goes out, the thermocouple cools, the electrical signal stops, and the gas valve snaps shut. It’s a brilliant, simple safety feature.
Checking the Thermocouple
When that pilot won’t stay lit, it’s usually because the thermocouple isn’t sending that crucial “all clear” signal to the gas valve. There are really only a few reasons why this happens:
- Soot and Buildup: A layer of carbon can form on the thermocouple’s tip over time, acting like an insulator and preventing it from getting hot enough.
- Poor Positioning: The tip might have been knocked out of place and isn’t sitting directly in the hottest part of the pilot flame anymore.
- It’s Just Worn Out: Thermocouples don’t last forever. After years of constant heating and cooling, they can simply fail.
Take a close look at the pilot assembly. The tip of the thermocouple should be right in the middle of the flame, and you should see it glow a faint red when the pilot is on. If it looks black and sooty or is off to the side, you’re on the right track.
This is a great point to pause and diagnose what you’re seeing. This visual guide can help you figure out the next steps.
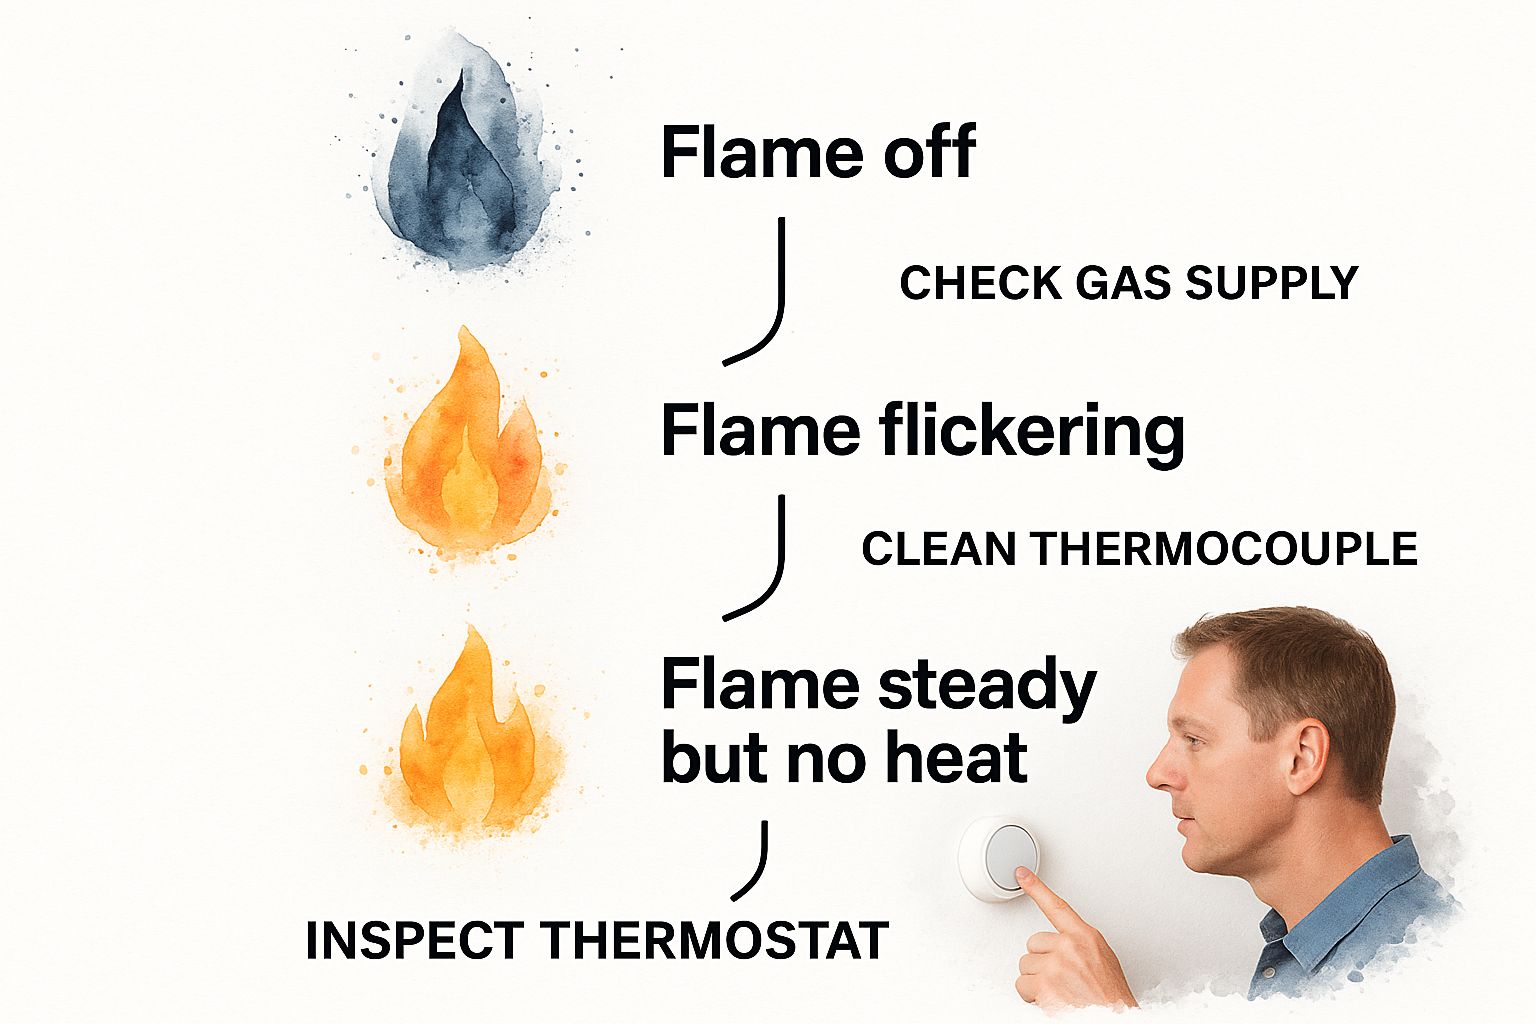
As you can see, a flickering flame is a dead giveaway for a thermocouple issue, while other problems have different tell-tale signs.
Cleaning and Making Adjustments
If you suspect a dirty thermocouple, the fix can be surprisingly simple. First, make sure you turn the gas supply off completely. Then, you can gently clean the tip with a piece of fine-grit sandpaper or even an emery board to scrub off that carbon buildup. If it’s bent, you can carefully push it back into the direct path of the flame.
Another part to check is the pilot tube itself—the little pipe that feeds gas to the pilot. If it gets clogged with dust or debris, the flame can become too weak to properly heat the thermocouple.
Expert Insight: In my experience, a faulty thermocouple accounts for 30-40% of all pilot light service calls. The flame needs to be a strong, steady blue that completely surrounds the top 1/2 inch of the thermocouple. If the flame is weak, yellow, or dancing around, it won’t get the sensor hot enough. That’s why cleaning out the pilot tube with a can of compressed air is a standard first step for any pro. You can learn more about maintaining your gas water heater’s components to see how a little preventative care can save you a lot of headaches.
If a good cleaning and a quick adjustment don’t do the trick, the thermocouple itself has likely reached the end of its life and needs to be replaced. For a confident DIYer, this is a very doable job. However, it means disconnecting gas lines, and it has to be done correctly. If you have any hesitation at all, this is the perfect time to call in a professional. Safety first, always.
If your pilot light won’t stay lit, use this flowchart to pinpoint the cause and determine the right course of action.
Pilot Light Problem Diagnostic Flowchart
| Observation | Likely Cause | Recommended Action |
|---|---|---|
| Pilot lights but goes out when you release the knob. Flame was blue and strong. | Dirty or Faulty Thermocouple: It’s not generating enough current to keep the gas valve open. | Shut off the gas. Clean the thermocouple tip with fine sandpaper. If that fails, replace the thermocouple. |
| Pilot flame is weak, yellow, or flickering. It won’t stay lit. | Clogged Pilot Orifice/Tube: Debris is restricting gas flow, weakening the flame. | Shut off the gas. Carefully clean the pilot tube and orifice with a needle or compressed air. |
| Pilot won’t light at all. You can’t hear or smell any gas. | Blocked Gas Supply or Faulty Gas Valve: No fuel is reaching the pilot assembly. | Ensure the main gas valve to the water heater is fully open. If it is, this likely indicates a problem with the control valve, which requires a professional. |
| Pilot lights and stays on, but the main burner won’t ignite. | Faulty Gas Control Valve or Thermostat: The system isn’t signaling the main burner to turn on. | This points to a more complex component failure. It is safest to call a qualified plumbing or HVAC technician for diagnosis. |
Following these steps can help you quickly identify whether you’re dealing with a simple fix or a more serious problem that requires professional attention.
Knowing When It’s Time to Call a Professional
Fixing your own pilot light can feel pretty satisfying, but a truly successful DIYer knows when to hand the job over to a pro. Recognizing your limits isn’t giving up; it’s just smart. Sometimes, what seems like a simple fix is actually a symptom of a much bigger, more dangerous problem.
The most critical sign that you’re out of your depth is a persistent gas smell. If you’ve followed all the steps, turned off the gas, and aired out the area but can still smell that distinct “rotten egg” odor, stop what you’re doing immediately.
Safety First: A lingering gas smell is a serious red flag. It points to a leak somewhere in the gas line or a bad seal in the control valve itself. Don’t try to be a hero. Leave the area, call your gas company from a safe distance, and then call a licensed plumber.
Take a good look at the gas lines and fittings around the control valve, too. If you see any rust or corrosion, that’s another clear signal to stop. Those components are under pressure, and their integrity is non-negotiable.
Red Flags That Demand a Professional
Even if you manage to get the pilot lit, other symptoms can pop up that tell you it’s time to call in an expert. Don’t ignore these—they often point to a failing part that could compromise your family’s safety.
Put down the tools and pick up the phone if you notice any of these issues:
- Soot Buildup: Do you see black, powdery soot collecting around the burner or on the bottom of the tank? That’s a major warning sign. It means the gas isn’t burning correctly, which can produce dangerous levels of carbon monoxide.
- Main Burner Won’t Fire Up: You’ve got a healthy blue pilot flame, but the main burner never ignites with that familiar “whoosh” when the water needs heating. This usually points to a faulty gas control valve, a component that’s definitely not a DIY-friendly fix.
- Visible Damage or Leaks: Any significant rust, corrosion, or worse, water actively leaking from the tank or its connections means you’re dealing with more than a pilot light problem. A compromised tank is a serious hazard.
These problems are often signs that your water heater needs repairs in general, with the pilot light being just the first thing you noticed.
When you’re facing these more complex issues, it’s always the right move to seek out comprehensive water heater repair and installation services. A professional can safely diagnose the real problem and get your hot water running again without putting your home at risk.
A Few Common Questions About Pilot Lights
Even after you’ve successfully relit your pilot, you might still have a few questions rattling around. It’s completely normal. Let’s tackle some of the most common things homeowners ask me about their water heaters. Getting these answers down will help you feel more confident now and in the future.
How Much Does a Professional Pilot Light Repair Cost?
This is a tough one because the final bill really depends on what the technician finds. There’s a big difference between a simple fix and a part replacement.
For a basic service call—maybe a strong draft blew the pilot out and you just can’t get it relit—you’re likely looking at $100 to $200. In this scenario, the tech comes out, relights it, and gives everything a quick once-over to make sure there isn’t a bigger problem.
But if a part has failed, the cost will climb. The most frequent culprit is a bad thermocouple. Getting a new one installed will typically run you between $150 and $350, parts and labor included. If the problem is more serious, like a faulty gas control valve, the repair could easily jump to $400 to $600 or more.
What Should a Healthy Pilot Light Flame Look Like?
The look of your pilot flame is a fantastic health report for your water heater. You’re looking for something very specific.
A healthy flame should be strong and steady, with a primarily blue color. It’s totally fine to see a little flicker of yellow at the very tip, but the body of the flame should be a crisp blue. The most important thing is that the flame is big enough to completely surround the tip of the thermocouple—that’s the little metal sensor right next to it.
Watch Out: A weak, sputtering flame that’s mostly yellow or orange is a serious warning sign. This usually means the fuel isn’t burning completely, which can be caused by a dirty pilot tube. Incomplete combustion is no joke; it can produce dangerous carbon monoxide gas.
Also, if the flame is making a roaring noise or seems to be “lifting” off the end of the tube, it’s time to get it looked at right away.
Can I Replace a Thermocouple Myself?
If you’re pretty handy and have done some basic repairs around the house before, replacing a thermocouple is definitely a doable weekend project. The part itself is cheap—usually less than $20 at a hardware or home supply store.
Here’s the basic game plan:
- First and foremost, shut off the gas supply to the water heater. No exceptions.
- Unscrew and remove the access panel covering the burner assembly.
- You’ll see the thermocouple; carefully unscrew its connections from the gas control valve and its mounting bracket by the pilot.
- Slide the new one in, making sure the sensor tip sits right in the path of where the pilot flame will be.
The trickiest parts are getting the connections tight enough without stripping them and positioning the new sensor perfectly. If you feel even the slightest bit unsure about working with gas components, just call a pro. It’s always better to be safe, and there’s no shame in calling for backup from a licensed plumber.
If you’ve gone through all these steps and are still getting nothing but cold water—or if you’re in the Denver area and would rather just leave it to an expert—we’re here to help. The team at Professional Plumber Denver has seen it all and can get your hot water running again. Visit us at https://professional-plumbers-denver.com to get your service scheduled.
