
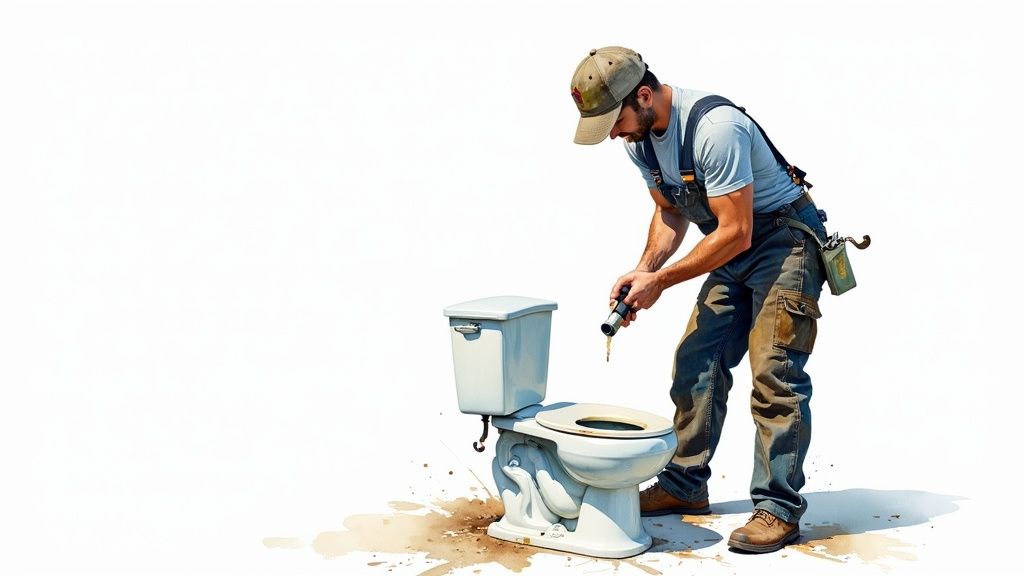
So, you’ve got a leaky toilet, or maybe just a sneaky suspicion something’s not right. Before you start pulling things apart, let’s talk about what’s actually involved in replacing a toilet wax ring.
At its core, the job is pretty simple: you shut off the water, drain the toilet, pull the whole thing off the floor, scrape away the old, messy wax, and then pop a new one on before bolting the toilet back down. This little wax ring is the only thing standing between your bathroom and a whole lot of nasty sewer gas and water damage.
While it’s not rocket science, the first and most critical step is making sure the wax ring is actually the culprit.
Is Your Toilet Wax Ring Failing You?

Before you even think about grabbing a wrench, you need to play detective. The most obvious sign is a puddle of water around the base of the toilet, but honestly, a lot of the time the clues are way more subtle. Catching them early can be the difference between a $10 fix and a $1,000+ subfloor repair. Trust me on that one.
Telltale Signs of a Bad Seal
One of the biggest giveaways isn’t something you see, but something you smell. If your bathroom has a persistent, foul sewer gas odor that you can’t pin down, the wax ring’s airtight seal is probably shot. That smell is a huge red flag that gases are seeping up from the drainpipe. Don’t ignore it.
Another dead giveaway? A wobbly toilet. If the toilet rocks or feels even a little bit loose when you sit on it, that movement has almost certainly broken the wax seal. A toilet should feel like it’s a solid part of the floor—zero movement.
Pro Tip: Get down on your hands and knees and really inspect the floor right around the base of the toilet. Stained grout, vinyl flooring that’s starting to peel up at the edges, or warped wood are all classic signs of a slow leak that’s been quietly damaging your subfloor for weeks or even months.
What to Look For
Here are a few more specific things I always check when I suspect a bad seal:
- Check the Ceiling Below: If your bathroom is on the second floor, take a walk downstairs. Look directly under the toilet area for any new water stains or discoloration on the ceiling. That’s a sure sign of trouble.
- The Paper Towel Test: Sometimes a leak is so slow you won’t see a puddle. Take a dry paper towel and wipe it completely around the base where the toilet meets the floor. If it comes up even slightly damp, you’ve found your leak.
- Weird Noises: This one is less common, but if the old wax has degraded and collapsed into the drain, it can cause gurgling sounds or make the toilet flush a bit sluggishly.
Figuring out these symptoms will give you the confidence that you’re fixing the right problem. If you want to get a better sense of the big picture, our guide on https://professional-plumbers-denver.com/blogs/when-to-replace-toilet/ offers some great advice. And if you’re on the fence between doing it yourself or calling a pro, getting a feel for the plumbing and HVAC industry can help you make an informed choice.
2. Gather Your Gear for a Flawless Repair
Trying to replace a toilet wax ring without the right tools is a recipe for disaster. Trust me, you don’t want to be making a frantic, mid-project run to the hardware store with your toilet sitting in the middle of the bathroom floor. A little prep work now saves a massive headache later.
The good news? You don’t need a plumber’s entire van. You probably have most of what you need already tucked away in your garage or under the sink. Think of this as your mission briefing—getting everything lined up is your first, and most important, step.
Your Toilet Wax Ring Replacement Toolkit
This is your non-negotiable list. Having these items ready and within arm’s reach will make the whole process go from a potential nightmare to a manageable weekend project. If your toolkit is looking a bit thin, our guide on essential plumbing tools is a great place to start building a solid foundation for this and any other plumbing jobs that come your way.
Here’s a quick checklist of everything you’ll need to get the job done right.
| Item | Category | Purpose |
|---|---|---|
| New Wax Ring | Essential | The star of the show! Choose standard, extra-thick, or wax-free. |
| Adjustable Wrench | Essential | For disconnecting the water line and removing the toilet bolts. |
| Putty Knife | Essential | Absolutely critical for scraping off all the old, stubborn wax. |
| Bucket & Sponge | Essential | To get every last drop of water out of the tank and bowl. |
| Old Towels or Rags | Essential | For soaking up spills and protecting your floor from the toilet. |
| Rubber Gloves | Essential | This is a messy job. Don’t skip these. |
| Utility Knife | Recommended | Helpful for cutting caulk and opening new packaging. |
| Flathead Screwdriver | Recommended | For prying off the bolt caps and scraping tight spots. |
| Shop-Vac | Recommended | The fastest way to empty the bowl and tank completely. |
Having these items laid out before you even turn off the water will make you feel like a pro and keep things running smoothly.
Picking the Right Seal
This is easily the most important decision you’ll make. While the classic wax ring has been the industry standard for decades, you’ve got options. What you choose really depends on your bathroom floor and flange situation.
The old-school wax ring isn’t going anywhere. It holds a whopping 52.3% share of a global market that’s expected to reach $4.28 billion by 2033. That kind of staying power tells you it’s reliable and it just plain works. You can dig into the full toilet seal market trends if you’re curious.
Here’s a quick rundown to help you decide:
- Standard Wax Ring: This is your go-to if the toilet flange (the part on the floor the toilet bolts to) is flush with or sitting just above the finished floor. It’s cheap, effective, and has been sealing toilets for generations.
- Extra-Thick Wax Ring: Did you just install new tile? Is your flange now sitting a bit below the floor level? This is the ring you need. That extra thickness is crucial for bridging the gap and creating a leak-proof seal.
- Wax-Free Seal: If you’re nervous about getting the toilet placement perfect on the first try, these are a lifesaver. They are made of rubber or foam and are often repositionable, which makes for a much cleaner, less stressful installation. Perfect for beginners.
Seriously, take a moment to look at your toilet flange and its height relative to the floor. Getting this choice right is half the battle and the key to preventing a slow, floor-ruining leak down the road.
Getting the Toilet Off Without Making a Mess
Alright, this is where the project really kicks off. The main goal here is to get that heavy, awkward toilet off the floor as cleanly as possible. A little bit of careful prep now will save you from mopping up a nasty mess later. Let’s get the water situation handled first.
Kill the Water Supply and Drain Everything
First things first, find the water shutoff valve on the wall right behind the toilet. Give it a firm turn clockwise until it stops. You don’t need to crank on it like you’re closing a submarine hatch, just make sure it’s snug and fully closed.
With the water off, flush the toilet and keep the handle held down. This will empty almost all the water from the tank, sending it down the drain where it belongs. You’ll still be left with about an inch of water in the tank and a full bowl.
Now, you’ve got to get the rest of that water out. If you have a shop vac, this is the easiest part of the job—just suck the water out of the tank and then the bowl. No shop vac? No problem. Grab a big sponge and a bucket. Sop up the water in the tank, wring it into the bucket, and repeat until it’s bone dry. Then do the same for the bowl.
A Pro’s Insight
Don’t even think about skipping this step. A toilet with water in it is ridiculously heavy and unstable. Worse, the second you tilt it, all that leftover bowl water is going straight onto your floor. Take the extra five minutes to get it completely dry. Trust me, you’ll thank yourself later.
Disconnect the Lines and Lift It Out
Once the toilet is empty, it’s time to disconnect the water supply line. Use your adjustable wrench on the plastic nut connecting the flexible hose to the bottom of the tank. Have a small towel handy to catch the few drips that will inevitably escape.
Next, move down to the base. You’ll see two little plastic caps, one on each side, covering the bolts that hold the toilet to the floor. Pop those caps off with a flathead screwdriver. Now you can see the nuts and washers. Use your wrench to take them off. If they’re old and rusted on, a quick spray of penetrating oil will make your life a whole lot easier.
With everything disconnected, it’s go-time. Here’s how to lift it without wrecking your back or your bathroom:
- Make a Soft Landing Spot: Before you lift, lay down some old towels or a big piece of cardboard next to the toilet. This will protect your floor from scratches and catch any gross wax residue.
- Break the Seal: Get a good grip on the bowl and gently rock the toilet from side to side. You’ll feel a slight pop or shift as the old wax seal breaks loose. Don’t try to lift until you feel this happen.
- Lift With Your Legs (Seriously): Stand over the toilet, feet shoulder-width apart. Get a secure grip under the bowl, keep your back straight, and lift straight up with your legs.
- Set It Down: Carefully carry the toilet to your prepared landing zone and set it down on its side. This will expose the flange and the old, nasty wax ring we’re about to deal with.
Setting the New Wax Ring for a Perfect Seal
Alright, with the toilet out of the way, you’re at the most critical stage of this whole job. Nailing this step is the difference between a leak-proof seal that lasts for a decade and having to do this all over again next weekend. It all comes down to getting the toilet flange perfectly prepped.
First things first, you have to get rid of every last bit of that old, sticky wax. This is non-negotiable. Grab a putty knife and start scraping everything off the flange on the floor. Don’t be shy—you need a completely clean surface for the new ring to bond to.
Once you’ve scraped off the chunky stuff, use some old rags or paper towels to wipe away any residue. It might take a little elbow grease, but trust me, it’s worth it. A clean flange is a leak-free flange.
Preparing and Inspecting the Flange
After it’s spotless, it’s time to play detective. Take a close look at the toilet flange—that PVC or cast iron ring bolted to your floor. You’re searching for any sign of damage. Look for cracks, chips, or broken-off pieces, paying special attention to the slots where the bolts go.
A damaged flange cannot create a proper seal, no matter how perfectly you set the new wax ring. If you spot significant damage, you have to stop and either repair or replace the flange before going any further. This is a crucial checkpoint that saves you a massive headache down the road.
This quick infographic shows you exactly what I mean. It’s a simple, three-part process.
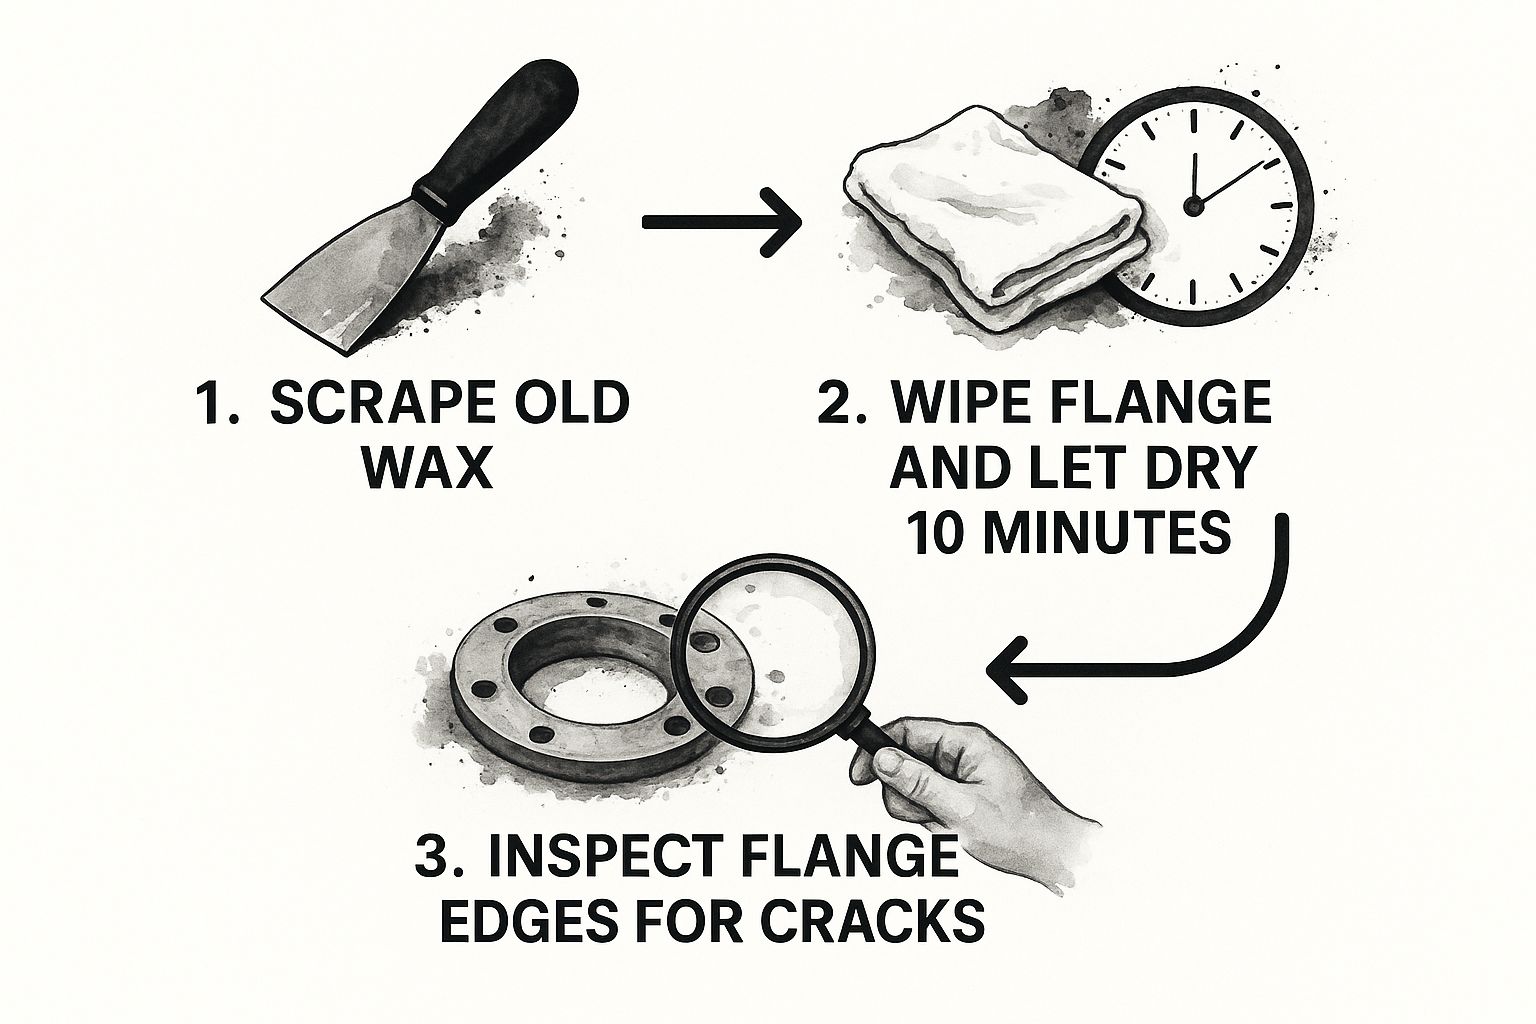
As you can see, this isn’t just about cleaning. It’s a methodical scrape, wipe, and inspect process to guarantee that surface is ready for a new, watertight seal.
Choosing Your Installation Method
Now for the main event. You’ve got two ways to place the new wax ring, and you’ll find that different plumbers swear by different methods. Neither one is wrong; it just comes down to what you feel most confident doing.
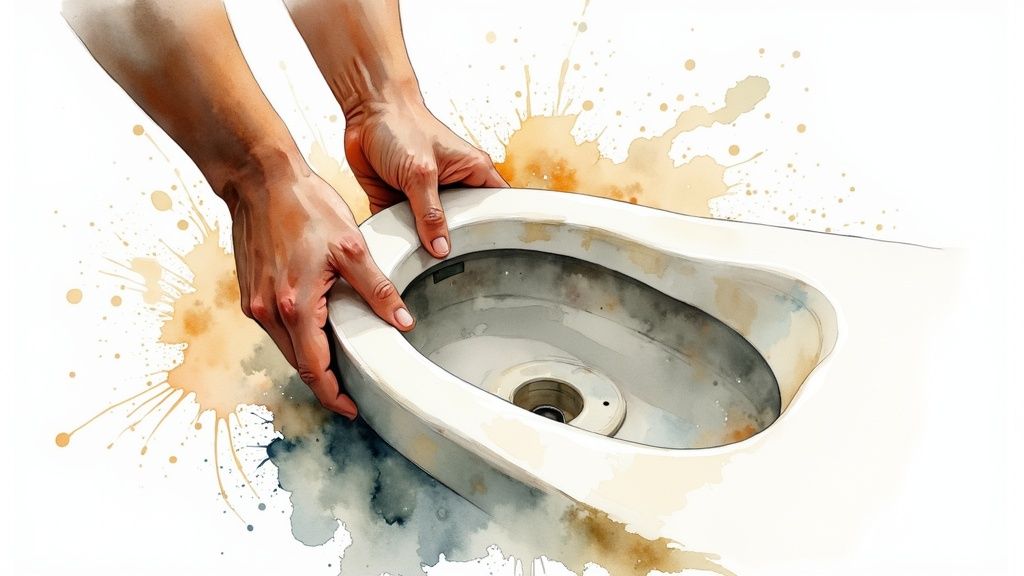
- Method 1: Place it on the Flange. You can set the new wax ring directly onto the clean flange. The key here is to get it perfectly centered over the drain opening.
- Method 2: Place it on the Toilet. The other option is to flip the toilet over (on a soft towel, of course) and press the wax ring firmly onto the outlet on the bottom.
From my experience, a lot of first-timers find it easier to put the ring on the toilet first. It helps you be certain that the ring is perfectly aligned with the toilet’s horn before you even lift it.
Crucial Takeaway
Whichever path you choose, the goal is the same: create a single, compressed, watertight seal when the toilet meets the flange. Once you press it down, there are no do-overs.
The Point of No Return: Lowering the Toilet
This part is a one-shot deal. Once the toilet makes contact with that wax, you can’t lift it, you can’t twist it, and you can’t even rock it to get it just right. Any of those movements will break the seal, and you’ll be heading back to the store for a brand-new wax ring.
Here’s how to nail the placement on the first try.
- Line Up the Bolts. Hover the toilet directly over the flange and look down through the bolt holes in the base. You want to align them perfectly with the two closet bolts sticking up from the floor.
- Lower Straight Down. Bend your knees and use your legs—not your back—to lower the toilet straight down onto the flange. Don’t let one side touch down before the other. Think of it like a smooth, level elevator ride down.
- Apply Even Pressure. The moment the toilet base is on the floor, sit on the toilet (facing backward can give you better balance) and use your body weight to press it down firmly. You should feel it gently squish the wax and settle securely onto the floor.
That steady, downward pressure is what molds the wax into a perfect, custom gasket between your toilet and the drainpipe. If you can resist the urge to wiggle it into place, you’ve mastered the final secret to replacing a toilet wax ring like a pro.
Reinstalling Your Toilet and Checking for Leaks
You’ve made it through the grimiest part of the job—now it’s time to put everything back together. Getting the toilet secured and checking your work is just as important as setting the new ring. If you rush this last part, you could end up with a wobbly toilet or a slow leak that ruins all your effort.
Let’s get this finished the right way.
With the toilet sitting squarely on the new wax ring, the next move is to bolt it back down. Grab the plastic washers and nuts and thread them onto the closet bolts. This is a moment for finesse, not brute force.
The Art of Tightening Without Cracking
Believe me, the most common mistake I see is someone overtightening the nuts and cracking the toilet’s porcelain base. It happens more easily than you’d think. The goal is to get it snug and stable, not to crank it down with all your might.
Here’s how to get the pressure just right:
- Start by hand: First, tighten both nuts by hand until they’re just snug. This helps keep the toilet level before you bring out the wrench.
- Alternate with the wrench: Using your adjustable wrench, give one nut a slight turn—maybe a quarter to a half-turn at most. Then, switch to the other side and do the same.
- Keep alternating: Go back and forth, a little on the left, a little on the right, until the toilet feels completely solid and doesn’t rock at all.
This alternating technique is key. It distributes the pressure evenly and prevents stress on the porcelain. As soon as the toilet is stable, stop. You’re done.
A Pro Tip You Can’t Ignore
The porcelain on a toilet is surprisingly fragile. Too much force will cause a hairline crack that you might not even notice until you see a puddle on the floor days later. A snug, stable fit is all you need—anything more is asking for trouble.
Reconnecting and The Final Check
Okay, home stretch. Reattach the water supply line to the fill valve on the underside of the tank. I always hand-tighten the connector first, then give it a final quarter-turn with a wrench just to be sure.
Now, slowly turn the water shutoff valve counter-clockwise to let the tank start filling up. Watch that supply line connection like a hawk for any drips.
Once the tank is full and the water stops running, it’s the moment of truth. Go ahead and flush the toilet a few times. After each flush, take a dry paper towel and wipe it all the way around the base where the toilet meets the floor.
If that paper towel is still bone-dry after three or four flushes, you can celebrate. You’ve just successfully learned how to replace toilet wax ring and created a perfect, leak-proof seal.
Common Questions About Replacing a Toilet Wax Ring
Even with the best instructions, you’re bound to have questions pop up when you’re halfway through a project like this. Replacing a toilet wax ring is straightforward, but a few common uncertainties can trip people up. Let’s clear those up so you can finish the job with confidence.
One of the first questions I always get is about which ring to buy. You’ll see standard and extra-thick options at the hardware store, and picking the right one is absolutely critical for getting a good, lasting seal. It’s not about preference—it’s all about your specific floor and flange setup.
Standard or Extra-Thick Wax Ring?
So, how do you know which one is right for your bathroom? It all boils down to the height of the toilet flange in relation to your finished floor.
- Go with a standard ring if the flange sits level with or just a hair above the floor surface.
- You’ll need an extra-thick ring if the flange is recessed below the floor. This happens a lot when new, thicker flooring (like tile or luxury vinyl) gets installed over an old floor.
The easiest way to check is to grab a yardstick or any long, flat object and lay it across the flange. If it sits flush on the floor on both sides, a standard ring is what you need. If you see a gap between the bottom of your straight edge and the top of the flange, that’s your sign to get the extra-thick version to make up for that distance.
What If I Mess Up Placing the Toilet?
This is a big one, and unfortunately, the answer is a tough one. Once you set the toilet down onto that new wax ring, it’s a done deal. You cannot shift it, twist it, or rock it.
Any movement at all will break the watertight seal you just created, and the ring will be ruined.
If you set the toilet and realize it’s crooked, you have to start the whole process over. That means lifting the toilet back off, scraping away the new ring you just installed, and putting on a fresh one. It’s a one-shot deal, which is why taking your time to line it up perfectly is so important.
Are Wax-Free Seals a Better Option?
Wax-free toilet seals are a great modern alternative, and their biggest selling point is that they completely solve the “one-shot” problem you have with traditional wax.
These are typically made of rubber or foam and are repositionable, which is a huge benefit if you’re new to this. They’re also a lot cleaner to work with.
That said, wax rings have been the go-to for plumbers for the better part of a century for a reason—they’re cheap and incredibly reliable when installed correctly. For more complex plumbing headaches that go beyond a simple leak, like a nasty clog, you might find some useful tips in our guide on how to snake a toilet.
Ultimately, choosing between wax and wax-free just comes down to your personal comfort level and whether you want that extra margin for error.
If you’ve hit a snag or just want the peace of mind knowing the job was done right, Professional Plumber Denver is always here to help. Our team has seen it all and can get you a perfect, leak-free seal every time. Visit us at https://professional-plumbers-denver.com to schedule your service.
