
Walking downstairs to find a pool of water on your basement floor is a moment no homeowner wants to experience. It’s a gut-punch. But what you do in the next few minutes is absolutely critical. Before you even think about saving your belongings, you need to focus on one thing: safety.
Your immediate priority isn’t the water itself, but the hidden dangers that come with it. Electrocution and contamination are very real risks, and protecting yourself and your family has to be the first order of business.
Your First Moves After Discovering a Flooded Basement
The sight of water spreading across the floor can be overwhelming, but your first actions will set the stage for everything that follows. Taking control means tackling the biggest threats head-on. This is about keeping people safe, not just saving property.
Your primary focus must be making the area safe to enter. Water and electricity create a lethal combination, and it’s the most immediate danger you face.
Prioritize Electrical and Gas Safety
Let me be blunt: never step into standing water in your basement. Not until you are 100% certain the power is off.
If your main breaker box is in a dry, safe location you can get to without walking through water, go there now. Shut off the main breaker first, then kill the power to every individual circuit that runs to the basement. This simple act could save a life.
What if the breaker box is in the flooded area? Do not touch it. Don’t even try. Call a licensed electrician immediately. They have the training and specialized gear to safely manage the situation. The same rule applies to natural gas. If you smell gas or even suspect a leak, get everyone out of the house right away and call your gas company from a safe distance.
Pro Tip: Never assume the water is safe. An electrical current is invisible in water, and it’s a deadly hazard. Always, always cut the power at the source before you do anything else.
Identify the Water Source
Once you’ve secured the power and made the area safe, it’s time to put on your detective hat. Finding out where the water is coming from is the key to stopping it. The source usually falls into one of three buckets:
- Internal Plumbing Failure: This is your classic burst pipe, a broken water heater, or a washing machine that’s gone haywire. If you spot a leak like this, your first move is to find your home’s main water shut-off valve and turn it off to stop the flow.
- External Groundwater: After a heavy downpour or a fast snowmelt, the ground gets saturated. All that water has to go somewhere, and sometimes it’s through tiny cracks in your foundation or up through window wells. Unfortunately, you can’t “turn off” the rain.
- Sewer Backup: This is the worst-case scenario. If the water is murky, has a foul odor, or you see solid waste, you’re dealing with a sewer backup. This is “blackwater,” and it’s loaded with nasty bacteria and contaminants. Stay far away from it.
Having a clear plan helps you manage the chaos and focus on what truly matters in those first crucial moments. This visual breaks down the immediate sequence of events:
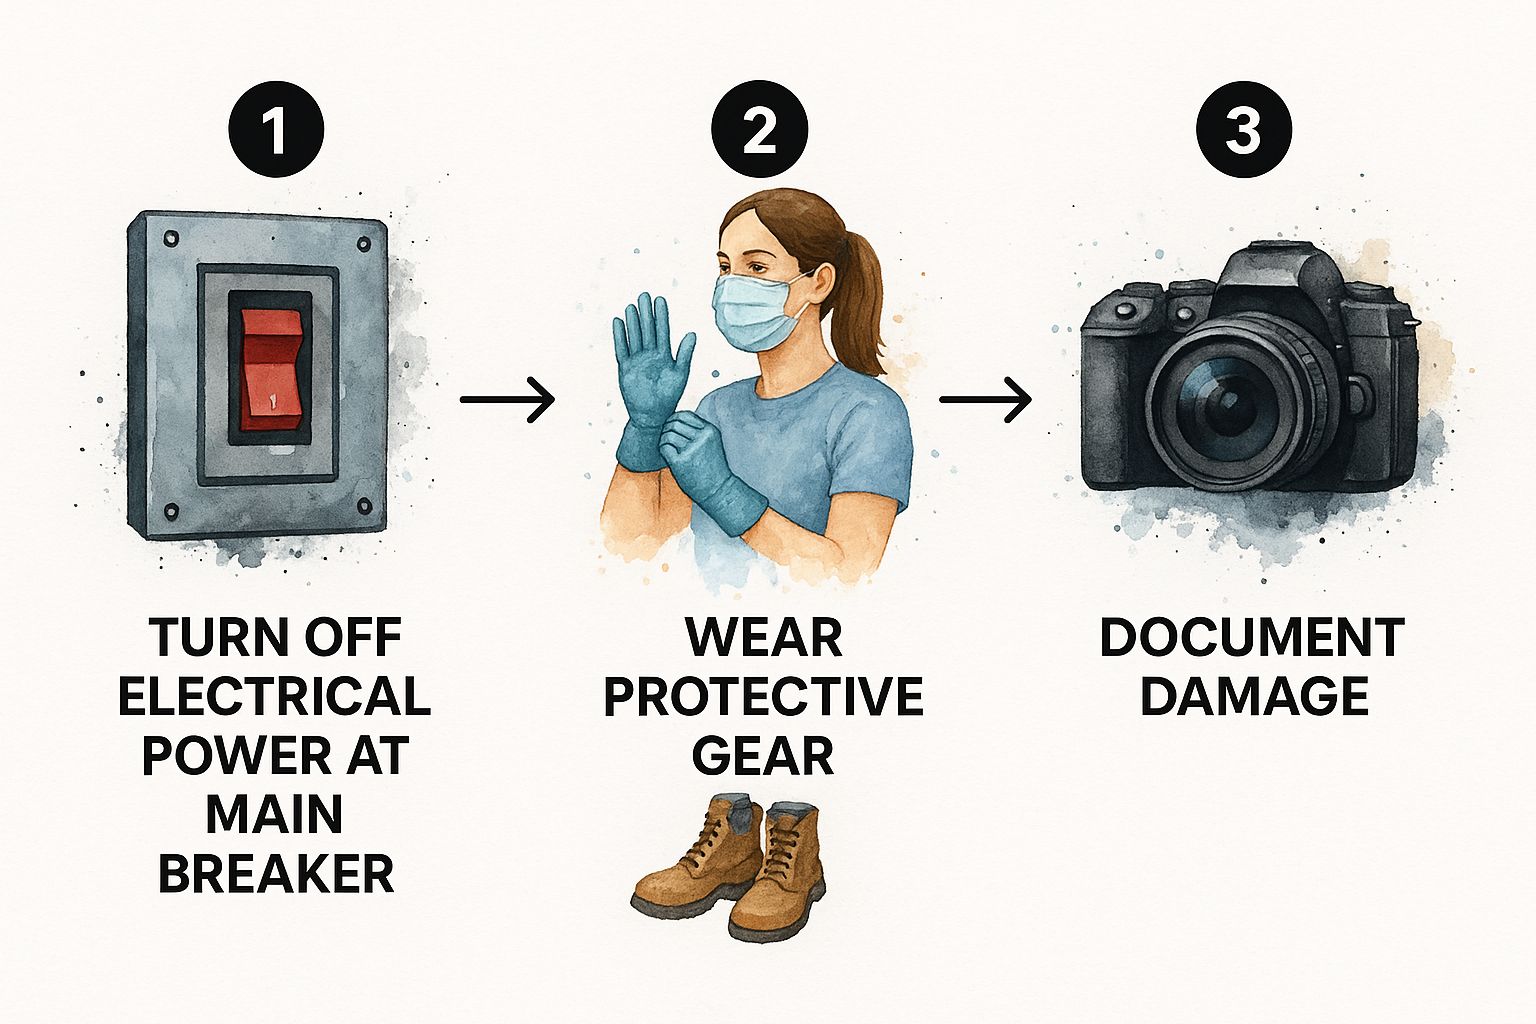
This process flow helps visualize the critical first steps: ensuring safety, gearing up, and beginning documentation.
While you’re navigating this mess, it’s a good time to think about making sure it never happens again. We’ve put together a comprehensive resource on how to prevent basement flooding that can help you protect your home down the road.
Immediate Safety Checklist Dos and Donts
When you’re facing a flooded basement, it’s easy to panic. This quick-reference table is designed to keep you focused on the most critical safety actions and help you avoid common—and dangerous—mistakes.
| Action (Do This) | Hazard (Avoid This) |
|---|---|
| ✅ Shut off electricity at the main breaker if it’s safe to access. | ❌ Wading into standing water before the power is confirmed off. |
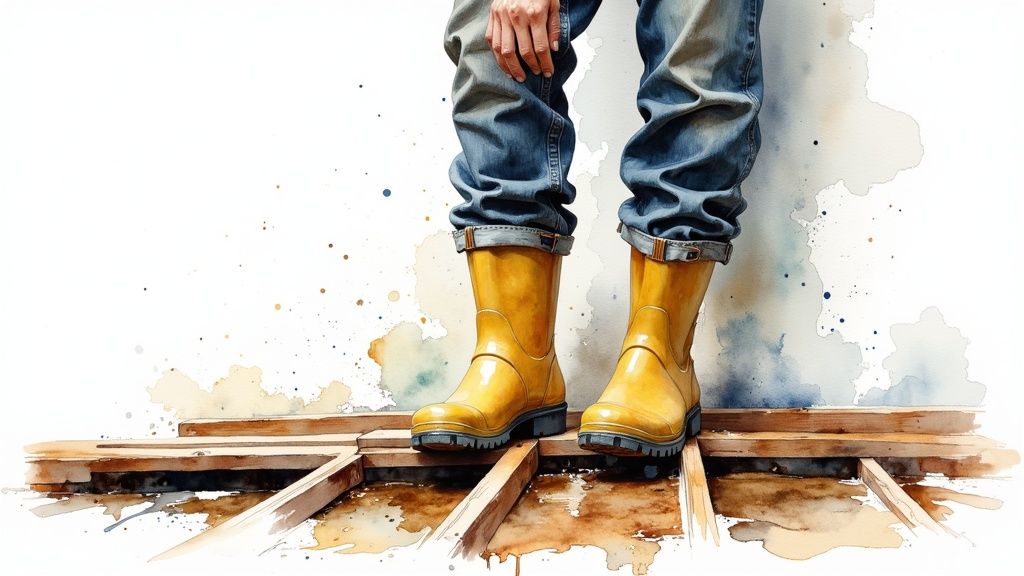
| ✅ Wear waterproof boots and gloves for protection. | ❌ Touching electrical appliances or devices in or near water. |
| ✅ Call a professional electrician if the breaker box is in the flooded area. | ❌ Using a vacuum or any electrical tool in or near the water. |
| ✅ Shut off the main water valve if the source is a plumbing leak. | ❌ Ignoring a gas smell—evacuate and call the gas company immediately. |
| ✅ Open windows and doors (if safe) to begin ventilating the area. | ❌ Making direct skin contact with sewer water (“blackwater”). |
Remember, your well-being is more valuable than any possession. Following these safety guidelines ensures you can handle the situation without putting yourself or your family at risk.
How to Document Damage for Your Insurance Claim
Once you’ve handled the immediate safety issues, your next role is that of a detective. Thinking about what to do when your basement is flooded can feel overwhelming, but proper documentation is the single most important thing you can do to ensure a smooth insurance claim. Don’t move a thing just yet. Your phone is your most powerful tool right now.
Start taking photos and videos of everything. I mean everything. Get wide-angle shots that show the entire flooded area, capturing the full extent of the mess. Then, get up close. Take detailed pictures of your submerged furnace, the waterlogged couch, and the ruined flooring.
One of the most critical pieces of evidence you can capture is the high-water mark. Look for the tell-tale line left on the walls, furniture, or stored boxes—it’s undeniable proof of how deep the water got.
Creating Your Damage Inventory
Your photos and videos are the headline, but the written inventory is the story. Your insurance adjuster is going to need a detailed, itemized list of every single thing that was damaged or lost. If you don’t already have one, now is the time to create a comprehensive home inventory.
Walk through the space and list every item, no matter how small it seems. For each thing on your list, be as specific as you can:
- What is it? Note the brand and model number if you know it (e.g., “Samsung 55-inch Smart TV, Model QN55Q60A”).
- How much did it cost? Dig up receipts if you can, but a reasonable estimate works if you can’t.
- How old is it? Note the approximate purchase date.
- What’s wrong with it? Describe the damage clearly (e.g., “completely submerged in water,” “wood is warped and splitting”).
This detailed list, combined with your visual evidence, makes it much harder for an insurance company to dispute your claim.
Identify the Type of Water
It’s crucial to understand that not all water is created equal. The source of the flood dictates the health risks and the cleanup approach, and your insurance policy may treat them differently.
Key Takeaway: The category of water flooding your basement directly impacts the health risks and the necessary cleanup strategy. Any situation involving Blackwater is a job for certified professionals, period.
There are generally three categories of water you might be dealing with:
- Category 1 (Clean Water): This is the least hazardous and usually comes from a broken water supply line or an overflowing sink. While it starts clean, it can quickly become contaminated by its surroundings.
- Category 2 (Greywater): This water is already contaminated. Think of an overflowing washing machine or a failed sump pump. It contains detergents, dirt, and microbes that could make you sick.
- Category 3 (Blackwater): The most dangerous type. This is water from a sewer backup or overland flooding from a river. It is teeming with bacteria, viruses, and other nasty pathogens. Never try to handle a blackwater cleanup on your own.
Alright, the power is off, and you’ve documented the damage. Now comes the hard part: getting the water out. Time is absolutely not on your side here.
When your basement is flooded, you’re in a race against the clock. Mold can start to grow in as little as 24-48 hours, which means moving fast isn’t just a good idea—it’s essential to protect your home and your health.

The amount of water staring back at you will dictate your game plan.
Picking the Right Tool for the Job
If you’re only looking at an inch or two of water, a trusty wet/dry vacuum (you probably know it as a shop vac) can be a lifesaver. It’s perfect for smaller-scale cleanups, but get ready to put in some work. You’ll be making a lot of trips to dump that canister.
But what if you’re sloshing through several inches of water? A shop vac just won’t have the muscle. In this case, you need to bring in the heavy artillery. Your best bet is to rent a submersible pump from a local hardware or rental store. These things are workhorses designed to move a serious volume of water, and fast.
A Pro’s Two Cents: I can’t stress this enough—when you set up that submersible pump, make sure the discharge hose runs far, far away from your house. You need to get that water at least 20 feet away from the foundation. If you don’t, you’re just inviting it right back into the basement, and you’ll be stuck in a frustrating loop.
No matter which tool you use, don’t forget your safety gear. Waterproof boots and gloves are a must. You have no idea what contaminants might be lurking in that water.
Tearing Out the Ruined Materials
Getting the water out is a huge victory, but it’s only round one. Now you have to deal with everything that got soaked. This part of the job is tough, grimy work, but it’s non-negotiable if you want to dry the space properly.
Anything porous that has been sitting in water is a ticking time bomb for mold and bacteria. It has to go.
- Soaked Carpets and Padding: Forget trying to save a saturated carpet. It’s a lost cause. You’ll need to cut it into smaller, more manageable sections to haul it out. And don’t forget the padding underneath—it’s basically a giant sponge and needs to be completely torn out.
- Waterlogged Furniture: Upholstered furniture like couches and chairs, along with anything made from particleboard, is almost certainly ruined. These materials soak up water, swell, and become a breeding ground for nasty stuff. Get them out of the basement and into a garage or yard to dry out before you throw them away.
- Saturated Drywall: Once drywall gets soaked, it loses its integrity and becomes a haven for hidden mold behind the walls. You’ll need to perform what we call a “flood cut.” This means cutting and removing the drywall from the floor up to at least 12 inches above the highest water line. This is crucial for allowing the wooden studs behind it to breathe and dry out completely.
It can feel brutal ripping out so much of your finished basement, but trust me, it’s a necessary evil. If you leave these saturated materials in place, you’re guaranteeing a future mold problem and a basement that never truly gets dry. This initial demo work paves the way for the most important phase: drying and dehumidifying everything that’s left.
Drying and Dehumidifying Your Basement to Stop Mold
Getting the standing water out feels like a huge win, but the fight isn’t over yet. Now you’re up against a sneakier opponent: the moisture you can’t see. It’s already soaking into your concrete, wood studs, and drywall, creating the perfect breeding ground for mold, which can start growing in as little as 24-48 hours.
Think of your basement like a giant sponge. Even after you’ve mopped and squeegeed, everything is still saturated. The next, and most critical, phase is aggressively pulling that lingering moisture out of every surface and the air itself.
Creating an Aggressive Drying Environment
Your first order of business is to get some serious air moving. A couple of old box fans from the garage won’t even make a dent. You need to get your hands on several high-velocity industrial fans, often called “air movers” or “carpet dryers.” You can rent these from most home improvement stores.
The goal here is to create a powerful vortex of circulating air. Set the fans up on the floor and aim them at the walls at an angle. Stagger them around the perimeter of the room to make sure air is constantly hitting every surface, especially those sneaky corners and crevices where moisture loves to collect.
Expert Insight: It’s tempting to open up the windows to “air it out,” but if it’s humid outside, you’re just pulling more wet air into the space. You’ll completely undermine your dehumidifier’s efforts. The best strategy is to seal the basement off and create a closed, controlled drying zone.
All this airflow is great for pulling moisture out of the drywall and concrete and turning it into vapor. But now that water is in the air, and you need to get it out of there.
The Non-Negotiable Role of a Dehumidifier
This is where a commercial-grade dehumidifier becomes your MVP. That small residential unit you might run in the summer simply doesn’t have the horsepower for a post-flood situation. You need a machine that can pull gallons and gallons of water out of the air every day.
Set the dehumidifier up in the middle of the basement. Make sure it has a way to drain continuously, either with a hose running to a floor drain or into your sump pit. If that’s not an option, get ready to empty the collection bucket over and over again—sometimes every few hours at the beginning.
It’s a simple but effective system:
- Air Movers: Force moisture out of the walls and floor and into the air.
- Dehumidifier: Captures all that airborne moisture and removes it.
This one-two punch is the only way to get your basement truly dry. The cost of renting this gear for a few days is nothing compared to the nightmare expense of a full-blown mold remediation job down the road. The financial hit from a flood is bad enough; globally, floods cause an estimated USD 388 billion in average annual losses. You can read more about the global economic impact of floods.
Of course, it’s also a good time to think about what caused this mess in the first place. If your sump pump gave out, you need to figure out why before the next storm hits. Our guide offers some helpful tips on troubleshooting common sump pump problems to help you prevent a repeat performance.
Be patient. This drying process is a marathon, not a sprint. It will likely take at least three to five days, and for a really bad flood, it could be a week or more. Don’t rush to pack everything up and call it a day. Your goal isn’t a basement that just looks dry, but one that is dry deep down in its bones.
When to Call in the Pros and Deal With Insurance

It’s tempting to try and tackle a flooded basement yourself, but you have to know when to throw in the towel. From my experience, there are clear lines you just don’t cross. Pushing past your limits here isn’t just ineffective—it can be downright dangerous for you and your home.
So, when do you make the call? If you’re looking at more than a few inches of water, or if that water has been sitting there for more than 24-48 hours, it’s time for backup. After that window, the risk of serious mold and even structural damage skyrockets. Professionals bring in heavy-duty equipment that can pull out moisture far more effectively than anything you can rent at the local hardware store.
Getting Your Insurance Claim Started
Remember all that documentation you did earlier? Now’s when it really pays off. Your first move should be calling your insurance agent to get the ball rolling on a claim. Have your photos, videos, and that list of damaged items ready to go.
When you talk to the adjuster, just stick to the facts. If you know where the water came from, say so— “A pipe burst behind the drywall,” for example. But don’t guess why it failed. Let the experts figure that part out. Your job is to report what happened and show them the damage. The financial toll of flooding is staggering; worldwide flood losses have hit around USD 325 billion over the last five years, and a lot of that wasn’t insured. You can dig deeper into the financial impact of global flooding on Munichre.com.
Red Flags That Mean You Need an Expert—Now
Some situations are simply not negotiable. These are the moments when you stop what you’re doing and immediately call a professional water damage restoration company. These crews are trained to handle hazardous scenarios that are well beyond a homeowner’s capabilities.
My Two Cents: Don’t even think about handling it yourself if you see signs of sewage, notice the water has soaked deep into the structure, or if it’s been standing for more than 48 hours. The health risks and potential for long-term damage are just too high.
Here are the absolute, undeniable signs you need to pick up the phone:
- You’ve got sewage contamination. If the water is brown or black, has a foul odor, or you see any solid waste, that’s considered “blackwater.” It’s a serious biohazard that requires professionals with proper protective gear and specific cleaning protocols.
- The water level is high. Is the water more than a foot deep? Has it spread into multiple rooms? The sheer volume of water is too much for shop vacs and box fans to handle.
- Your electrical system is compromised. If the water has reached your outlets, breaker box, furnace, or water heater, you’re in dangerous territory. You’ll need a restoration team and a licensed electrician to safely assess and repair the damage.
- You already suspect mold. Seeing fuzzy spots on the wall or smelling that unmistakable musty, earthy odor means mold has already taken hold. This requires a certified mold remediation specialist to remove it safely and permanently.
Finding the right company is key. Look for a local service that is certified, insured, and has a solid reputation. I always recommend checking online reviews, asking for a few references, and insisting on a detailed, written estimate before they start any work. If a plumbing failure caused the flood, knowing who to call in an emergency is critical. You can learn more about what to expect from emergency plumbing services in Denver in our detailed guide.
Common Questions I Hear About Basement Flooding
Once the initial shock of seeing water in your basement wears off, the questions start flooding in, too. It’s a stressful, overwhelming experience, and believe me, you’re not alone. I’ve heard every question in the book from homeowners standing in your exact shoes.
Getting straight answers about what comes next can make a world of difference. Let’s walk through some of the most common concerns I help people navigate after the water is out.
How Long Does It Really Take for a Basement to Dry?
This is probably the biggest misconception I run into. Just because you can’t see standing water doesn’t mean your basement is dry. Not even close. Getting it “visibly dry” might take a day, but achieving “structurally dry” is a whole different ballgame.
Even with professional-grade air movers and dehumidifiers running full tilt, you’re typically looking at three to five days for the space to dry out completely. If you had significant flooding, it could easily take a week or more. The timeline depends on how much water there was, what got wet (concrete and wood are like sponges), and even the humidity outside.
The only way to know for sure if your studs and subfloor are dry is with a moisture meter. Mold can start growing in as little as 24-48 hours, so rushing this step is the single biggest mistake you can make. It can lead to a much bigger, more expensive problem down the road.
Trust me, patience here will save you a massive headache later.
Can I Just Clean Up a Sewage Backup Myself?
Please, don’t. I can’t say this strongly enough: cleaning up a sewage backup is not a DIY job. This isn’t just dirty water; it’s what we call Category 3 “blackwater,” and it’s a serious biohazard.
This water is teeming with nasty bacteria, viruses, and other pathogens that can make you incredibly sick. Your bottle of Clorox just isn’t going to cut it.
Here’s why you call a professional restoration crew for this:
- They have full-body Personal Protective Equipment (PPE) to keep themselves safe.
- They use EPA-approved antimicrobial agents that are specifically designed to kill the dangerous stuff in blackwater.
- They’re trained to know what can be salvaged and what’s too contaminated and must be safely removed.
Trying to save a few bucks here isn’t worth risking your health. This is one of those times you absolutely have to call in the pros.
Is This Flood Covered by My Homeowners Insurance?
This is the big one, and the answer almost always comes down to one thing: where the water came from. A standard homeowners policy is designed to cover sudden and accidental damage from sources inside your house. Think burst pipes, a failed washing machine hose, or your water heater letting go.
What it almost never covers is “flooding”—which insurers define as water that comes from the ground up. That means damage from heavy rainfall, a nearby creek overflowing, or groundwater seeping through your foundation walls is typically excluded. For that, you need a separate flood insurance policy.
Sewer backup is another gray area. Most standard policies don’t cover it unless you’ve specifically added a “sewer backup rider” to your plan. It’s crucial to pull out your policy or call your agent to understand exactly what your coverage looks like.
What Are the First Signs of Mold After a Flood?
Long before you see those tell-tale black or green spots, your nose will often tell you something is wrong. The number one early warning sign of a hidden mold problem is a distinct musty, earthy smell that just won’t go away.
Keep an eye out for other clues, too:
- Paint or wallpaper that starts to peel, bubble, or warp.
- New stains or dark discoloration on drywall, baseboards, or ceilings.
- A sudden onset of allergy-like symptoms—sneezing, coughing, watery eyes—that only seem to act up when you’re in the basement.
Because mold loves to hide behind walls and under floors, that musty odor is your best detective. If you smell it, it’s time to get a professional inspection before it gets out of hand.
When your basement floods, knowing what to do is half the battle. But some jobs are just too big, too dangerous, or too complicated to handle on your own. For expert help with the plumbing emergencies that cause flooding—from sump pump failures to water heater disasters—Professional Plumber Denver is ready to help the Denver Metro area 24/7. Contact us for fast, reliable service.

Recent Comments