
That sad trickle from your showerhead or the washing machine that takes forever to fill? It’s more than just a daily nuisance—it’s your home’s plumbing system trying to tell you something important. Figuring out what those signs mean is the first step in protecting your pipes, appliances, and wallet from some serious headaches down the road.
Why Your Home’s Water Pressure Matters
Think of your home’s water pressure like your body’s blood pressure. It needs to be just right. Too high, and you’re headed for trouble. Too low, and things just don’t work the way they should. Finding that sweet spot is key to a healthy, happy plumbing system.
The Dangers Lurking in Your Pipes
When your water pressure is too high—we’re generally talking anything over 80 PSI—it puts a relentless strain on every single pipe, joint, and fixture in your house. It’s like running your car’s engine in the red, 24/7. This constant stress can cause some real damage.
You might experience:
- Sudden pipe bursts or sneaky pinhole leaks hidden behind drywall.
- Premature failure of your appliances, as the internal components of your dishwasher, washing machine, and water heater weren’t built to handle that kind of force.
- Loud, startling noises in your walls, often called “water hammer,” which is the sound of water slamming to a stop inside the pipes.
On the flip side, low water pressure (usually anything dipping below 40 PSI) is a major source of frustration. It can also point to bigger problems you can’t see, like hidden leaks bleeding pressure away or old pipes getting clogged with mineral buildup.
This isn’t just a problem for individual homeowners; it’s a massive challenge for entire cities. A 2022 study on urban water distribution found that over 95% of system nodes experienced dangerously high pressure when demand was low. This dramatically increases the risk of major leaks and pipe bursts across the entire water grid. You can read more about these fascinating urban water network challenges and findings online.
To help you connect the dots, here’s a quick guide to what you might be experiencing.
Water Pressure Symptoms at a Glance
Sometimes it’s hard to tell if your pressure is too high or too low based on symptoms alone. This table can help you quickly diagnose what might be going on.
| Symptom | Likely Cause: Low Pressure | Likely Cause: High Pressure |
|---|---|---|
| Weak Shower | The classic sign. Not enough force to provide a satisfying spray. | Less common, but a sputtering or inconsistent spray can sometimes occur. |
| Faucets Leaking | Unlikely. Low pressure doesn’t usually cause drips. | Constant dripping, especially from newer fixtures, as pressure forces water past seals. |
| Banging Pipes | Not a symptom of low pressure. | A hallmark of high pressure. This is classic “water hammer.” |
| Appliances Fail | No, low pressure is inefficient but not damaging. | Yes, high pressure strains pumps and valves, leading to premature failure. |
| Slow-Filling Toilet | Your tank takes a very long time to refill after flushing. | Your tank refills very quickly and often with a loud “whoosh” sound. |
Seeing your home’s issues in this chart is a strong signal that it’s time to grab a pressure gauge and get a real number.
The Bottom Line: Checking your water pressure is one of the smartest, cheapest bits of preventive maintenance you can do for your home. It’s not just about getting a better shower—it’s about catching small problems before they flood your basement or destroy your expensive appliances. Knowing your home’s PSI is the first step toward taking control.
Choosing the Right Tools for an Accurate Test
You don’t need to haul out a giant plumber’s toolkit just to check your water pressure. Thankfully, this is a one-tool job, but picking the right tool is what really counts. The star of the show is a simple water pressure test gauge.
When you’re browsing the aisles at the hardware store, you’ll see a few options. Zero in on one that has standard threading so it can easily screw onto an outdoor hose bib or the cold-water hookup for your washing machine. A clear, easy-to-read dial is also a must—you don’t want to be guessing at the numbers.
What to Look for in a Quality Gauge
Here’s a pro tip: The single most important feature is a peak pressure indicator, which some brands call a memory needle. It’s usually a red needle that gets pushed by the main black needle and then stays put at the highest pressure reading. This is incredibly helpful because it captures the true static pressure for you, even if you get distracted and look away.
It’s tempting to just grab the cheapest gauge you see, but this is one of those times where spending an extra few bucks makes a huge difference. Cheaper models almost never have that memory needle and, worse, their readings can be way off. An inaccurate gauge might cause you to worry for no reason or, more dangerously, miss a serious high-pressure problem that could damage your pipes and appliances.
A reliable gauge isn’t just a one-time-use tool; it’s a long-term investment in your home’s health. It gives you the power to run a quick, accurate diagnostic test whenever you suspect something is off.
Of course, knowing your way around a pressure gauge is just one piece of the puzzle. If you’re interested in building a small but capable kit for other common jobs, take a look at our guide on essential plumbing tools. It covers the other basics that are genuinely useful to have on hand for future plumbing tasks.
Alright, you’ve got your pressure gauge in hand. Now comes the fun part: getting an accurate reading. This isn’t some complicated scientific procedure; it’s really about a few simple, common-sense actions that make sure the number you see on the dial is the real deal.
First things first, you need to find the right spot to test. I almost always recommend using an outdoor hose bib—what most people call a spigot or outdoor tap. For the most accurate picture of what the city is supplying, pick the hose bib closest to where your main water line enters the house. This gives you a baseline reading before the water winds its way through all your home’s pipes.
Getting Ready for a True Reading
Before you even think about screwing on the gauge, you need to make sure you’re measuring your home’s static pressure. Think of this as the “at rest” pressure of your system. It’s the force in the pipes when no water is moving anywhere in the house.
To get this right, you’ll need to do a quick sweep of the house:
- Shut off every single faucet and shower. No drips!
- Check that the dishwasher and washing machine aren’t in the middle of a cycle.
- Give everyone in the house a heads-up not to flush a toilet or run any water for a few minutes.
I can’t stress this enough: this simple prep step is the key to an accurate test. If a toilet flushes while you’re testing, you’ll accidentally measure “dynamic” pressure instead, which is always lower and will send you down the wrong troubleshooting path.
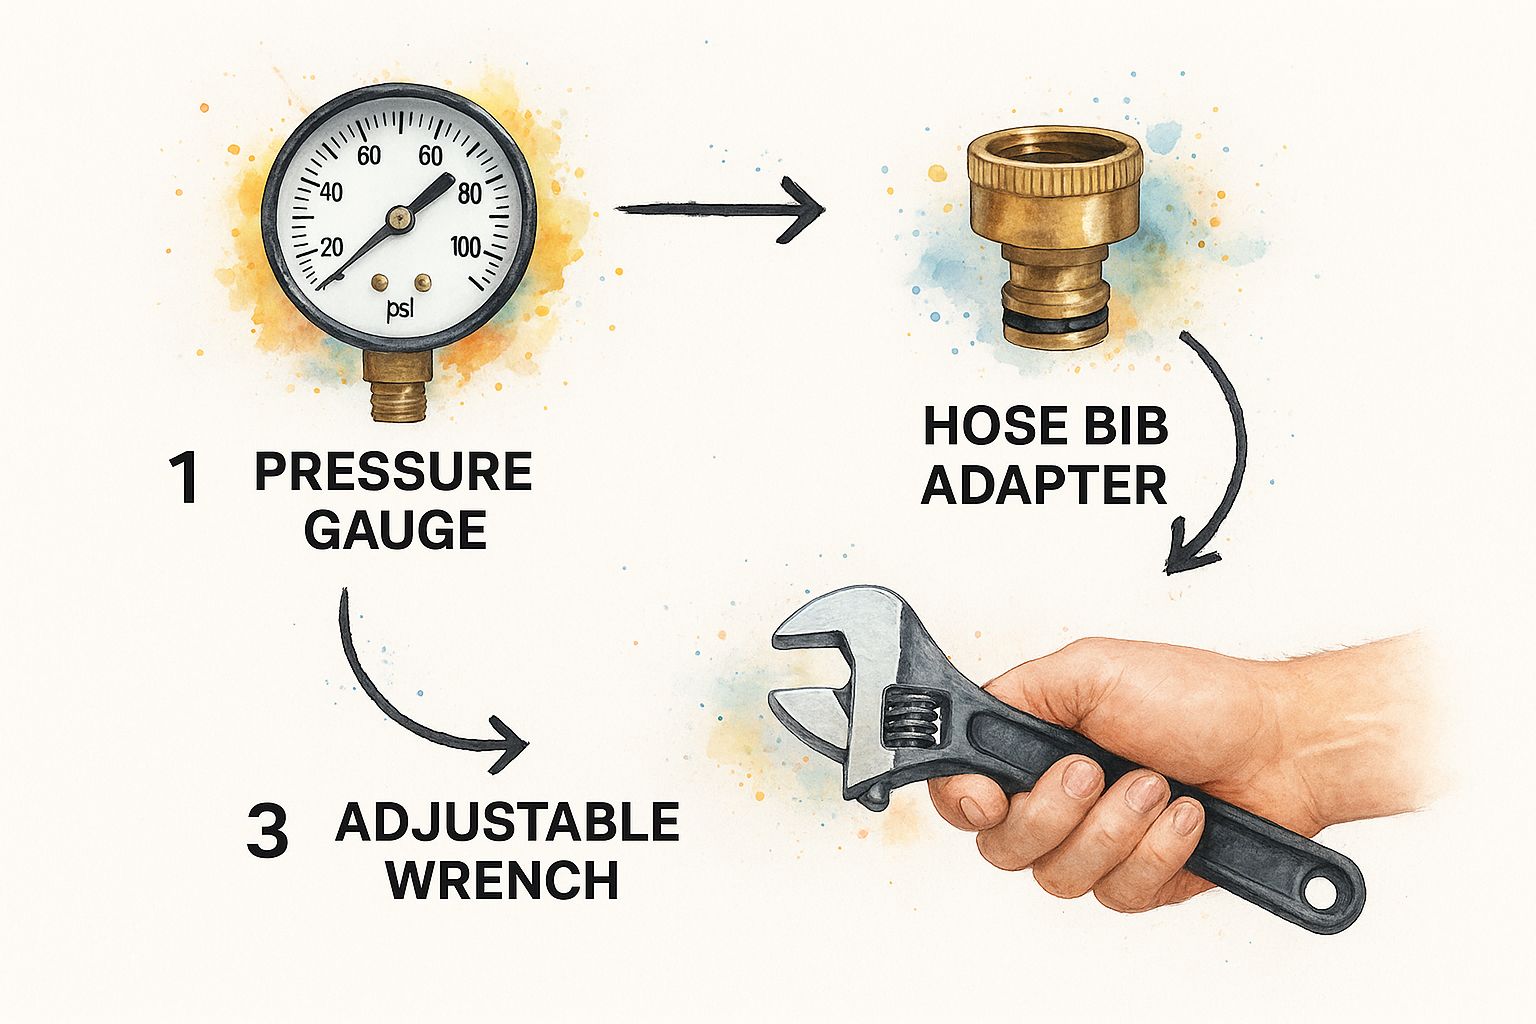
As you can see, the setup is pretty straightforward. A good gauge, maybe an adapter, and a wrench for a stubborn spigot are all it takes.
Taking the Actual Measurement
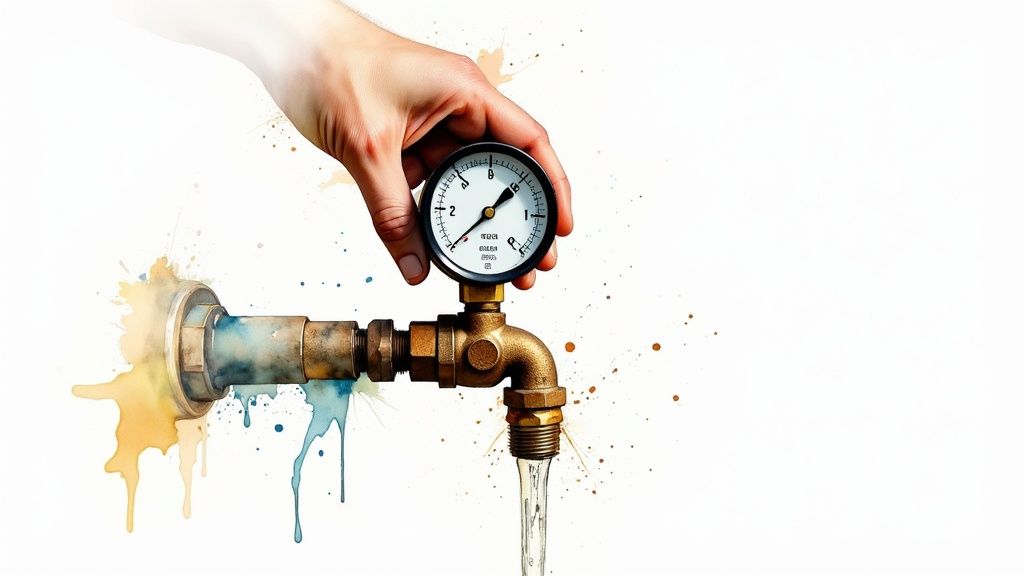
With all the water off, go ahead and screw the pressure gauge onto the hose bib threads. Here’s a pro tip: hand-tighten the gauge only. The small rubber washer inside is what creates the seal. If you crank on it with a wrench, you can easily damage that washer, which causes leaks and can throw off your reading.
Once it’s on there nice and snug, open the faucet all the way. You’ll see the needle on the gauge spring to life and settle on a number. If you bought a gauge with a red “peak indicator” needle, it’ll hold at the highest pressure for you. Let it sit for a minute just to be sure it has completely stabilized.
This whole idea of pressure testing is a core concept in the plumbing world. On a much larger scale, pros use hydrostatic pressure testing on new pipelines. They fill a brand-new pipe with water, pressurize it, and watch. If the pressure drops below 70% of the test pressure within 90 minutes, the pipe fails—it’s a sure sign of a leak. You can see how serious this is by looking at professional pipeline testing standards.
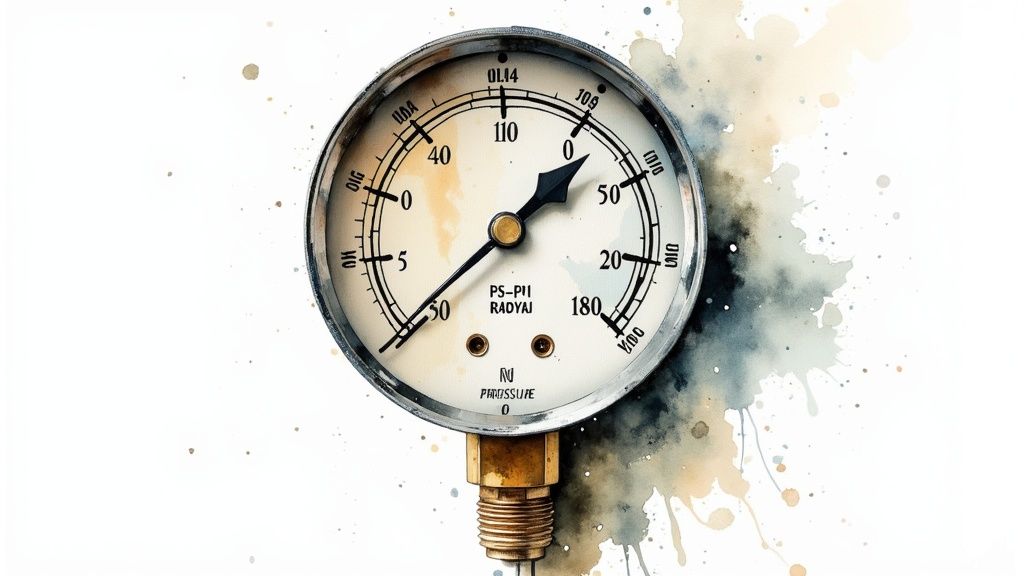
Go ahead and write down the number on the gauge. That PSI reading is the critical piece of information you need to figure out what’s going on with your home’s water pressure.
What Your Water Pressure Reading Actually Means
So, you’ve got a number on the gauge. What story is it telling you? That reading, measured in Pounds per Square Inch (PSI), is one of the most important vital signs for your home’s plumbing. It can mean the difference between a happy, functional system and one that’s quietly heading toward a major failure.
For most houses, the sweet spot for water pressure sits between 45 and 55 PSI. Think of this as the “Goldilocks zone”—it’s powerful enough for a great shower and lets your appliances run efficiently, but it’s not so strong that it puts your pipes and fixtures under constant stress.
If your test shows a number outside that ideal window, it’s a signal to take a closer look. Both low and high pressure have their own unique set of headaches.
If Your Pressure Is Too Low
A reading that dips below 40 PSI is officially considered “low pressure.” While it’s not an immediate emergency, it’s definitely the cause behind a lot of daily annoyances. That weak, drizzly shower? The washing machine that seems to take forever to fill? This is likely your culprit.
Low pressure can point to several issues, from simple fixes to more complex plumbing problems lurking behind your walls. If your gauge confirms a low reading, our guide on the most common low water pressure causes is a great place to start your investigation.
The Hidden Dangers of High Pressure
Now, on the flip side, any reading that creeps over 80 PSI should be treated as a serious red flag. This is where plumbing problems can get expensive, fast. High pressure is like a silent saboteur, working 24/7 to wear down every part of your plumbing system.
Pro Tip: Many manufacturers of water heaters, dishwashers, and washing machines will void their warranties if the home’s water pressure is over 80 PSI. Their internal components simply aren’t built to withstand that kind of relentless force.
Sustained high pressure is a direct cause of some pretty startling and costly issues:
- Banging Pipes (Water Hammer): Ever hear a loud bang or shudder from inside the walls when you turn off a faucet? That’s the sound of water slamming to a halt in the pipes, and it’s a classic sign of too much pressure.
- Worn-Out Fixtures and Appliances: The seals and valves in your faucets, toilets, and ice makers will fail much quicker, leading to persistent drips, leaks, and early breakdowns.
- Burst Pipes and Hoses: This is the worst-case scenario. The constant strain can cause supply lines to burst at their weakest points, resulting in major water damage that can be devastating to your home.
Understanding Your PSI Reading
To make it even clearer, here’s a quick reference table to help you interpret your results and decide on the next steps.
| PSI Reading | Classification | Common Problems and Next Steps |
|---|---|---|
| Below 40 PSI | Low | Annoying but not typically dangerous. Look for clogged aerators, a partially closed shut-off valve, or deeper issues like pipe blockages or municipal supply problems. |
| 45 – 55 PSI | Ideal | Your system is in the sweet spot. No action is needed; your plumbing is operating under healthy conditions. |
| 56 – 79 PSI | High | This is borderline high. It’s not an emergency, but it’s causing unnecessary wear. Consider installing a pressure-reducing valve (PRV) to protect your home. |
| 80+ PSI | Dangerously High | Immediate action is recommended. Your pipes, fixtures, and appliances are at risk of premature failure and leaks. A PRV installation is essential. |
Ultimately, that little number on your pressure gauge gives you a powerful insight into the long-term health of your home. Taking a few minutes to test it can save you thousands in future repairs.
Fixing Common Water Pressure Problems
Alright, you’ve got your pressure test results. Now it’s time to put that number to work and figure out what’s really going on with your plumbing. Whether the gauge showed a frustratingly weak flow or a dangerously high reading, the next steps are all about bringing your system back into balance.
What To Do When Your Pressure Is Too Low
If your PSI reading came in low, you’re in luck—the most common culprits are often simple fixes you can investigate yourself before picking up the phone to call a pro.
- Check the Main Shutoff Valve: First, find your home’s main water shutoff valve. It’s surprising how often these get partially closed after some other household maintenance, which chokes the water flow to your entire house. Make sure the handle is turned all the way to the open position.
- Inspect the Pressure Reducing Valve (PRV): If you have a PRV (it’s a bell-shaped device, usually near the main shutoff), it could be the source of your woes. These valves can fail over time or might just be set too low. A slow, gradual drop in pressure over months or years often points to a failing PRV.
Sometimes, the issue is isolated to a single fixture. For a weak shower, there are some easy fixes to increase your shower’s water pressure that can make a world of difference. If you’ve tried these simple checks and are still stumped, it’s time to dig deeper. Our guide on low water pressure troubleshooting can walk you through the next steps.
Taming Dangerously High Pressure
Did your gauge scream past 80 PSI? This is a problem you need to address immediately, and the solution nearly always involves a Pressure Reducing Valve (PRV). This humble device is the guardian of your home’s plumbing, installed on the main water line to step down the powerful pressure from the city’s supply to a safe level for your pipes and appliances.
If your pressure is high and you don’t have a PRV, installing one is the single best thing you can do to prevent burst pipes, appliance damage, and costly water waste.
While some DIYers might tackle it, adjusting or replacing a PRV is really a job best left to a qualified plumber. They have the specific tools and experience to dial it in perfectly without causing new problems. Taking action now moves you from simply knowing you have a problem to actively protecting your home.
Common Questions About Water Pressure
Once you get the hang of testing your water pressure, a few questions almost always come up. Getting these details straight is key to understanding what’s really going on with your home’s plumbing and what you need to do next.
How Often Should I Check My Water Pressure?
Think of it like an annual check-up for your plumbing system. I always tell homeowners to test their water pressure at least once a year as part of their regular home maintenance routine. This is the best way to spot slow, creeping changes before they turn into a full-blown crisis.
Of course, you should also grab the gauge anytime you notice something’s off. A few tell-tale signs include:
- Showers that suddenly feel weak or a washing machine that takes forever to fill.
- New, strange banging sounds coming from your pipes (a classic sign of water hammer).
- Faucets that keep dripping no matter how many times you try to fix them.
Can I Just Test the Pressure at an Indoor Faucet?
While your outdoor hose bib gives you the truest reading of the pressure coming into your house from the street, testing indoors can be a fantastic troubleshooting move. In my experience, the best spot inside is almost always the cold water hookup for your washing machine.
Testing inside helps you figure out if a pressure issue is a whole-house problem or if it’s isolated to one specific area. If you get a much lower reading indoors compared to what you saw outside, that’s a big clue—it could mean there’s a clog, a hidden leak, or a failing valve somewhere in your home’s internal plumbing.
A big pressure drop between your outdoor spigot and an indoor faucet is a dead giveaway. It tells you the problem is inside your house, not with the city’s supply. This one simple comparison test can save you a world of headaches and guesswork.
My Water Pressure Jumps Around—Is That Normal?
It can be. Small dips and rises throughout the day are perfectly normal. You might see the pressure drop a bit in the morning when the whole neighborhood is getting ready for work and then rise slightly in the middle of the night when demand is low.
What isn’t normal are wild, unpredictable swings. If you see your pressure suddenly tank or spike for no reason, that often points to a problem with your home’s Pressure Reducing Valve (PRV). In some cases, it could also signal an issue with the municipal water supply itself.
If you’ve tested your pressure and found a problem that feels bigger than a simple DIY fix, don’t hesitate to bring in a professional. The team at Professional Plumbers Denver has the tools and experience to track down and solve any plumbing problem in the Denver Metro area, from a faulty PRV to a hard-to-find leak. Contact us 24/7 for reliable service.

Recent Comments