
Let's be honest: when you think about winter home prep, insulating your pipes probably isn't the most exciting task on your list. But I'm telling you, it's the single best thing you can do to prevent a catastrophic burst pipe. A small investment in some foam sleeves or fiberglass wrap can literally save you thousands of dollars in water damage and emergency repairs when the temperature really drops.
Why Bother Insulating Your Pipes? It's a Smart Investment.
Picture this: it's the coldest night of the year, and you wake up to the sound of rushing water. A pipe in your unheated crawl space has frozen and burst. Now you're not just calling an emergency plumber; you're dealing with a flooded basement, ruined drywall, and the potential for mold. That one frozen pipe can easily spiral into a five-figure nightmare.
Reframing this task is the key. It’s not just a chore; it’s a critical investment in protecting your home and your wallet.
Spending one weekend afternoon installing pipe insulation gives you an incredible return on investment. It’s one of the most effective ways I know to protect your property from the kind of damage that can completely upend your life.
It's About More Than Just Preventing a Disaster
On top of preventing a plumbing catastrophe, proper insulation comes with a great secondary benefit: it saves you money on energy. Your water heater is constantly working to get hot water to your showers and sinks. Uninsulated pipes, especially over long runs, are like heat vampires, sucking the warmth out of the water before it gets to you.
When you wrap those hot water lines, you dramatically reduce that heat loss. The result? Your water heater doesn't have to work as hard, you get hot water faster, and you’ll actually see a difference in your utility bills. It's one of the easiest home improvements for energy conservation you can make.
A Growing Trend in Home Protection
More and more homeowners are catching on to the importance of this simple upgrade. In fact, the global market for pipe insulation is on the rise, projected to hit over $7.1 billion by 2030. This isn't just a coincidence; it's driven by a growing awareness of how crucial it is to protect our homes and find smart, energy-saving solutions.
If you want to dive deeper, you can explore the pipe insulation market trends and projections for a broader view. For more tailored advice, our guide on winter plumbing tips for the Denver cold has some great region-specific strategies that really work.
Choosing the Right Insulation for Your Home
Walking into the hardware store and seeing a whole aisle of pipe insulation can feel a bit overwhelming. The secret is to stop thinking about the product itself and start thinking about your pipes—where they are, what shape they are, and how exposed they'll be to the cold.
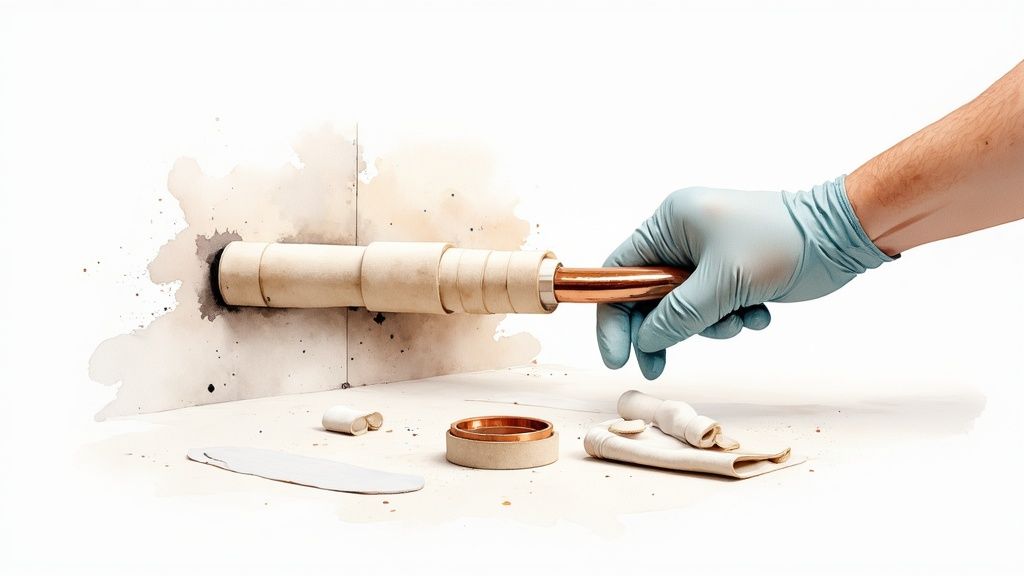
For most people, the go-to choice is the simple polyethylene foam tube. You’ve probably seen them; they’re the long, grey tubes with a slit down one side. These are fantastic for the long, straight stretches of pipe in your basement or crawlspace. They’re designed for a quick, tool-free install.
What's R-Value and Why Does It Matter?
You’ll see an "R-value" printed on the insulation's packaging. In simple terms, this is its power rating for fighting off the cold. The higher the number, the better it is at preventing heat from escaping your pipes. A pipe in a drafty, unheated garage in a place like Minneapolis is going to need a much higher R-value than one tucked away in a sealed, temperate basement.
The real goal here isn't just to cover your pipes—it's to create a solid thermal barrier. A higher R-value provides a more robust defense against freezing, which is critical during those deep, multi-day cold snaps when your plumbing is most vulnerable.
What about those tricky spots? For pipes that have a lot of elbows and joints, like the maze of plumbing around your water heater, rigid foam tubes just won’t cut it. This is where fiberglass pipe wrap comes in. It’s a flexible tape that you can wrap snugly around all those awkward angles and T-fittings. A quick tip from experience: always wear gloves and a long-sleeved shirt when working with fiberglass.
Thinking about insulation in a broader sense can also pay off. While we’re focused on pipes, the same principles apply to your entire home. For instance, knowing how to insulate a metal roof can be just as crucial for overall energy efficiency and protection.
Comparing Common Pipe Insulation Types
To help you decide what to grab at the store, I've put together a quick comparison of the most common materials you'll find.
| Insulation Type | Best For | Installation Difficulty | Typical R-Value |
|---|---|---|---|
| Polyethylene Foam | Long, straight pipes in accessible areas like basements. | Easy | R-2 to R-3 |
| Fiberglass Wrap | Bends, elbows, and irregular shapes. | Moderate | R-2 to R-4 |
| Rubber Insulation | Both hot and cold pipes; offers moisture resistance. | Moderate | R-3 to R-5 |
| Spray Foam Kits | Sealing gaps where pipes enter walls. | Difficult | High (varies) |
Ultimately, choosing the right insulation is about matching the material to the job at hand. For the vast majority of homes, you’ll get the best results by using a combination of foam tubes for the straight runs and fiberglass wrap for all the tricky bits. This two-pronged approach ensures every inch of vulnerable pipe is protected.
Creating Your Home Plumbing Protection Map
Before you even think about buying insulation, the real work begins with a solid plan. A successful project hinges on knowing exactly what you're up against. Taking a few moments to map out your home’s plumbing is the difference between an efficient, one-and-done trip to the hardware store and frustrating, repeated visits.
Think of it as a pre-game strategy session. You’re performing a quick “plumbing audit” to identify every pipe that needs protection before the first freeze hits.
Finding Your Most Vulnerable Pipes
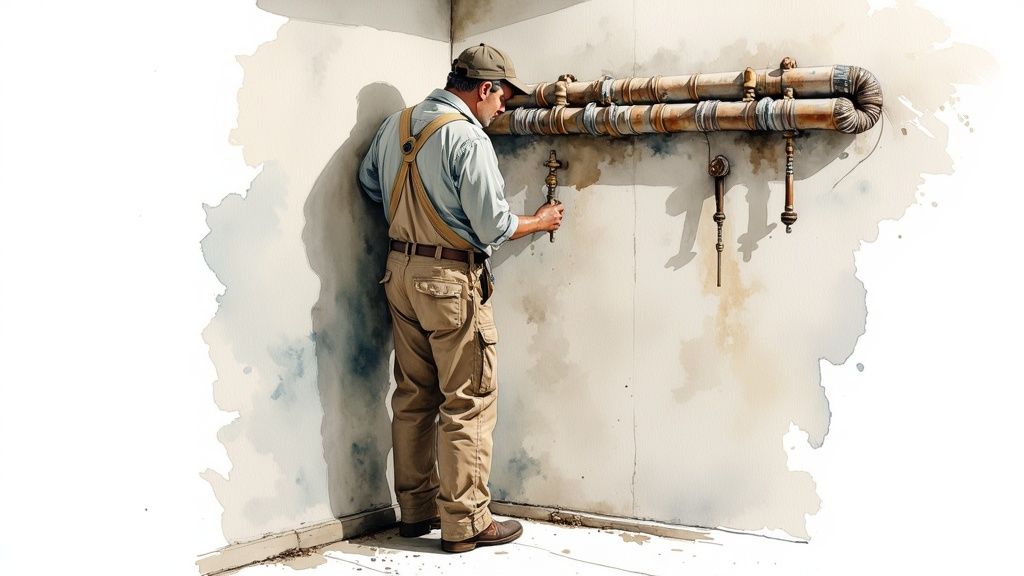
Grab a notepad and a pen, and start your tour in the parts of your house that don't get much love from your heating system. These are the prime targets for winter's icy grip.
I always tell homeowners to start looking in these specific spots:
- Unfinished basements and cellars
- Crawl spaces
- Attics (especially if any water lines run through them)
- Garages, whether they're attached or detached
Your mission here is to find the pipes most exposed to the cold. As you move through these areas, keep a close eye on any plumbing that runs along exterior walls—they get hit the hardest. Also, check for pipes near foundation vents or any little gaps where frigid air can sneak in. Following a thorough plumbing maintenance checklist can help make sure you don't miss anything.
Your goal is to sketch a simple map. It doesn’t need to be a masterpiece. Just a basic layout showing where every hot and cold water line is located. This drawing will be your best friend when it comes time to figure out exactly how much insulation you need to buy.
Taking this kind of proactive approach is becoming more and more common. The global pipe insulation market was valued at an impressive USD 9,655.41 million in 2023 and is only expected to grow. It’s clear that homeowners are getting serious about protecting their property. When you create your own plumbing map, you’re adopting the same professional mindset for a crucial DIY job.
How to Install Pipe Insulation Like a Pro
Alright, you've got your plan and your materials. Now for the satisfying part—actually getting the insulation on the pipes. When it comes to installing pipe insulation for winter, it’s all about technique, not brute force. A little care and precision here will create that seamless thermal barrier and make sure there are no sneaky cold spots.
Forget about just wrestling foam tubes onto your pipes and calling it a day. The details, especially around tricky areas like elbows and T-fittings, are what really count. These are the places where gaps love to form, completely undermining your efforts. Taking an extra minute on these connections makes all the difference.
This graphic breaks down the basic flow of the job.
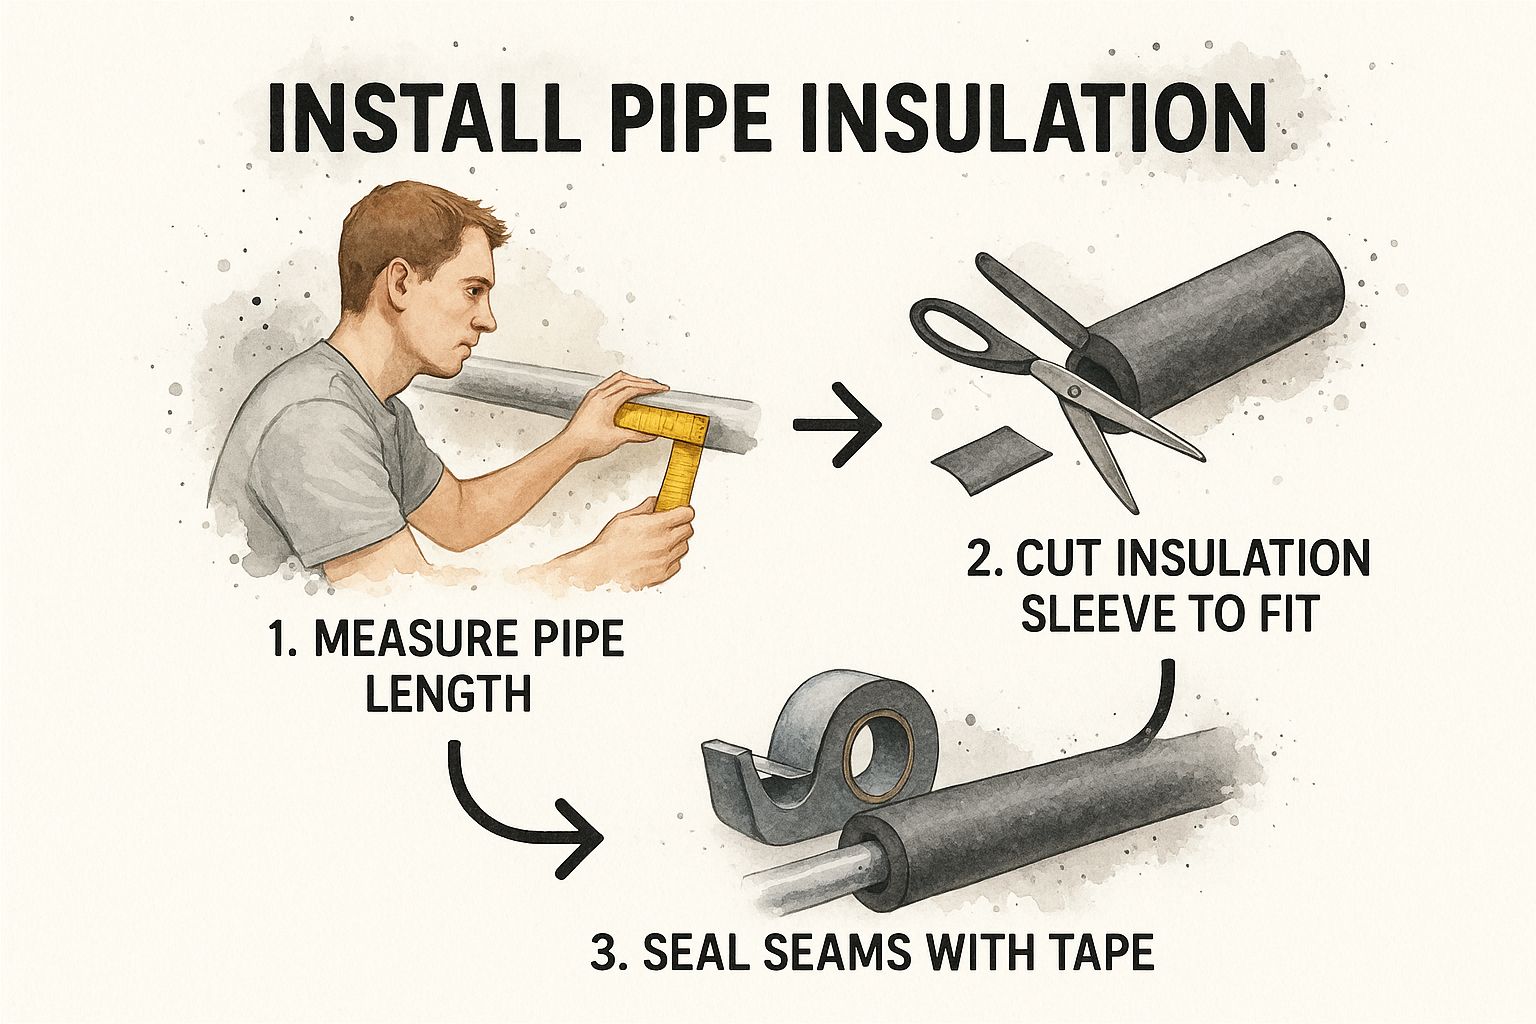
As you can see, it boils down to three simple actions: measure, cut, and seal. But the secret to success is doing each one right to create an unbroken shield against the cold.
Perfecting Your Foam Tube Installation
For the long, straight sections of pipe, those pre-slit foam tubes are your best friend. Just pop open the slit, snap it over the pipe, and press the self-sealing adhesive strip closed. It’s that easy. For a little extra peace of mind, especially in areas where the insulation might get bumped, I like to add a zip tie every few feet.
The real craft shows up when you hit the corners. To get a perfect, airtight fit on a 90-degree elbow, you'll need to make two 45-degree angle cuts.
This is where a miter box is worth its weight in gold. It's a simple guide that holds the foam tube steady, letting you make a clean, perfect 45-degree cut with a utility knife every single time. Put two of those cuts together, and you get a flawless corner with zero gaps.
Making precise cuts is one of the most important parts of the job. If you're looking to build up your toolkit, our guide on essential plumbing tools can help you choose the right equipment for any plumbing project.
Handling Fiberglass and Irregular Shapes
What about that jumble of pipes and odd-shaped fittings around your water heater? This is where fiberglass wrap really shines. The biggest mistake I see people make is wrapping it way too tightly. Compressing fiberglass just crushes all the tiny air pockets that actually do the insulating, killing its effectiveness.
Here’s how to do it correctly:
- Gear up first. Always wear gloves, eye protection, and a long-sleeved shirt. Trust me, you don't want those fiberglass fibers on your skin or in your eyes.
- Wrap spirally. Wind the fiberglass around the pipe, overlapping the edges by about half an inch to make sure nothing is left exposed.
- Keep it snug, but not tight. The wrap should feel cushioned and a bit fluffy, not squashed flat against the pipe.
- Secure the ends. Use foil tape or a few plastic zip ties to keep the wrap from unraveling over time.
By mastering these simple techniques for both foam and fiberglass, you can be confident that every vulnerable inch of your plumbing is protected. This is how you proactively install pipe insulation for winter and save yourself from a costly, stressful plumbing disaster.
Your Complete Winter Pipe Protection Strategy
While properly installed pipe insulation for winter is your best line of defense, creating a truly freeze-proof home requires a few extra layers of protection. Think of insulation as your heavy winter coat—it does the main job, but you still need the hat and gloves for total coverage. These next steps are simple but can make all the difference when a deep freeze hits.
First things first: head outside before the first hard frost and disconnect all your garden hoses. A frozen hose still attached to an outdoor spigot acts like a highway, allowing ice to creep back into the supply pipe hidden inside your wall. That’s a recipe for a burst pipe in one of the most difficult-to-reach places.
Sealing Air Leaks and Keeping the Heat On
Your next mission is to become an air leak detective. Cold air infiltration is the silent enemy of your plumbing, especially in spots where pipes pass through the foundation or exterior walls. Take a close look and fill any gaps you find with exterior caulk or expandable spray foam. Sealing these cracks completely stops those frigid drafts from directly chilling your pipes. It's a small job with a massive impact.
During a particularly brutal cold snap, one of your best last-resort tactics is controlled right from your sink. It might feel counterintuitive, but letting a faucet slowly drip is a time-tested trick. The constant movement of water generates just enough friction and energy to make it significantly harder for the water inside the pipe to freeze solid.
Finally, fight the temptation to set your thermostat way back at night or when you leave the house. Keeping your home's temperature stable ensures that enough ambient warmth circulates into the spaces where pipes are most vulnerable, like inside walls or under cabinets.
This comprehensive approach is catching on everywhere. In fact, the global market for industrial pipe insulation is on the rise, largely driven by a growing focus on energy savings. You can discover more insights about these market dynamics and see how crucial this has become. By layering these simple strategies, you're not just insulating pipes—you're building a truly resilient defense against winter's worst.
Common Questions About Winter Pipe Insulation
Even after you've spent an afternoon wrapping pipes, it's natural to have a few nagging questions. Did I do it right? Did I miss anything? Getting the small details right is what separates a job well done from a potential disaster when the temperature really drops.
Let’s walk through some of the things homeowners ask me all the time after they’ve tackled insulating their pipes.
Getting the Details Right for Full Protection
One of the first things people wonder is if they really need to insulate both hot and cold water pipes. The answer is a definite yes, but for different reasons. Your cold water lines are the most vulnerable to freezing solid and bursting, so they are the absolute priority. Don't skip them.
Insulating your hot water pipes, on the other hand, is just smart energy management. It keeps the water hotter as it travels to your faucet, which means you waste less water waiting for it to warm up and your water heater doesn't have to work as hard. It's a win-win.
So what about those little gaps around fittings and corners? They matter—a lot. Even a small exposed area can act as a freezing point for the entire pipe. This is why you can't just slap the insulation on. You need to be meticulous. Take the time to make miter cuts on foam sleeves for tight corners and use tape to secure every seam.
Of course, the trickiest pipes are the ones you can't see. Insulating pipes already hidden inside walls isn't practical unless you're planning a major renovation. If you're not tearing out drywall, the best approach is to be incredibly thorough with all the pipes you can reach in your basement, crawl space, attic, and garage.
It’s critical to remember that insulation only slows down heat loss—it doesn't generate heat. In an unheated house during a prolonged power outage, even the best-insulated pipes can eventually freeze.
This is why insulation is just one piece of your winterization puzzle. During a severe cold snap, it's still a good idea to let a faucet trickle to keep water moving through the pipes. When you combine great insulation with smart habits, you’re giving your home the best possible defense against a nasty winter surprise.
When it comes to protecting your home's plumbing from the unique challenges of a Denver winter, you need experts who know the local environment. For any plumbing needs, from emergency repairs to comprehensive winterization, trust Professional Plumbers Denver. Get in touch with us today for peace of mind this winter.

Recent Comments