
It’s a scary moment for any homeowner: you turn on the faucet during a cold snap, and nothing comes out. Or worse, the slow drip you left running has gone silent. That quiet is often the first, and only, warning sign of a frozen pipe, a precursor to a messy and incredibly expensive burst.
Why a Sudden Freeze Puts Your Home at Risk
When temperatures drop fast, like they often do during a Denver cold front, the water in your pipes doesn’t just get chilly—it starts to change state. This isn’t just an inconvenience; it’s a direct threat to the plumbing that keeps your home running.
The real problem comes down to simple physics. As water freezes into ice, its volume expands by about 9%. In an open space, that’s no big deal. But inside the closed, rigid environment of a pipe, that expansion has nowhere to go. This creates an ice plug, and the pressure behind it builds to a staggering level, sometimes exceeding 2,000 pounds per square inch. That’s more than enough force to rupture a copper or plastic pipe.
The Anatomy of a Pipe Burst
Many people think a pipe splits right at the spot where the ice forms. That’s a common misunderstanding. The ice plug actually acts like a cork in a bottle. It traps water between the blockage and the closed faucet, and as more ice forms, the pressure in that trapped section of water skyrockets until the pipe gives way at its weakest point. That weak point could be far from the actual ice.
The damage from a burst pipe is rarely minor. It’s not just a quick plumbing fix; it’s a full-blown flood inside your walls. A single burst pipe can release hundreds of gallons of water, leading to a cascade of problems:
- Widespread Water Damage: Soaked drywall, buckled hardwood floors, and ruined insulation are just the start.
- Structural Harm: The weight of the water can cause ceilings to collapse and compromise your home’s framework.
- Loss of Valuables: Furniture, family photos, electronics—anything in the water’s path can be destroyed.
- Mold Infestation: Once the water is gone, the lingering moisture creates a perfect breeding ground for mold, posing a serious health risk.
You might think this is just a cold-climate issue, but the data tells a different story. Insurance claims show that states with typically milder winters often suffer the most because homeowners are less prepared. In fact, Georgia, Tennessee, and Texas consistently rank in the top ten states for frozen pipe claims, with Georgia alone seeing losses of around $100 million. You can learn more about which states are most affected by this plumbing risk.
Understanding this process—from a simple temperature drop to a potential household disaster—is key. It reframes pipe protection from a seasonal suggestion to an essential part of home maintenance.
A Practical Guide to Insulating Vulnerable Pipes
Insulation is your first, best, and cheapest line of defense against frozen pipes. Think of it as a winter jacket for your plumbing, creating a simple thermal barrier that keeps frigid air from turning the water inside into a destructive, expanding block of ice. While it might sound like a job for a pro, insulating the most vulnerable pipes in your home is a surprisingly simple weekend project that buys you incredible peace of mind.
The trick is knowing where to look. Not all pipes are created equal when it comes to risk. You need to focus on the ones that run through unheated or poorly insulated spaces.
From my experience dealing with countless emergency calls in the Denver area, the problem spots are almost always the same:
- Crawl spaces and unfinished basements
- Attics
- Garages, especially plumbing running along exterior walls
- Cabinets under kitchen or bathroom sinks, particularly those on an outside wall
If a pipe is in a spot that feels cold to you, it’s definitely cold enough to freeze. These are the front lines in the battle against a burst pipe during a sudden Colorado cold snap.
Choosing and Applying the Right Insulation
For most DIY situations, you’ll be looking at three main types of insulation. Foam pipe sleeves are by far the easiest to use. They come pre-slit, so you just pop them over the pipe and seal them up, often with a built-in adhesive strip. They’re perfect for long, straight sections of plumbing.
For trickier spots with lots of elbows and joints, fiberglass wrap is a solid choice. You just wrap it around the pipe like a bandage and secure it with duct tape or cable ties. The idea of creating a thermal barrier is a universal concept. This same practical thinking applies to larger projects, like when you consider how to insulate a metal roof for lasting comfort.
A little prevention saves a world of hurt later. Burst pipes can cause catastrophic damage, yet it’s shocking how many people skip this simple step. Data from Aviva insurance found that even though 6% of households have suffered damage from frozen pipes, almost a quarter of residents still don’t bother to insulate them. Discover more insights about preventing costly winter damages.
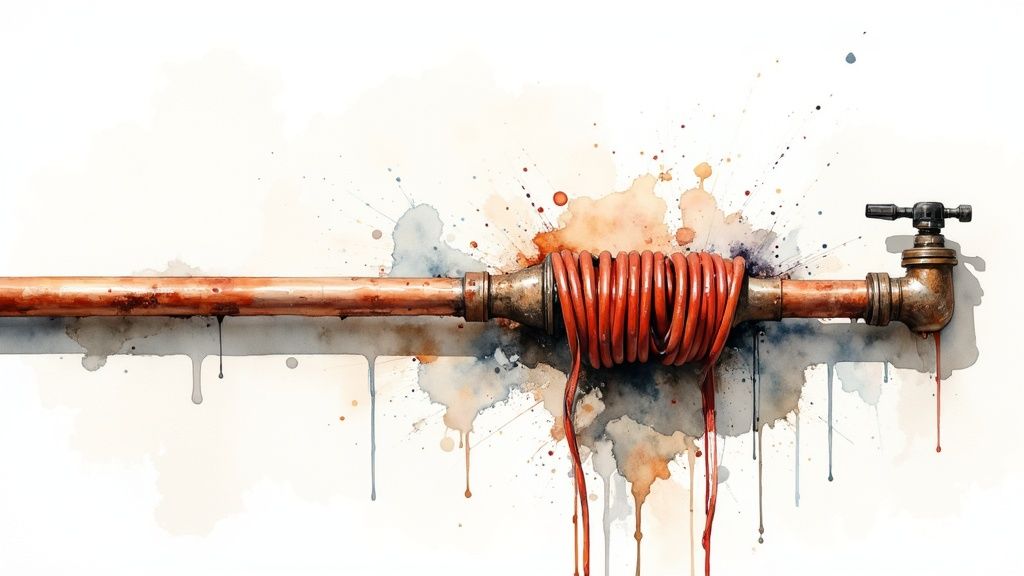
For pipes in the absolute coldest, highest-risk areas—like a north-facing wall or an exposed crawl space—you might need to step up your game with electric heat tape. This is an active solution. It’s basically a heated cable that you wrap around the pipe and plug in, providing a steady, low-grade warmth to keep water flowing no matter how low the temperature drops.
If you want to get into the nitty-gritty of choosing the best material, our complete guide on pipe insulation for winter is a great resource. Whichever method you land on, the goal is the same: make sure all seams and joints are sealed tight. Gaps defeat the purpose.
When it comes to preventing frozen pipes, a little proactive work goes a long way. Thinking beyond just the pipes themselves and winter-proofing your whole home is the best defense against Denver’s plunging temperatures. These aren’t huge, time-consuming projects; they’re mostly simple habits and quick tasks that make a world of difference when a cold front hits.
Let’s start outside, where the most common (and costly) mistakes happen.
The single most important thing you can do is disconnect all garden hoses from your outdoor spigots. I’ve seen it countless times: a homeowner forgets, and that leftover water in the hose and spigot freezes solid. That ice expands back into the supply line inside the wall, cracking the pipe. You won’t even know it happened until you have a major flood on your hands come spring.
Secure Your Outdoor Water Supply
After you’ve disconnected and drained your hoses for storage, the next step is crucial. You need to shut off the water supply feeding those exterior faucets.
Most Denver-area homes have a dedicated shut-off valve for each outdoor spigot. You’ll usually find it in the basement, a crawl space, or a utility closet, often near the wall where the faucet is located. Turn that valve clockwise until it’s firmly in the “off” position.
Head back outside and open the spigot itself. This allows any trapped water in the line to drain out completely, leaving the pipe empty and safe from freezing.
Moving inside, some of the most effective tricks are also the easiest. Simply open the cabinet doors under your kitchen and bathroom sinks, especially if they’re located on an exterior wall. This allows the warm air from your home to circulate around the plumbing, providing just enough heat to keep those pipes above the freezing point. It’s a small action with a big impact.
This visual guide breaks down the essential steps for protecting your pipes.
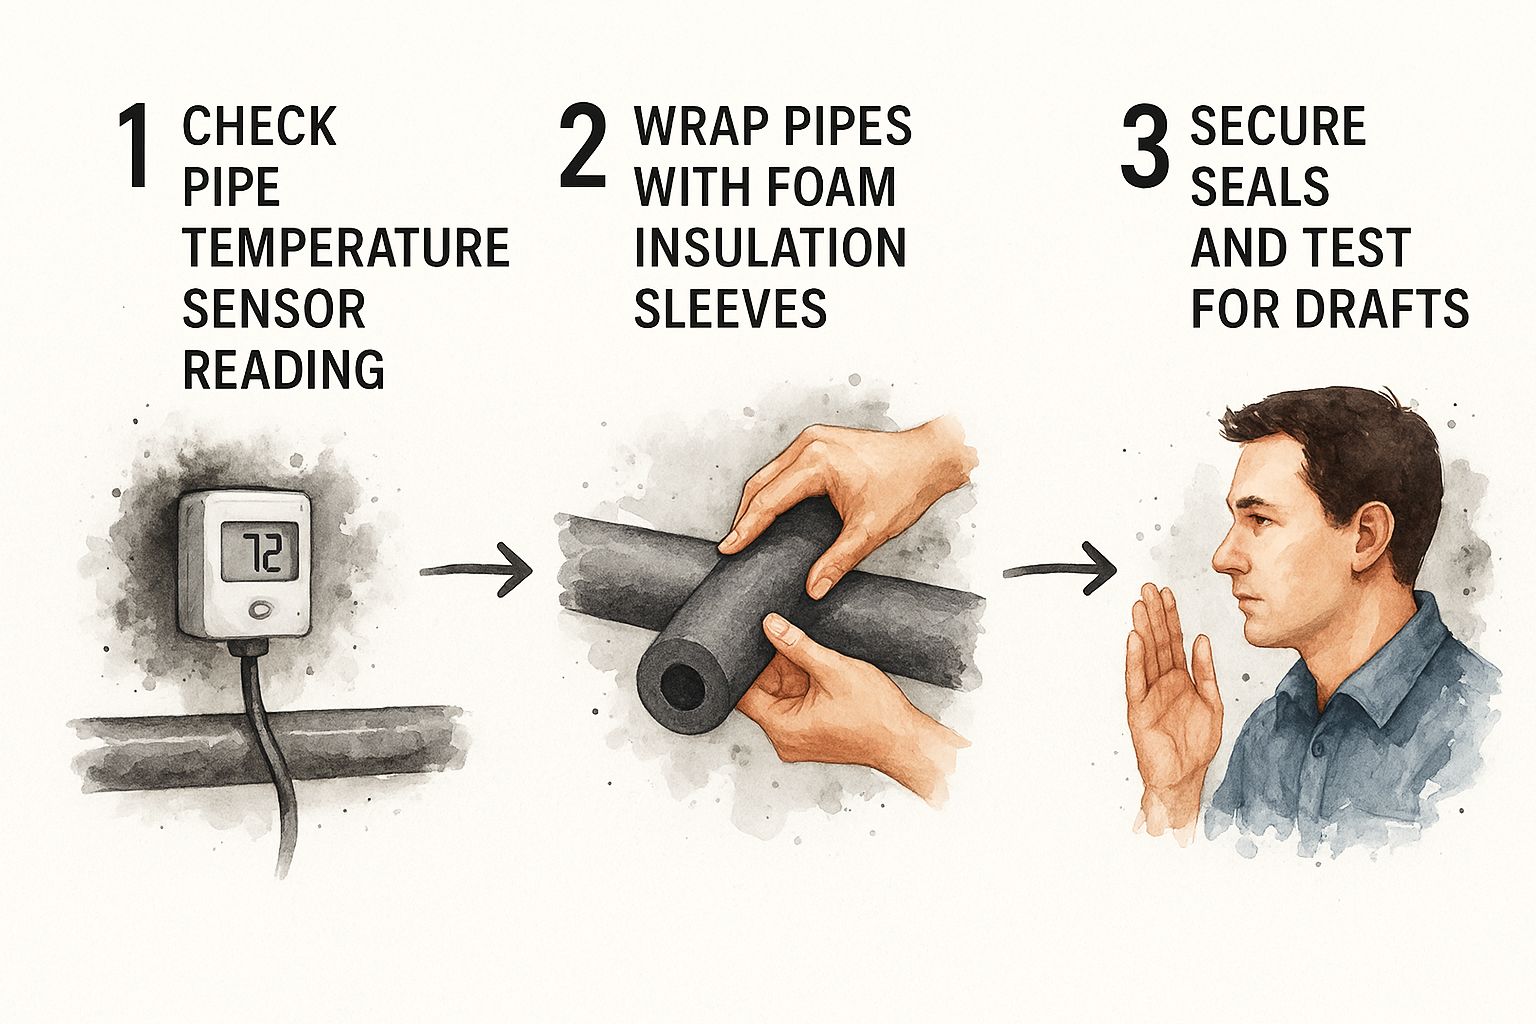
Before a deep freeze sets in, a quick run-through of your home can prevent a catastrophe. This checklist covers the key actions to take.
Your Pre-Freeze Home Preparation Checklist
| Area | Action Required | Why It’s Important |
|---|---|---|
| Outside | Disconnect and drain all garden hoses. | Prevents water from freezing in the spigot and cracking the supply pipe inside the wall. |
| Inside | Shut off interior valves to outdoor spigots. | Completely cuts off the water supply, ensuring the pipe leading outside is empty. |
| Outside | Open the outdoor spigots to drain them fully. | Removes any remaining water after the interior valve is closed, eliminating freeze risk. |
| Inside | Open cabinet doors under sinks on exterior walls. | Allows warm air from your home to circulate around vulnerable plumbing, keeping it from freezing. |
| Inside | Keep the thermostat at a consistent temperature. | Prevents cold spots from forming in your home where pipes could be exposed to freezing temperatures. |
Making this checklist a habit is one of the smartest things a homeowner can do before winter truly arrives.
Maintaining a steady thermostat setting is also key. While it’s tempting to lower the heat at night or when you’re away to save on energy bills, a significant drop in your home’s internal temperature can put your plumbing at risk. Keep the heat set to a consistent temperature, no lower than 60°F, to make sure even hidden corners of your home stay safely above freezing.
These direct plumbing actions are your first line of defense. But don’t stop there. Learning how to winterize other areas like windows and doors can dramatically reduce cold drafts and overall heat loss. A well-sealed home is a warmer home, which provides an extra blanket of security for your entire plumbing system.
For a complete breakdown, check out our detailed winter plumbing tips to systematically secure your property before the next cold snap.
What to Do During an Extreme Cold Snap
When the forecast calls for a classic Denver deep freeze, it’s time for some quick, temporary measures. These aren’t long-term fixes, but they are incredibly effective at getting you through the coldest nights without the disaster of a burst pipe.
The first and easiest thing to do is to let a few key faucets drip. I know it sounds like an old-timer’s trick, but there’s real science behind it. A slow, steady drip of cold water keeps things moving inside the pipe, which makes it much harder for ice to form in the first place.
But here’s the most critical part: that open faucet acts as a pressure relief valve. If an ice blockage does form, the immense pressure building up behind it has a safe way to escape. Without that drip, the pressure has nowhere to go but straight through the wall of your pipe.
Add a Little Heat to Vulnerable Areas
Next, think about the coldest spots in your house. Every home has them—those unheated basements, chilly crawl spaces, or garages where the pipes are most exposed. Sometimes, insulation just isn’t enough when the temperature really plummets.
A well-placed space heater can be a lifesaver here, but you absolutely have to prioritize fire safety.
- Pick a Safe Model: Use a modern space heater that has an automatic shut-off feature in case it overheats or gets knocked over.
- Give It Room to Breathe: Always place it on a hard, flat surface. Keep it at least three feet away from anything that could catch fire—think curtains, furniture, or cardboard boxes.
- Don’t Set It and Forget It: Never leave a space heater running overnight or when you’re out of the house. The goal is to use it to warm up the space for a few hours before the temperatures hit their lowest point.
These small, temporary actions are surprisingly powerful ways to prevent frozen pipes when a cold snap hits.
Of course, even with the best precautions, accidents can happen. It pays to know what to do in a worst-case scenario to minimize the damage. We’ve put together a guide on the immediate steps to take if a pipe bursts that’s worth a read.
How to Safely Thaw a Frozen Pipe
Even with the best prep work, a brutal Denver cold snap can freeze a pipe you thought was safe. You turn on a faucet and get a weak trickle, or worse, nothing. That’s the classic sign of a frozen pipe. The key is not to panic. First, you need to find where the blockage is.
Before you start thawing, immediately open the faucet that the frozen pipe leads to. This is a crucial step. It relieves the immense pressure building up behind the ice and gives the melting water a clear exit path, which can be the difference between a simple thaw and a burst pipe.
Gentle Heat is the Goal
Your mission is to apply slow, gradual heat to the pipe. Whatever you do, never use an open flame. A blowtorch or propane heater is a recipe for disaster—it can boil the water instantly, create a steam explosion, and even start a fire.
Stick to these much safer, tried-and-true methods:
- Hair Dryer: Grab a standard hair dryer, put it on a low setting, and start applying heat near the faucet. Slowly work your way back along the pipe toward the frozen section.
- Hot Towels: This is a classic for a reason. Soak some towels in hot water, wring them out thoroughly, and wrap them directly around the pipe. You may need to reapply them as they cool.
- Heating Pad: If you have an electric heating pad, you can wrap it around the frozen area to provide a constant, gentle warmth.
A single, tiny crack in a pipe can spew hundreds of gallons of water, causing catastrophic damage. And it’s not just a problem in the coldest states; cities from Mississippi to Alaska deal with this. The average insurance claim for burst pipe damage hits anywhere from $25,000 to $27,000. To get a better sense of how common this is, you can explore detailed findings on US cities with frozen pipes.
If you’ve tried these methods and aren’t seeing results, or if the pipe is hidden behind a wall where you can’t reach it, it’s time to stop and call a professional plumber. Pushing your luck at this point could quickly turn a minor inconvenience into a major flood.
Burning Questions on Preventing Frozen Pipes
Even with the best preparation, a few key questions always come up when a Denver cold snap is on the way. Getting straight answers can be the difference between a calm winter and a chaotic, expensive emergency. Let’s dig into what homeowners ask us most often.
At What Temperature Do Pipes Actually Freeze?
We all know water freezes at 32°F, but your pipes have a little more resilience than you might think. For water inside an uninsulated pipe to actually start freezing, the air surrounding it usually needs to drop to 20°F or below and stay there for at least six straight hours.
This is the “danger zone.” A quick dip below freezing isn’t the main concern; it’s that prolonged, deep freeze that really sets the stage for a burst pipe.
Should I Drip My Faucets or Shut Off the Water for Vacation?
This is a classic dilemma, and the answer really depends on how long you’ll be gone.
If you’re heading out for an extended trip, the absolute safest move is to shut off the main water supply. Once it’s off, go through the house and open every faucet to completely drain the system. No water in the pipes means zero chance of freezing.
For a shorter getaway of just a few days, letting a faucet drip is a perfectly fine strategy. It keeps water moving, which helps prevent ice from forming.
A Pro’s Two Cents: If you go the dripping route, pick the faucet that’s furthest from where your main water line enters the house. This little trick ensures water is flowing through the longest stretch of your plumbing, giving you the most protection.
Are PEX Pipes Really Better Than Copper at Preventing Bursts?
In a way, yes. PEX (cross-linked polyethylene) piping has a major advantage over traditional copper or PVC: flexibility.
When water freezes, it expands. That expansion is what splits rigid copper pipes wide open. PEX, on the other hand, can stretch and expand with the ice, making it far less likely to rupture. It can still freeze and cause a blockage, but the risk of a catastrophic burst is significantly lower.
What’s the First Warning Sign of a Frozen Pipe?
The most obvious red flag is a sudden lack of water. You turn on a tap and get nothing more than a weak trickle, or maybe not a single drop.
Another, more subtle sign to watch for is a visible layer of frost or even a bit of ice forming on an exposed pipe. If you spot this on a pipe in your basement, crawl space, or garage, you’ve caught a problem in its earliest stage. It’s time to act quickly—and gently—to thaw it out before the pressure builds.
When you’re facing a plumbing puzzle you can’t solve, it’s always best to call in a professional. The team at Professional Plumbers Denver has seen every kind of winter plumbing disaster and knows how to fix it right. For reliable, 24/7 service you can count on in the Denver Metro area, get in touch with our experts.

Recent Comments