
That constant drip…drip…drip from your outdoor spigot isn't just an annoying sound. It's a sign that a simple part, usually a little rubber washer or some packing material, has finally given up. The good news? Fixing a leaking hose bib is a fantastic DIY project that will save you water, money, and a call to the plumber.
Why Is My Hose Bib Leaking, Anyway?
When you see water dripping from your hose bib, it’s a clear signal that a small, internal component has failed. It might seem like a minor problem, but leaving it alone is a mistake. A steady leak can waste hundreds of gallons of water over a year and, even worse, can slowly cause water damage to your home’s foundation.
Thankfully, most of these repairs are cheap and don't require any advanced plumbing voodoo. Once you understand what’s causing the leak, you’re already halfway to fixing it. Most of the time, the problem falls into one of three buckets.
The Usual Suspects Behind a Leaky Spigot
-
Worn-Out Stem Washer: This is the #1 culprit. At the very end of the valve stem is a small rubber washer that gets squashed every time you turn off the water. After years of use, it gets hard and brittle, losing its ability to create a watertight seal. This is what causes that classic drip from the spout itself.
-
Degraded Packing Material: If you see water seeping out from around the handle—especially when the water is turned on—your packing is shot. This is a special washer or string-like material wrapped around the valve stem, right behind the handle. Its only job is to stop water from sneaking up the stem, and when it wears out, you get a handle leak.
-
Cracked Faucet Body: This one is less common but more serious. A crack in the metal body of the hose bib, usually caused by freezing water or an accidental impact, means the entire faucet needs to be replaced. A simple repair kit won't cut it here.
It's no surprise that the global faucet market is booming, with projections showing it could reach $58.3 billion by 2033. This growth is driven by new construction and a greater focus on water conservation. As more people become aware of water waste, maintaining simple fixtures like hose bibs becomes even more important. You can find more details on this trend and its impact in a market analysis by the IMARC Group.
Before you even think about grabbing your tools, let’s quickly diagnose the problem. The table below will help you match your leak's location to its likely cause, so you know exactly what you’re up against.
Common Hose Bib Leak Sources at a Glance
Use this table to quickly identify your leak's likely cause, the parts you'll need, and the repair difficulty.
| Leak Location | Common Cause | Repair Part Needed | DIY Difficulty |
|---|---|---|---|
| Dripping from the spout | Worn-out stem washer | New rubber washer | Easy |
| Leaking around the handle | Degraded packing material | Packing washer or string | Easy |
| Water from the anti-siphon cap | Failed vacuum breaker | Vacuum breaker repair kit | Easy |
| Crack in the faucet body | Freeze damage or impact | Full hose bib replacement | Moderate |
Taking a minute to properly identify the source of the leak makes the whole process smoother. Now that you have a good idea of what’s wrong, you can head to the hardware store with confidence.
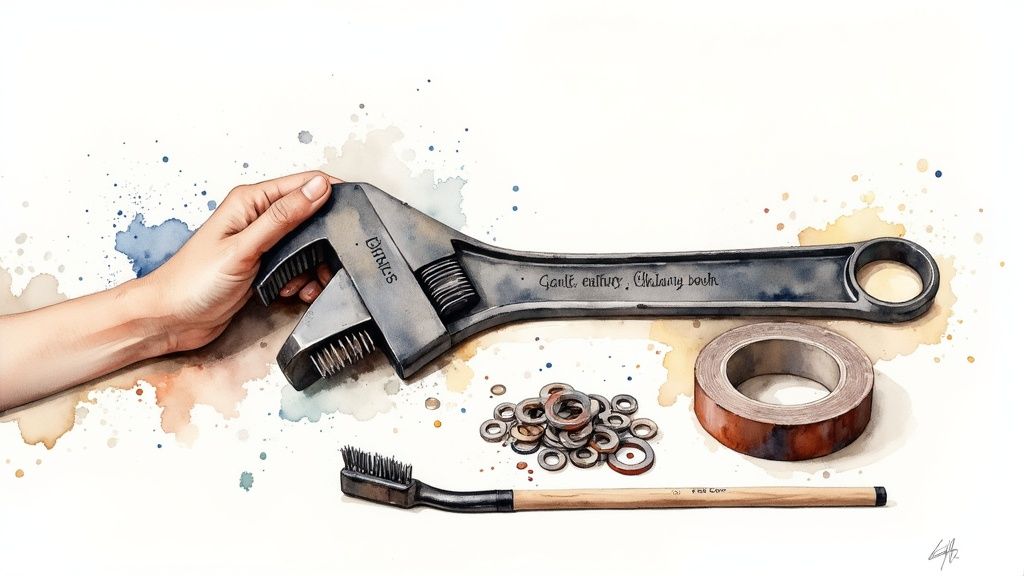
Getting Your Tools and Parts Together
Nothing turns a quick fix into an afternoon-long headache faster than having to stop midway through to hunt for a tool. Before you even think about shutting off the water, get everything you need laid out and ready to go. A successful repair is all about preparation.
Believe me, having your gear organized makes a world of difference. If you find yourself constantly digging through drawers, it might be time to invest in a quality toolbox to keep your plumbing essentials in one spot.
You don't need a professional plumber's full kit for this, but a few key items are non-negotiable. While a standard adjustable wrench can work in a pinch, I always recommend a good pair of channel-lock pliers. They give you a much more secure grip on the packing nut and faucet body, which really helps prevent stripping that soft brass.
What You'll Need From Your Toolbox
- Channel-lock pliers or an adjustable wrench: Your go-to for gripping the main components.
- Flathead screwdriver: Perfect for prying off that stubborn old washer at the end of the stem.
- Wire brush: This is a must-have for cleaning up any corrosion or gunk from the threads. Clean threads make for a good seal.
The Right Replacement Parts
Now for the parts. This is where a lot of people trip up, but it’s actually pretty simple. For most common hose bib leaks, you're only dealing with a couple of small, inexpensive components.
My best piece of advice? Once you take the faucet apart, bring the old, worn-out bits with you to the hardware store. It’s the only surefire way to walk out with the right size replacements and avoid a second trip.
Your shopping list will be short. You’ll definitely need a new stem washer—that’s the little rubber disc that actually stops the water from dripping out the spout. You'll also need either a packing washer (a small rubber ring) or a bit of graphite packing string to create a seal around the handle stem. Some newer faucets might have a small O-ring in the mix, too.
The Complete Hose Bib Repair Process
Alright, you've got your tools and parts lined up. Let's get this done. Taking on a hose bib repair is pretty straightforward, but the real secret to a one-and-done fix is being methodical. Don't rush it. Focusing on each step carefully is what guarantees a drip-free faucet when you turn that water back on.
First thing’s first: you have to shut off the water supply to the hose bib. Head down to your basement or crawl space and look for a separate shut-off valve on the pipe that leads to that outside wall. Once you've turned it off, pop back outside and open the spigot to let any trapped water drain out.
This visual guide lays out the core steps for tackling the leak, from the initial shut-off to swapping out the internal parts that are usually the culprits.
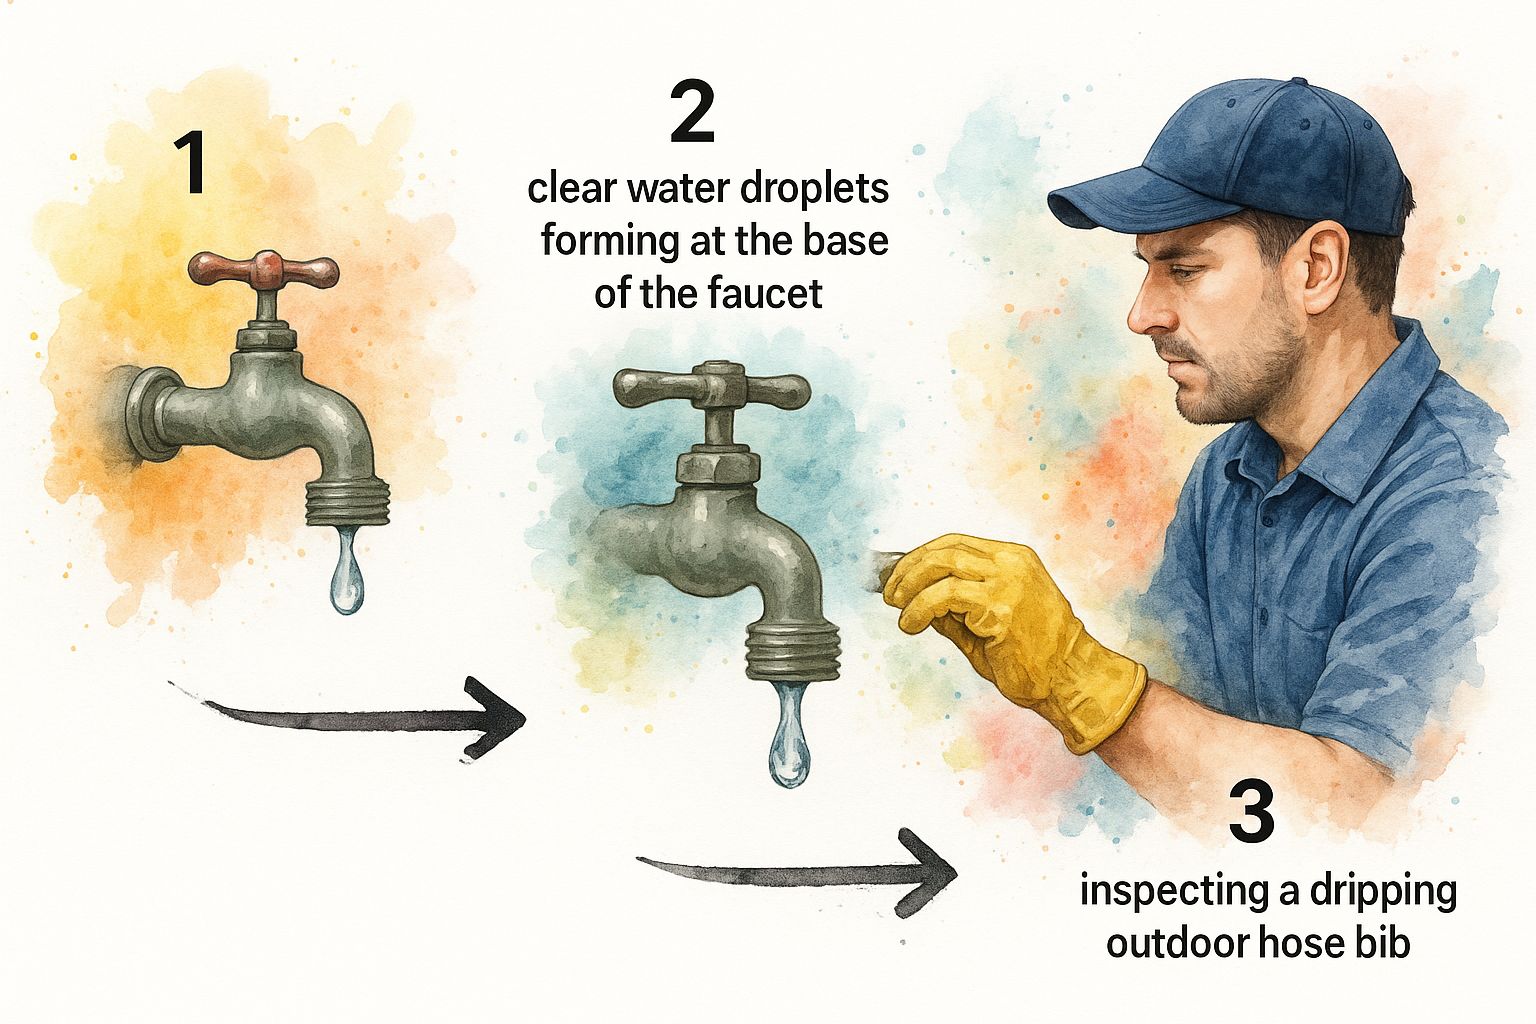
The goal here is to carefully take apart the faucet, get to the small internal seals that have worn out over time, and replace them. It's simpler than it sounds.
Disassembling The Hose Bib
With the water off, you can start taking the faucet apart. Find the screw holding the handle on—it's almost always a Phillips head—and remove it. If the handle feels fused on after years of use, a few gentle taps from underneath with a hammer will usually break it free.
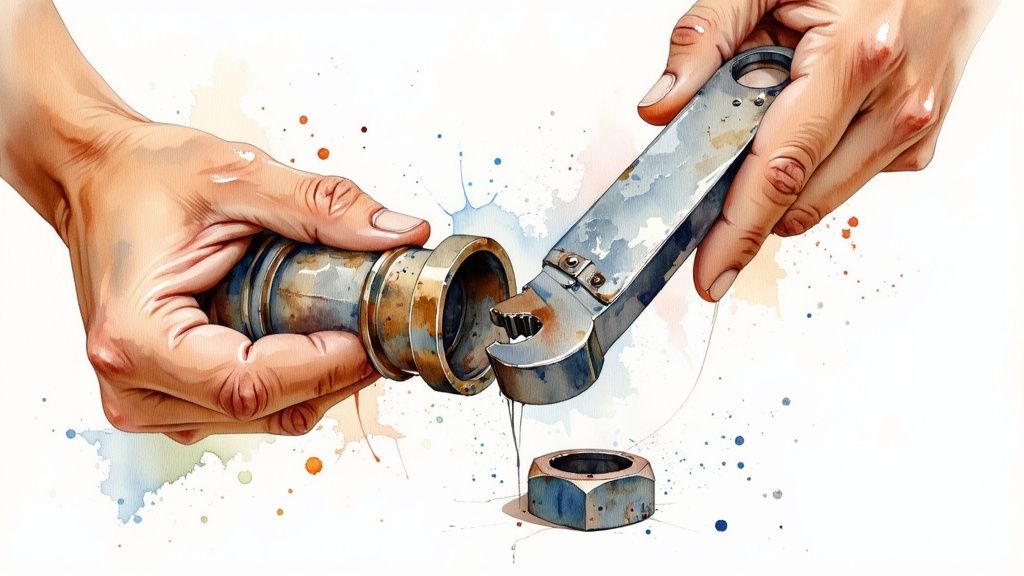
With the handle off, you'll see the packing nut. This is the bigger hexagonal nut sitting right behind where the handle was. Grab your adjustable wrench or channel-lock pliers and turn it counter-clockwise to loosen it. A pro move here is to use a second wrench to hold the body of the faucet still. This keeps you from accidentally twisting the entire pipe inside the wall.
I always recommend wrapping the packing nut with a rag or a bit of electrical tape before you put a wrench on it. The soft brass scratches easily, and this simple trick keeps the tool's teeth from marring the finish. It's a small detail that keeps things looking sharp.
Once that packing nut is loose, you can unscrew the whole valve stem. Just keep turning it counter-clockwise as if you were opening the faucet, and it will eventually come right out. For a closer look at the components you're working with, check out our in-depth hose bib leak repair guide.
Replacing The Worn Parts
Now that you have the stem in your hand, you can spot the problem areas. At the very end, you'll find the stem washer, which is held on by a small brass screw. Unscrew it, pop the old, hardened washer off with a flathead screwdriver, and put the new one on. Easy.
Next, look at the stem right behind the threads where the packing nut sits. You'll see the old packing washer or some graphite packing string. Use your screwdriver to carefully dig out the old material and replace it with the new stuff.
- If it's a packing washer: Just slide the new one into place.
- If it's packing string: Tightly wrap the new string clockwise around the stem a few times until it's snug.
Before you put it all back together, take your wire brush and give the inside threads of the faucet body a quick cleaning. Getting rid of any gunk or mineral buildup is key to a good seal. Now, just reassemble everything in reverse order. Tighten the packing nut until it feels snug—but don't crank on it—and you're ready to test your handiwork.
Even with the right parts and a solid plan, a DIY project to repair a leaking hose bib can sometimes throw you a curveball. It happens to the best of us. Don't get discouraged if things don’t go perfectly—most of these little setbacks are common and have simple solutions once you know what to look for.
A frequent frustration is a valve stem that just won't budge. After years of sitting out in the elements, corrosion can make it feel like it's been welded in place.
Before you start reefing on it with all your might, grab some penetrating oil. Spray a little around the packing nut and give it a good 15 minutes to work its magic. A few gentle taps on your wrench with a hammer can also help break that stubborn corrosion's grip.
When The New Parts Still Leak
This is the one that really gets people. You’ve replaced the washer and packing, put everything back together, and turned the water on, only to be greeted by that familiar drip…drip…drip. It’s incredibly frustrating, but the fix is usually pretty straightforward.
-
Persistent Spout Drip: If water is still coming from the spout, your culprit is almost certainly the valve seat. This is the little brass ring inside the faucet body where the stem washer sits to create a seal. Over time, it can get tiny nicks or become pitted, which prevents a perfect seal. You can smooth it out with a simple tool called a valve seat dresser.
-
Handle Leak Won't Quit: Still got water seeping out from under the handle? The packing nut probably just needs to be a little tighter. Try giving it another quarter-turn with your pliers. If that doesn't do it, you might need to wrap a bit more packing string around the stem to create a thicker, more robust seal.
Remember, the goal is snug, not stripped. It's easy to get carried away, but over-tightening brass fittings can cause more damage than the original leak. Gentle, small adjustments are always the way to go.
Sometimes, even a simple repair can feel overwhelming. It’s no surprise the professional faucet repair services market is expected to hit $2.5 billion globally by 2025. As homes get older and fixtures get more complicated, knowing when to call for backup is key. You can see more on this in a detailed market growth forecast.
For other stubborn plumbing issues you might run into around the house, check out our guide on common plumbing problems and how to fix them.
To Repair or Replace? That Is the Question
Sometimes, a quick fix is really just kicking the can down the road. While most small drips from a hose bib can be solved with a simple washer replacement, there are definite signs that it’s time to stop patching and just start fresh.
Making the right call here will save you from a temporary repair that’s doomed to fail a few weeks later.
The decision usually comes down to the condition of the faucet’s body itself. Take a close look. If you spot heavy corrosion, visible cracks in the metal, or threads that are so stripped they can't create a good seal anymore, it's time for a replacement. A simple repair kit isn't going to fix a fundamentally broken faucet.
Repair vs. Replace: Which Is Right for You?
So, how do you decide? Let's break it down into a few common scenarios I see all the time. This little table should help you figure out the best course of action.
| Scenario | Best Action: Repair | Best Action: Replace |
|---|---|---|
| Leaking only when water is running | This is usually a bad packing washer or O-ring. A simple and cheap fix. | |
| Constant drip, even when off | A worn-out seat washer is the likely culprit. Another easy repair. | |
| Visible crack in the faucet body | Don't even try to fix this. The crack will only get worse. Replace it immediately. | |
| Heavy rust or mineral buildup | Corrosion compromises the metal. It’s better to install a new, clean faucet. | |
| Stripped threads on the spout | You'll never get a hose to seal properly again. Time for a new one. | |
| Handle is broken or hard to turn | If the stem is just stripped, you might get away with a new handle. | If the valve stem itself is bent or seized, a full replacement is easier. |
Ultimately, if the core structure of the hose bib is compromised, a replacement is the only long-term solution. Don't waste a Saturday afternoon on a repair that won't last.
When a New Hose Bib Is a Smart Upgrade
Modern hose bibs aren't just replacements; they're genuine upgrades, especially for those of us in colder climates.
-
Frost-Free Models: These are an absolute game-changer. They work by placing the actual shut-off valve inside the heated part of your wall, which keeps the water from freezing and bursting the pipe. It's a must-have feature to prevent a winter catastrophe. Protecting your pipes is key, so learning about proper pipe insulation for winter is a great place to start. You can learn more here: https://professional-plumbers-denver.com/blogs/pipe-insulation-for-winter/
-
Quarter-Turn Valves: Newer spigots often feature a simple quarter-turn ball valve. They're much faster to turn on and off and, in my experience, tend to be more durable than the old multi-turn style handles.
Homeowners are catching on. The faucet parts and repair industry was valued at around $2.5 billion in 2025, and it’s only expected to grow as more people invest in better, more water-efficient fixtures.
If the job feels a bit too big to tackle on your own, it's never a bad idea to look into professional outdoor water solutions for a lasting, worry-free fix.
Still Have Questions About Your Hose Bib?
Even after you've put the tools away, a few questions might pop up. It's one thing to stop a leak, but it's another to make sure it stays fixed for good. Let's tackle some of the most common things people wonder about after this kind of repair.
How Do I Find the Right Size Washer?
This is probably the most common snag people hit. The absolute easiest way to get it right is to simply take the old washer with you to the hardware store. Once you've shut the water off and taken the hose bib apart, just pocket that little rubber ring and bring it with you.
You can compare it directly to the new ones to find a perfect match. A lot of stores also sell multi-packs with an assortment of common washer sizes. Grabbing one of these isn't a bad idea; you’ll likely find the one you need, plus you'll have spares for the next time a faucet acts up.
What's a Frost-Free Hose Bib? Is It Worth It?
A frost-free hose bib is a smart design for cold climates. Unlike a standard spigot where the valve is right at the handle, a frost-free model has a long stem that moves the actual shut-off valve several inches back, inside the warmer part of your wall. This keeps water from freezing, expanding, and bursting the pipe right where it exits your house.
If you live anywhere that sees freezing temperatures in the winter, upgrading to a frost-free hose bib is a no-brainer. It's a small investment that can save you from a catastrophic (and expensive) burst pipe and the water damage that comes with it.
I Replaced the Packing, So Why Is It Still Dripping at the Handle?
This is frustrating, but the fix is usually simple. If you're still seeing a slow drip from around the handle after replacing the packing washer or string, the packing nut probably just isn't tight enough.
Give it another small quarter-turn with your adjustable wrench—don't crank on it, just a firm nudge. If that doesn't solve it, you might not have used enough packing material. The solution is to just add a bit more packing string around the valve stem to create a tighter, more effective seal.
Sometimes, a simple DIY fix uncovers a bigger problem. If you've run into a snag or just want the peace of mind that comes with a professional job, don't hesitate to call for help. For any plumbing needs in the Denver Metro area, Professional Plumber Denver is ready to step in. Contact us for reliable service you can count on.

Recent Comments