
Before you even think about unscrewing the old faucet, let’s talk about prep. I can’t tell you how many times a simple project has turned into a nightmare because of a missing tool or the wrong part. A little bit of planning is what separates a smooth, professional-looking installation from a frustrating, leak-filled disaster.
This is your pre-game setup. Getting everything you need in one place before you start means no frantic, mid-job runs to the hardware store.
Setting Yourself Up for a Smooth Installation
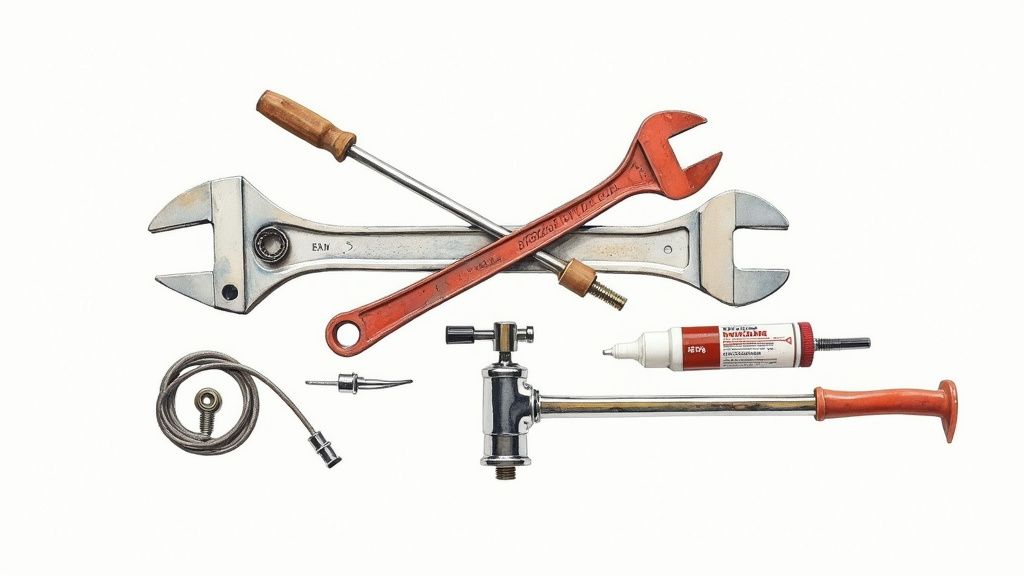
Knowing how to install a bathtub faucet correctly starts with having the right gear. Sure, an adjustable wrench is a must-have, but the real MVP of this job is often the basin wrench. It’s specifically designed to get into those impossibly tight spots behind the tub where standard wrenches just won’t fit.
Getting your materials straight is just as critical. The last thing you want is a slow drip because you used the wrong sealant.
Your Essential Bathtub Faucet Installation Toolkit
Here’s a complete checklist of what I recommend having on hand. This covers a standard faucet replacement and includes a few tips from years of experience.
| Item | Primary Use | Pro Tip |
|---|---|---|
| New Faucet Kit | The main event! | Unbox it first to make sure all parts are included and nothing is damaged. |
| Adjustable Wrench | Tightening and loosening supply lines and mounting nuts. | Have two sizes handy; a smaller one can be more nimble. |
| Basin Wrench | Reaching nuts in tight spaces behind the tub. | This is non-negotiable for most installations. Don’t try to substitute it. |
| Plumber’s Putty | Creating a watertight seal under the faucet base. | Knead it until it’s soft and pliable before applying. |
| Silicone Sealant | Sealing gaps where the faucet meets the wall or tub surround. | Use 100% silicone for a durable, waterproof bond. |
| Braided Supply Lines | Connecting the faucet to the shut-off valves. | Measure your old ones and buy a new pair that’s 2-3 inches longer to prevent kinking. |
| Bucket & Towels | Catching residual water and cleaning up. | You’ll be surprised how much water is left in the old lines. Keep them handy! |
| Utility Knife | Cutting away old caulk or sealant. | A fresh, sharp blade makes this job much easier and cleaner. |
Having this toolkit ready to go will make the whole process feel less like a chore and more like a satisfying upgrade.
Now is also the perfect time to check your water shut-offs. Before you do any plumbing work, you absolutely must know how to turn off your water main to prevent a flood. If the shut-off valves under the tub look ancient or won’t budge, now’s the time to deal with them. You can check out our guide for that right here: https://professional-plumbers-denver.com/blogs/how-to-install-shut-off-valve/
A well-prepared workspace not only saves time but also significantly reduces the risk of common installation errors like leaks or a wobbly faucet. Taking 30 minutes to organize your tools and parts can save you hours of troubleshooting later.
It’s no surprise that this is a popular project. With renovations and new construction on the rise, the global bathtub faucets market hit a value of USD 5.2 billion in 2023. More and more homeowners are swapping out old, inefficient fixtures, and it’s a job you can definitely tackle yourself.
Getting the Old Faucet Out Without a Fight
Taking out the old faucet is often where the real work begins. If you’re not careful, it’s surprisingly easy to scratch your tub’s finish or strip a corroded fitting. A little patience here can prevent a simple swap from turning into a major headache.
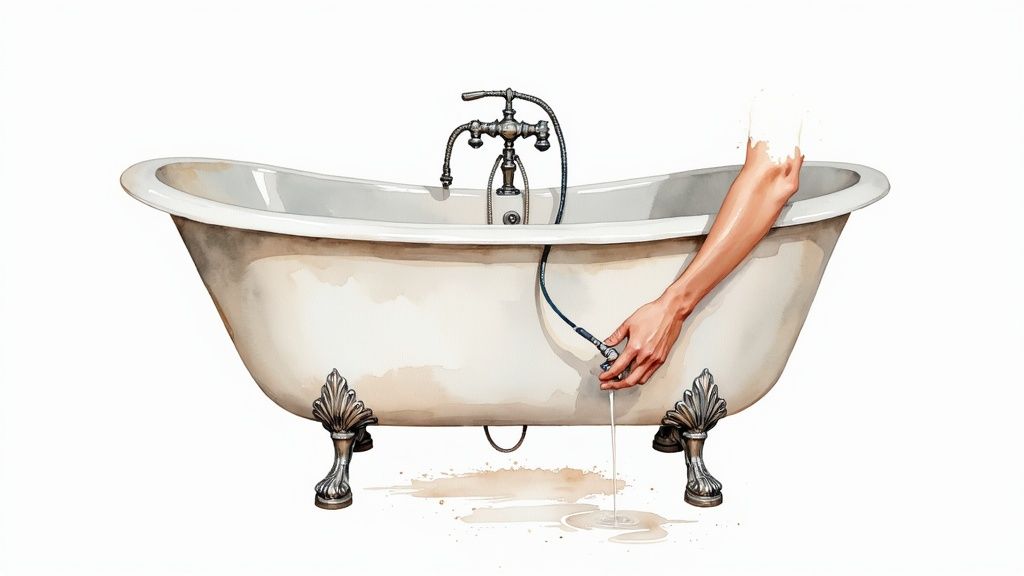
First things first: shut off the water. No exceptions. Find the main shutoff valve for your house or the specific valves for the bathroom and turn them off completely. It’s also a good idea to open the faucet to drain any water left in the lines. Trust me, there’s always more in there than you expect.
Prepping the Area for a Clean Removal
Once the water is off, protect your workspace. Lay down an old towel or a drop cloth inside the tub. A single slip of a wrench can chip porcelain or crack an acrylic tub, and that’s a repair you don’t want to deal with.
Next up is the old sealant. Over the years, plumber’s putty and caulk can get rock-hard, basically gluing the faucet to the tub deck. Grab a utility knife with a fresh blade and carefully score the caulk line around the base of the spout and handles. Take your time to avoid gouging the tub’s surface. Getting a clean slate is essential, and if you’re struggling, you can learn how to remove old caulk like a pro.
This infographic gives you a great visual on the entire process, from start to finish.
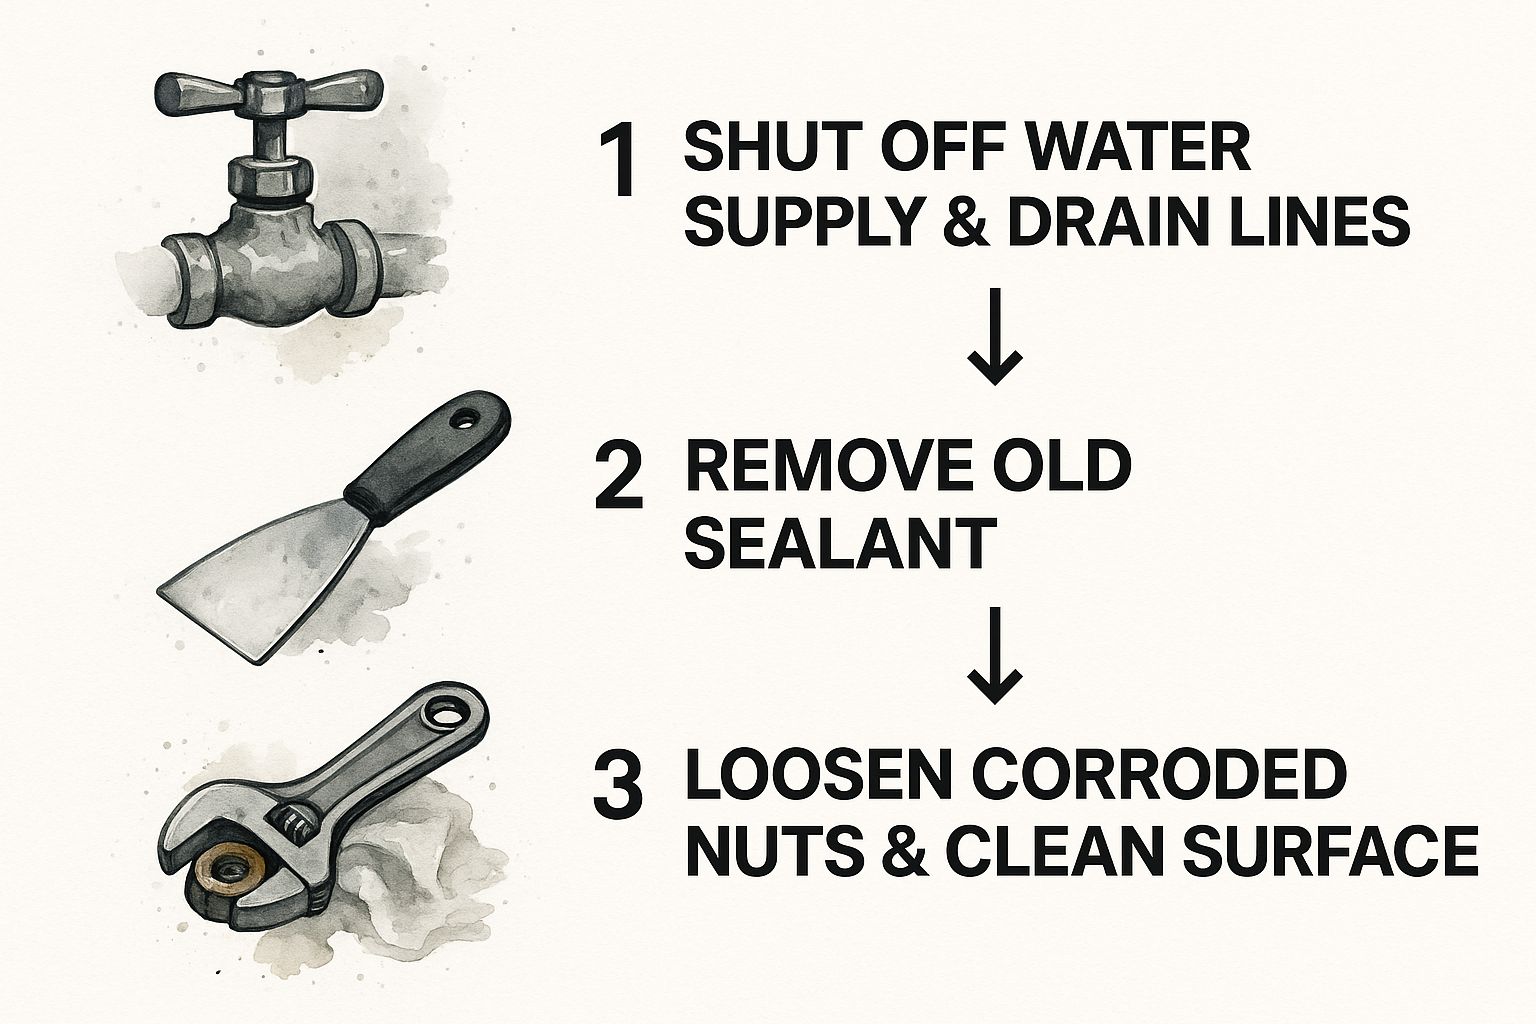
As the visual shows, managing the water supply and clearing away old gunk are the foundational steps. Don’t even think about grabbing a wrench until those are done.
Pro Tip: Run into a mounting nut that’s completely seized up with corrosion? Don’t just crank on it with more force—that’s how you break things. Instead, hit it with a good penetrating oil (like WD-40 or PB B’laster) and let it sit for 15-20 minutes. That little bit of patience will do the hard work for you and can save you from a much bigger problem.
Installing Your New Bathtub Faucet
With the old fixture out of the way and the surface prepped, it’s time for the fun part. This is where you get to see your bathroom’s new look really take shape.
First things first, let’s create a solid, waterproof seal. Take a small amount of plumber’s putty and roll it between your palms to form a thin rope, roughly the thickness of a pencil. Carefully press this putty rope around the underside of the faucet’s base.
When you press the faucet into place, that putty will squish out slightly, creating a perfect seal that fills any microscopic gaps. Don’t skip this—it’s your primary defense against water sneaking underneath and causing rot or mildew you won’t see until it’s too late.
Securing the Faucet and Connecting the Lines
Now, you’ll need to get underneath the tub deck. Take the mounting nuts that came with your faucet and thread them onto the tailpieces. Start by hand-tightening them until they’re just snug, which gives you a chance to make sure the faucet is straight and centered.
Once you’re satisfied with the alignment, grab your basin wrench and give each nut a final quarter-turn. The key here is snug, not strained. If you crank down too hard, you risk cracking the acrylic or porcelain of the tub itself. That’s a much bigger headache.
With the faucet body locked in, it’s time to connect the water lines. Depending on your setup, you might be working with flexible braided lines or rigid copper pipes. If you find yourself needing to adapt existing copper, knowing the proper technique is essential. For those situations, we have a helpful guide on how to solder copper pipes for a secure fit.
Connect the hot and cold lines to the correct faucet inlets. The standard is pretty simple:
- Hot water almost always connects on the left.
- Cold water connects on the right.
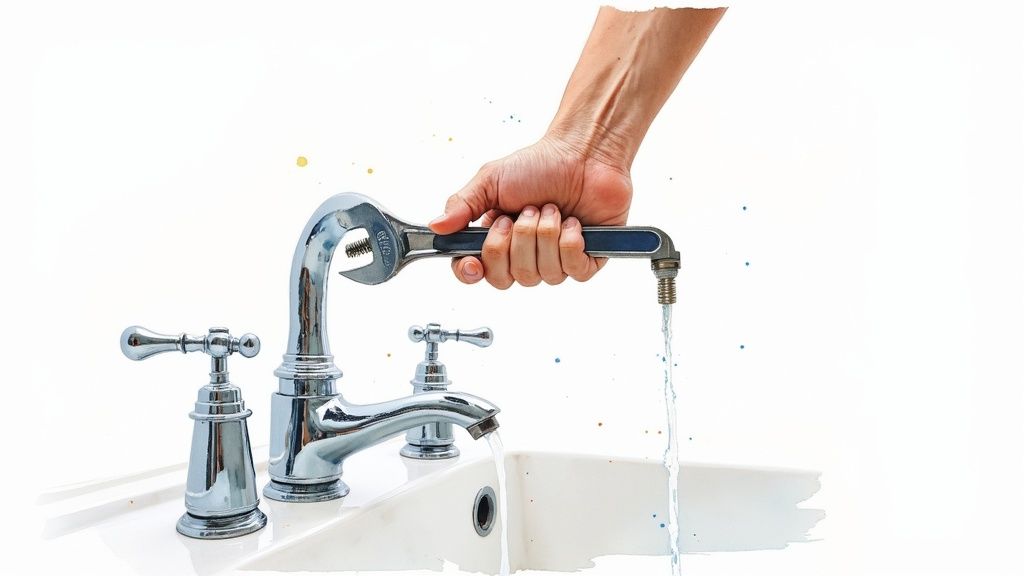
Tighten the connector nuts by hand first to avoid cross-threading, then finish with an adjustable wrench for that last quarter-turn. This gentle approach protects the rubber washers inside and creates a leak-free seal.
Pro Tip from the Field: A mistake I see all the time is kinking the flexible supply lines. Make sure there’s a gentle, swooping curve from the valve to the faucet. A sharp bend restricts water flow and can lead to a burst line down the road.
While we’re focused on this manual installation, it’s worth noting how dominant they still are. Traditional faucets account for 83.7% of the market revenue. And with nearly 60% of all faucet jobs taking place in the bathroom, this is a skill every homeowner can benefit from. You can read more about these trends in this detailed faucet industry analysis.
Last but not least, let’s get the tub spout on. Most modern spouts either thread onto a pipe nipple coming out of the wall or are held in place by a small set screw underneath. If yours threads on, wrap the pipe threads with plumber’s tape before you screw it on to guarantee a watertight fit.
With everything connected, you’re just one step away from turning the water on.
The Final Check for a Leak-Free Finish
Alright, your new faucet is in and looks great. It’s tempting to pack up your tools and call it a day, but this last step is what really matters. Taking a few extra minutes for a thorough inspection is the difference between a job well done and a frantic call about water damage next week.
First things first, let’s get the water back on, but do it slowly. Head to your main shut-off and only open it about a quarter of the way. Giving the pipes a gentle reintroduction to pressure avoids that jarring “water hammer” jolt that can stress fresh connections. Let it run for a minute to bleed any air out of the lines.
Pinpointing Potential Leak Sources
Now it’s time to go on a leak hunt. Grab a flashlight and a few dry paper towels—they’ll show even the tiniest bead of moisture that your eyes might miss. You need to be methodical here and check every single connection you worked on.
Here’s your inspection checklist:
- Supply Line Connections: Get your flashlight and paper towel right where the hot and cold lines meet the shut-off valves and the faucet itself. These are the most common trouble spots by far.
- Faucet Base: Press a dry paper towel firmly all the way around the base of the faucet. If your plumber’s putty or silicone seal isn’t perfect, you’ll know right away.
- Spout and Diverter: Run the water and pull the diverter to send water to the showerhead. Check around the base of the tub spout for any sneaky drips.
Found a leak? Don’t panic and don’t just crank down on the fitting with a wrench.
That’s a classic rookie mistake that can easily strip the threads or even crack the fitting. The right way is to turn the water off, completely disconnect the leaking joint, and check the rubber washer inside. Make sure it’s clean and sitting perfectly flat, then reconnect and tighten it to that “snug plus a quarter-turn” sweet spot.
This final check is your best insurance policy. Once you’re 100% confident that every connection is bone-dry, go ahead and open the main water valve all the way. Now you can finally enjoy that new faucet.
Working Out the Kinks: Common Installation Problems
Even the most carefully planned projects can hit a snag. After you’ve put in all that effort, discovering a wobbly faucet handle or frustratingly weak water pressure can feel like a real setback. But don’t worry, these issues are usually easy to fix.
If your brand-new faucet feels unstable or just won’t sit flush against the tub deck, the problem is almost always underneath. The culprit is often mounting nuts that weren’t tightened evenly. It could also be some old plumber’s putty or sealant residue creating an uneven surface. The fix is simple: turn off the water, get back under there, loosen the nuts, and scrape the mounting surface completely clean before tightening everything back down.
Tackling Leaks and Low Water Pressure
Is the water flow disappointingly weak? This is a classic issue caused by sediment and debris getting stirred up in the pipes during installation. Thankfully, the solution is usually straightforward.
- Unscrew the aerator right at the tip of the faucet spout.
- You’ll find a small screen inside. Pop it out and rinse it thoroughly to remove any gunk.
- Screw the aerator back on, and you should be good to go. This simple cleaning solves the problem 90% of the time.
A slow, steady drip is another common headache. Before you start thinking you bought a faulty faucet, give every connection one more check to make sure it’s snug. If the drip persists, you might have a damaged O-ring or washer inside one of the fittings. For a deeper dive into hunting down drips, our guide to common leaky faucet repairs can walk you through it.
Remember, a DIY project can quickly become more expensive than a professional job if a small mistake leads to water damage.
While tackling it yourself is rewarding, it’s also smart to know when to call it a day. In the U.S., a professional faucet installation typically runs between $200 and $400. Sometimes, that peace of mind is worth every penny. You can get a better sense of the factors that influence faucet installation costs on PrecedenceResearch.com.
Your Top Bathtub Faucet Questions, Answered
Even with the best instructions, you’re bound to hit a snag or two when you’re elbows-deep in a plumbing project. That’s just part of the process. Getting a handle on these common questions can save you a lot of headache and maybe even a second trip to the hardware store.
Let’s tackle some of the most frequent “what-if” scenarios that come up during a faucet swap.
What If I Bought a Single-Handle Faucet for a Three-Hole Tub?
This is a classic one, but the solution is simple. You can absolutely install a modern single-hole faucet where an old three-hole model used to be. The trick is to use a deck plate (you’ll also hear it called an escutcheon).
This plate is designed specifically to cover up the two extra holes, giving you a clean, seamless surface for your new faucet. Many new faucets come with a matching deck plate right in the box. If yours didn’t, you can easily find one sold separately—just be sure to match the finish to your new fixture.
How Tight Is Too Tight for the Connections?
It’s tempting to crank down on the fittings with all your might, but that’s one of the biggest mistakes you can make. Over-tightening can crack the plastic nuts or crush the rubber washers, which ironically causes the very leaks you’re trying to prevent.
The rule of thumb I always follow is to tighten by hand first until it’s snug. Then, give it just a final quarter-turn with a basin wrench. That’s it. You want a firm seal, not a strained one.
Plumber’s Putty vs. Silicone: What’s the Difference?
These two are definitely not interchangeable, and using the wrong one will cause problems down the road. Here’s when to use each:
- Plumber’s Putty: This is your go-to for creating a waterproof seal under the faucet base or the drain flange. It stays soft and pliable, which is a huge advantage because it makes future removal a breeze. It’s meant to form a compression seal, not an adhesive one.
- Silicone Sealant: Think of silicone as a permanent adhesive. It’s perfect for sealing the outside edges where the faucet or deck plate meets the tub deck or tile. It cures hard and prevents water from splashing into gaps.
And one last pro tip: never, ever use putty on threaded pipe connections. That’s a job strictly for plumber’s tape.
If you’ve run into a snag or just want the peace of mind that comes with a pro installation, the team at Professional Plumbers Denver is always ready to help. We’ve seen it all and can get your new faucet installed perfectly in no time. Get in touch with us today for a fast, reliable service.

Recent Comments