
Getting your ducks in a row before you start a plumbing project is the secret to getting it done right. When it comes to installing a shut-off valve, this prep work is non-negotiable. It’s what separates a quick, clean job from a frantic, messy disaster.
You absolutely want to avoid that mid-project dash to the hardware store, especially with your home’s water turned off.
Prepping for a Leak-Free Installation
First things first, you need to choose the right valve for the job. Not all valves are created equal, and your choice will depend on your pipe material, your tools, and your comfort level with plumbing tasks.
You’ll generally run into three main types:
- Compression Valves: These are a solid choice for most DIYers. They work by tightening a nut that compresses a small brass ring, called a ferrule, onto the pipe to create a watertight seal. No special tools required, just a couple of wrenches.
- Push-to-Connect Valves: You’ve probably heard of the brand SharkBite—this is that style. They are incredibly easy to use. Just push the valve firmly onto a clean, squarely cut pipe, and a set of internal teeth grabs on for a secure, instant seal.
- Sweat (Solder) Valves: This is the old-school, pro-level method. It involves using a torch and solder to permanently join the valve to a copper pipe. While it creates an incredibly strong bond, it’s a skill that takes practice. If you’re not experienced with soldering, it’s best to stick with the other options.
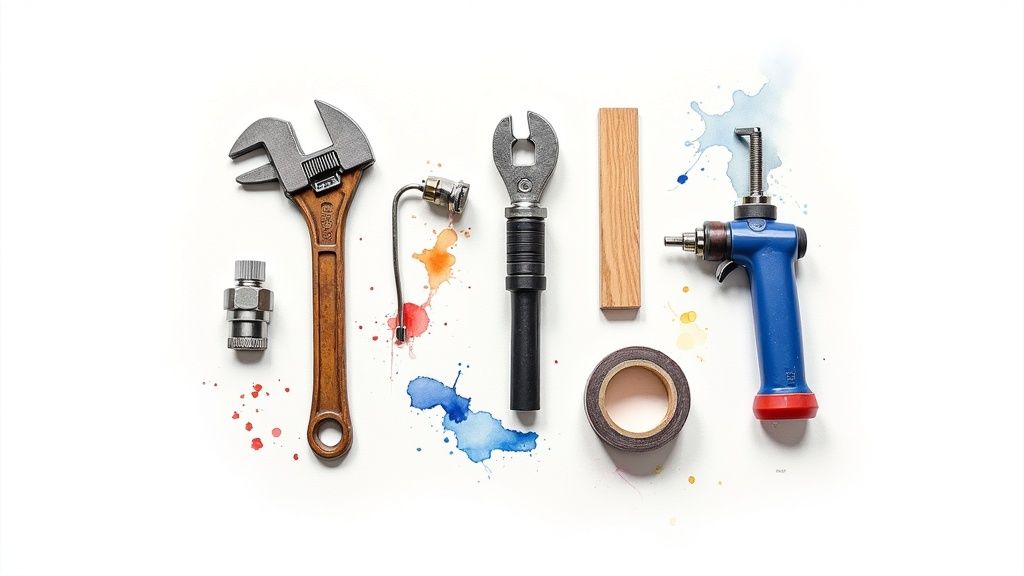
Your Toolkit and Materials
Picture yourself crammed under a sink. The last thing you want is to realize you’re missing a wrench. Having everything laid out and ready to go is crucial. For a complete rundown of a well-rounded plumbing kit, our guide on essential plumbing tools is a great resource.
Before you touch a pipe, make sure you have everything on this list ready to go.
Your Valve Installation Toolkit
| Item Category | Specific Item | Pro Tip |
|---|---|---|
| The Main Component | The new shut-off valve | Double-check that it matches your pipe’s size (e.g., 1/2 inch) and material (e.g., copper, PEX). |
| Wrenches | Two adjustable wrenches | You’ll need one to provide counter-torque on the pipe or fitting and the other to tighten the new valve nut. |
| Cutting & Cleaning | Pipe cutter | This gives you a much cleaner, straighter cut than a hacksaw, which is essential for a good seal. |
| Pipe Prep | Emery cloth or a deburring tool | Use this to smooth out any sharp edges or burrs on the pipe end after cutting. A rough edge can damage the seal. |
| Cleanup Crew | Small bucket and a few old towels | Even with the water off, there will always be some left in the line. Be ready to catch it! |
With your tools and materials all set, you’re ready to tackle the job with confidence.
A properly functioning shut-off valve is a cornerstone of modern plumbing. In fact, the global market for these essential components was valued at a massive USD 10.82 billion in 2024. This number really drives home how vital a good installation is, whether you’re a pro on a job site or a homeowner making a simple repair.
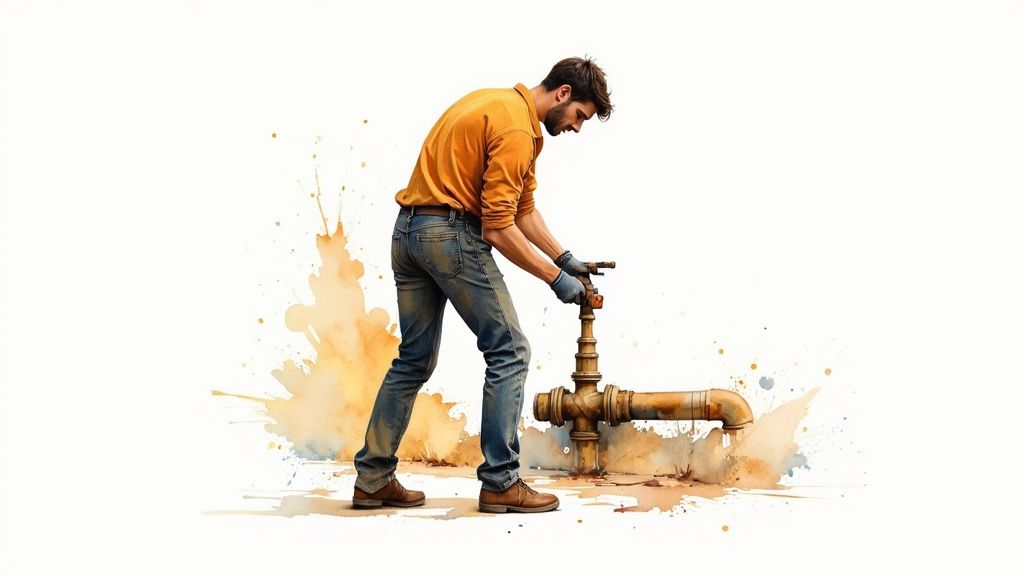
Removing the Old Valve and Prepping the Pipe
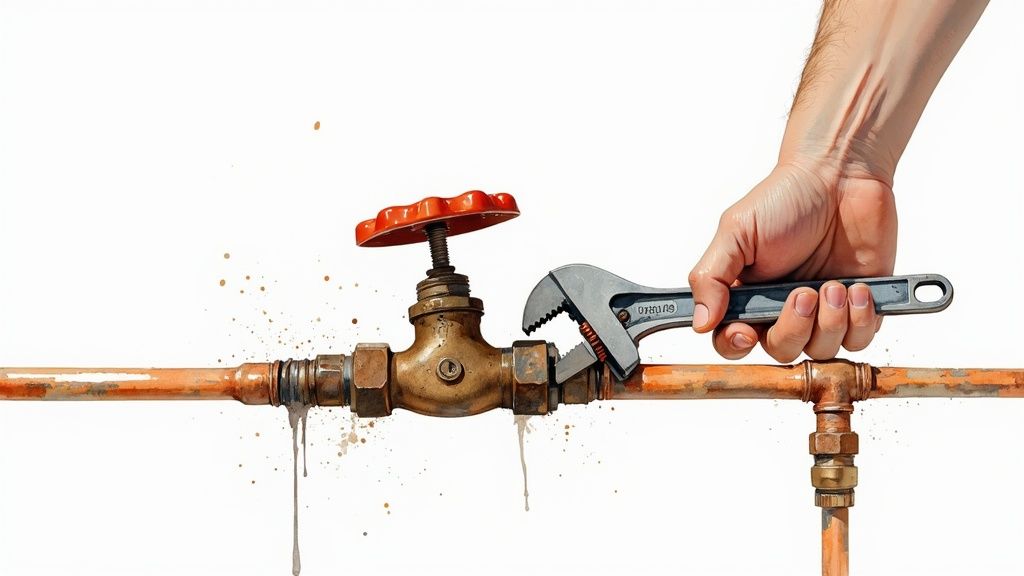
Alright, with the water shut off and your tools laid out, you’re ready to get your hands dirty. Getting the old valve off takes a bit of elbow grease, but the real key is using the right technique.
You’ll need two adjustable wrenches for this part. Use one to grip the pipe or fitting coming out of the wall, holding it completely still. Use the other wrench to turn the valve’s nut counter-clockwise to loosen it.
Why two wrenches? This is a non-negotiable pro tip. It stops you from accidentally twisting and damaging the pipe hidden inside the wall. Trust me, turning a simple valve swap into a major plumbing repair is a headache you don’t want. Don’t forget to slide your bucket underneath to catch any leftover water that will inevitably spill out.
Getting a Clean Cut for a Solid Fit
After you’ve wrestled the old valve off, take a close look at the end of the pipe. Chances are it’s a little rough or has old compression ring marks. You’ll want a fresh, clean surface for the new valve, which means you’ll probably need to make a new cut.
A tubing cutter is your best friend here. It’s designed to give you a perfectly square cut, which is absolutely critical for creating a watertight seal later on. A crooked cut, like one you might get from a hacksaw, is one of the top reasons for those annoying, slow drips.
From my experience, the biggest mistake people make is rushing the prep work. Taking an extra 60 seconds to clean and deburr the pipe is the single most important thing you can do to ensure the new connection is leak-free for the long haul.
Once you’ve made your cut, you’ll feel tiny metal or plastic burrs around the edge. You need to get rid of these. A simple deburring tool or even a small piece of emery cloth will smooth out the inside and outside edges of the pipe.
This quick step is crucial because those sharp burrs can easily slice or damage the O-ring or compression fitting on the new valve. A damaged seal means a definite leak. Once it’s smooth, your pipe is officially prepped and ready for its new valve.
Putting the New Shut Off Valve In Place
Alright, your pipe is prepped and ready to go. Now for the satisfying part: installing the new shut-off valve. How you tackle this depends entirely on which type of valve you picked out. We’ll cover the most common ones you’re likely to have on hand.
Installing a Compression Valve
Compression valves are a classic for a reason—they’re reliable. Getting them on right is all about developing a good feel for it.
First, slide the new compression nut over the end of the pipe, followed by the little brass ring called a ferrule. Once those are on, push the valve body itself onto the pipe until it stops.
Get the nut started by hand, tightening it onto the valve’s threads. Now, grab two wrenches. Use one to hold the valve steady and the other to tighten the compression nut. You’re aiming for a solid half to three-quarters of a turn past hand-tight. Don’t go crazy here; the goal is to create a tight seal without cranking down so hard that you damage the pipe or the ferrule.
This image lays out the critical safety checks you need to run through before starting any plumbing work.
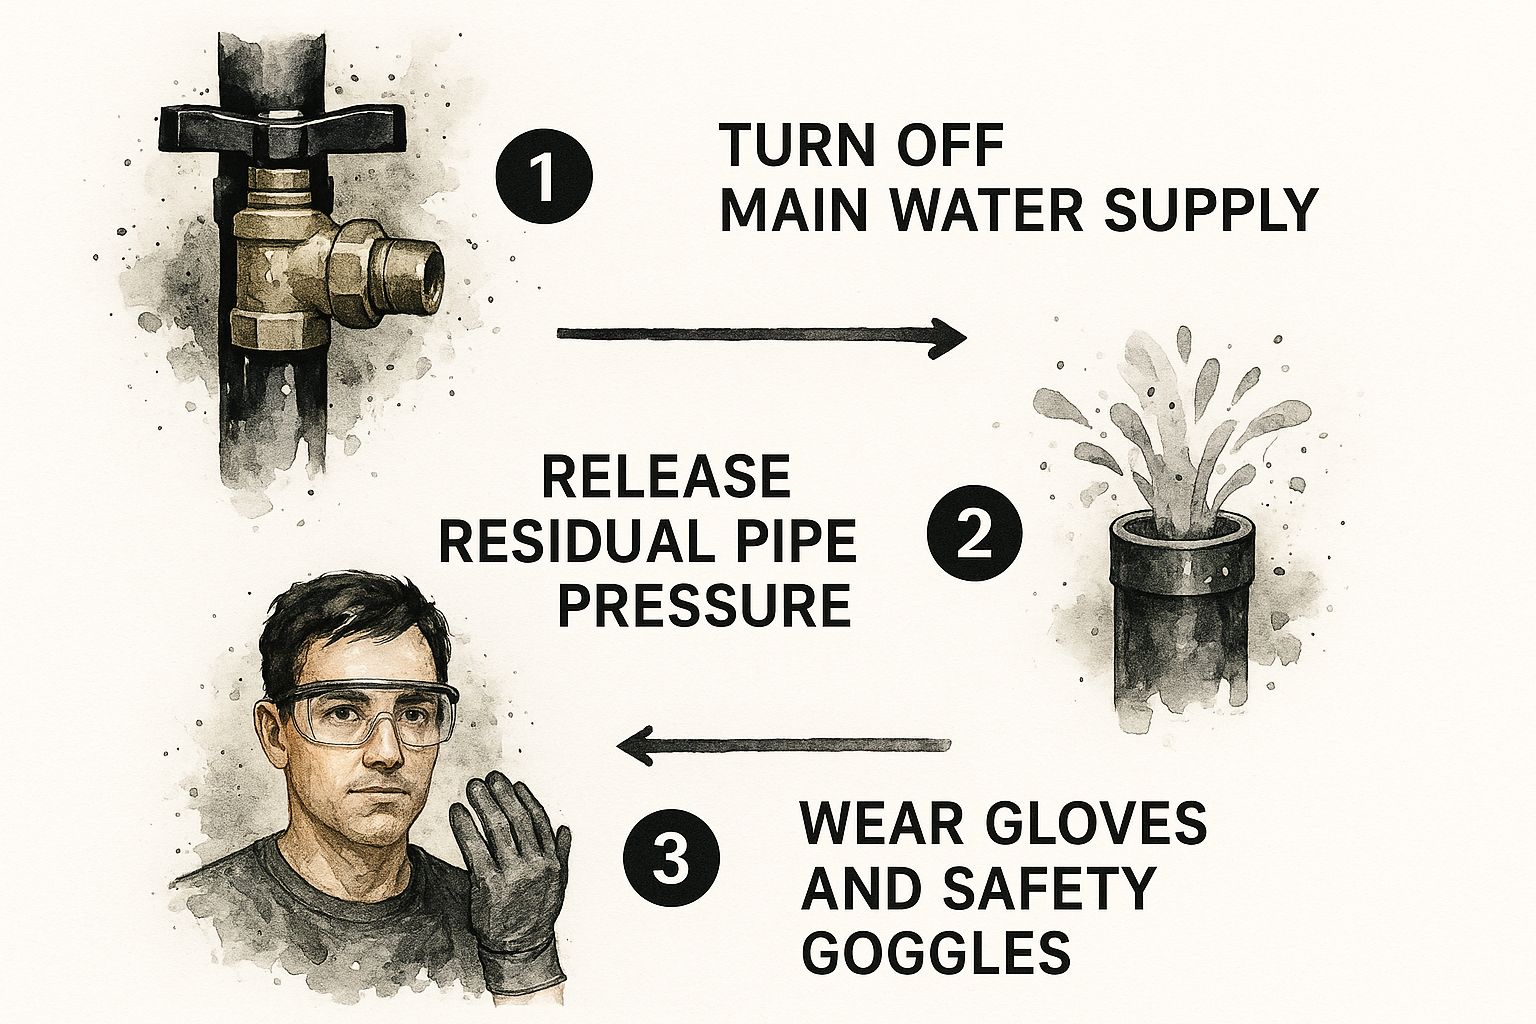
Seriously, don’t skip these. Following these three steps is the best way to prevent a mini-flood in your kitchen or a trip to the emergency room.
The Push-to-Connect Method
If you opted for a push-to-connect valve (like a SharkBite), you’re in for a much quicker job. The key here is a clean, perfectly round pipe end.
Simply push the valve straight onto the pipe with firm, even pressure. You’ll feel a distinct “click” or a solid seating sensation when it’s all the way on. And that’s it. The internal mechanism, with its O-ring and gripping teeth, does all the work to create a secure, watertight seal instantly.
A Little Trick I’ve Learned: Before you push the valve on, use the little depth gauge that comes with the fitting to mark the proper insertion depth on your pipe with a permanent marker. This gives you a clear visual confirmation that the valve is seated correctly and not just partially on.
The Sweat-on (Soldered) Valve
For the pros, soldering, or “sweating,” a copper valve is the gold standard. It creates a permanent, incredibly durable bond. After cleaning and fluxing both the inside of the valve and the outside of the pipe, you’ll heat the joint with a torch until the solder melts and flows into the gap through capillary action.
This method requires practice and a healthy respect for the open flame, but the result is a connection that will last for decades.
Comparing Valve Installation Methods
To help you decide, here’s a quick side-by-side look at these three common installation methods. This should give you a better sense of which one is the right fit for your project and your comfort level.
| Method | Best For | Difficulty Level | Key Consideration |
|---|---|---|---|
| Compression | DIYers and accessible areas where wrenches can be used easily. | Easy | Requires two wrenches and care not to over-tighten and damage the pipe. |
| Push-to-Connect | Quick repairs, tight spaces, and anyone wanting a tool-free installation. | Easiest | The pipe end must be perfectly clean, round, and free of burrs for a reliable seal. |
| Sweat (Solder) | Permanent installations by experienced DIYers or professionals. Creates the strongest bond. | Difficult | Involves an open flame, requires practice, and is not suitable for tight or flammable spaces. |
No matter which valve you choose, mastering the basics of a solid, leak-free connection is a skill that will serve you well. It’s the foundation of all plumbing.
Interestingly, even as technology evolves, these fundamental skills remain crucial. The market for smart water shut-off valves is on track to hit USD 5 billion by 2025, as more homeowners look for automated leak protection. But even those high-tech systems connect to your plumbing using these same tried-and-true methods.
If you want to practice these skills on a different fixture, this step-by-step guide on how to install a kitchen faucet is a great resource. The principles of creating a watertight connection are very similar and will help build your confidence.
Testing Your Work for a Leak-Free Seal
Alright, the new valve is installed. Now for the moment of truth. Before you go cranking the main water supply back on, hold on. Turning it on full blast can create a “water hammer,” which is a nasty pressure shockwave that can damage your pipes. Don’t risk it.
The right way to do it is to open the main water valve slowly. Just a quarter-turn will do for now. This lets the pressure build up gradually, giving you time to check your work. Keep your eyes glued to that new valve.
The Initial Leak Check
Get up close and personal with your new connection. Look at it from every conceivable angle. What you’re looking for is any sign of moisture—even the smallest bead of water forming around the nuts or where the valve body meets the pipe.
You should also listen for any subtle hissing sounds. Sometimes you can hear a leak before you can see it.
Pro Tip: Grab a dry paper towel and wipe it completely around the new connections. It’s an old-school trick, but it’s the best way to find a minuscule leak. Any dampness will show up instantly on the paper.
If you do spot a drip, don’t sweat it. The first step is to turn the main water supply off again immediately. If you installed a compression valve, try giving the compression nut another gentle one-eighth to a quarter-turn. Be careful not to overtighten. If that doesn’t solve it, you might need to take it apart and reseat the connection. For trickier leaks that just won’t quit, it might be time to read up on professional https://professional-plumbers-denver.com/blogs/plumbing-leak-detection/ techniques.
Once you’re absolutely certain the connection is bone-dry, go ahead and open the main water supply all the way. The final check? Test the valve itself. Turn the handle to the closed position to make sure it completely stops the flow, then open it back up. If it operates smoothly and everything is still dry, you can officially call this job a success.
Common Installation Mistakes and How to Avoid Them
Learning how to install a shut-off valve the right way often comes from knowing what not to do. I’ve seen it time and again—even experienced DIYers can make tiny missteps that turn into massive headaches down the road. But if you know what to watch out for, you can get a perfect, leak-free seal on your first try.
One of the biggest culprits? Over-tightening a compression fitting. It’s tempting to really wrench down on that nut, thinking tighter is better. But all you’re doing is crushing the small brass ring (the ferrule) and potentially denting the pipe itself. You can actually create a leak this way.
Another classic mistake is rushing the prep work. When you’re in a hurry, it’s easy to skip cleaning and deburring the end of the pipe after you cut it. This is a guaranteed recipe for a slow, nagging drip that can cause serious water damage over time.
Mismatched Parts and Sloppy Prep Work
Falling into the trap of using the wrong hardware is incredibly common. You have to make sure the valve you grabbed is actually rated for the job. A classic example is using a cold-water-only valve on a hot water line—it’s just not built for the heat and is bound to fail prematurely.
Here are a few other common missteps I see all the time:
- Forgetting to Deburr: Those little burrs and rough edges left after cutting a pipe will shred the O-ring inside a push-to-connect valve. They can also stop a compression fitting from seating flush, which means no proper seal.
- Using Teflon Tape on Compression Fittings: This is a big one. These fittings are engineered for a metal-on-metal seal. Wrapping the threads with tape actually gets in the way and can be the very cause of a leak.
- Cutting the Pipe Crooked: A clean, square cut is absolutely essential. If the pipe end isn’t perfectly straight, a push-to-connect fitting will never seal correctly.
A leak-free installation is about more than just convenience; it’s about preventing costly damage. Getting it right the first time is the most efficient approach to any plumbing project.
A solid, leak-free installation is also a huge part of modern water conservation efforts. In the EU, for instance, efficiency rules have pushed smart valves into about 25% of new installations to cut down on expensive water loss. You can read the full research about these global market trends.
Your Shut Off Valve Questions Answered
https://www.youtube.com/embed/0XmUoCkdhSo
Even a seemingly simple plumbing project can throw a few curveballs your way. Let’s walk through some of the most common questions that come up when you’re installing a new shut-off valve, so you can tackle the job with total confidence.
One of the first things you’ll have to decide at the hardware store is whether you need a straight valve or an angle valve. It all comes down to how your pipes are routed.
- If your water line comes straight out of the wall (horizontally), you’ll need an angle valve. This type makes a 90-degree turn to direct the water up toward the faucet or toilet.
- If the pipe comes up from the floor (vertically), a straight valve is what you need to keep the water flowing in a straight line.
Valve Lifespan And Compatibility
So, how long do these things even last? While there’s no strict expiration date, a solid rule of thumb is to replace them every 8-10 years. A perfect time to do it is when you’re already replacing the faucet or toilet it’s connected to.
Of course, if you see any obvious corrosion, mineral buildup, or find the handle is completely seized up, don’t wait—it’s time for a replacement.
Another frequent question is about those popular push-to-connect fittings. They’re incredibly convenient, but you can’t just use them on any old pipe. They work great on copper, PEX, and CPVC. However, they are not compatible with older galvanized steel or polybutylene pipes. For a good, leak-free seal, the pipe end needs to be clean, smooth, and perfectly round.
What if your brand-new valve leaks as soon as you turn the water back on? Don’t panic. First, shut off the main water supply again. If it’s a compression valve, try giving the nut a gentle quarter-turn. If that doesn’t stop the drip, you might have overtightened it and crushed the compression ring. In that case, you’ll need a new one.
And what if you can’t even get started because you’re not sure where the main water shut-off for your house is? This is a critical first step you absolutely can’t skip. Check out our guide on how to find the water main shut off to get you pointed in the right direction.
While doing it yourself can be rewarding, some plumbing jobs are best left to the experts. If you run into unexpected trouble or just want the peace of mind that comes with a pro’s touch, calling for professional plumbing services is always a smart move.
When you need a job done right without the hassle, the experts at Professional Plumbers Denver are ready to help. For reliable plumbing and drain cleaning services across the Denver Metro area, visit us at https://professional-plumbers-denver.com.

Recent Comments