
When you're ready to install an undermount sink, you’re basically gluing and clamping the sink basin to the bottom of your countertop. It’s a bit more involved than a drop-in sink, but the payoff is that clean, seamless edge where the counter meets the sink. It’s a game-changer for cleanup, letting you wipe messes straight into the basin.
The whole job really breaks down into three main parts: getting everything prepped, the actual mounting, and then all the finishing touches.
Why Choose an Undermount Sink?
Let's be honest, installing an undermount sink is more than just swapping out a fixture. It’s a serious upgrade for both the look and function of your kitchen or bathroom. The biggest draw is that totally flat, uninterrupted countertop.
I’ve found that the lack of a sink lip is what people love most. There's nowhere for food, gunk, and grime to get trapped. That simple act of wiping crumbs directly into the basin is a small daily joy you'll appreciate right away. This sleek design is a huge part of why they've become so popular.
A Growing Trend in Home Design
It’s not just you—these sinks are definitely having a moment. The global market for undermount sinks hit about USD 1.5 billion recently and is on track to climb to around USD 2.3 billion by 2033. That boom is tied directly to the trend toward minimalist design and the recent surge in home renovation projects. If you're curious about the numbers, you can explore the undermount sink market's growth trends.
To help you get from start to finish, I've broken down the project into a clear roadmap.
Undermount Sink Installation Phases at a Glance
This table gives you a quick overview of what to expect at each stage of the project. Think of it as your high-level game plan.
| Phase | Primary Goal | Key Activities |
|---|---|---|
| Preparation | Set the stage for a perfect, secure fit. | Gather tools, clean surfaces, dry-fit the sink, and mark clip locations. |
| Mounting | Create a permanent, waterproof bond to the counter. | Apply silicone adhesive, position the sink, and tighten the mounting clips. |
| Finishing | Make the sink fully operational and professional. | Connect plumbing, check for leaks, and clean up excess adhesive. |
Having a clear understanding of these phases helps prevent you from feeling overwhelmed and ensures you don't miss a critical step along the way.
My goal here is simple: to give you the confidence and the practical steps to do this job yourself. We’re aiming for a secure, professional-looking installation that will last for years.
While this guide dives deep into the undermount process, you can find broader tips applicable to all models in our general guide on how to install a kitchen sink. We'll cover everything from the must-have tools to navigating those little problems that always seem to pop up, so you can get that flawless finish in your own home.
Getting Your Tools and Materials in Order
A successful sink installation is all about preparation. Trust me, the last thing you want is to be halfway through, holding a heavy sink in place, only to realize you're missing a crucial part. A mid-project run to the hardware store is a recipe for frustration. Let's avoid that.
Think of this as your pre-flight checklist. Getting everything you need lined up now will make the actual installation feel smooth and controlled.
The Absolute Essentials
You can’t cut corners on these items. Using the wrong stuff here is asking for leaks, mold in your cabinet, or a sink that sags over time. Don't compromise.
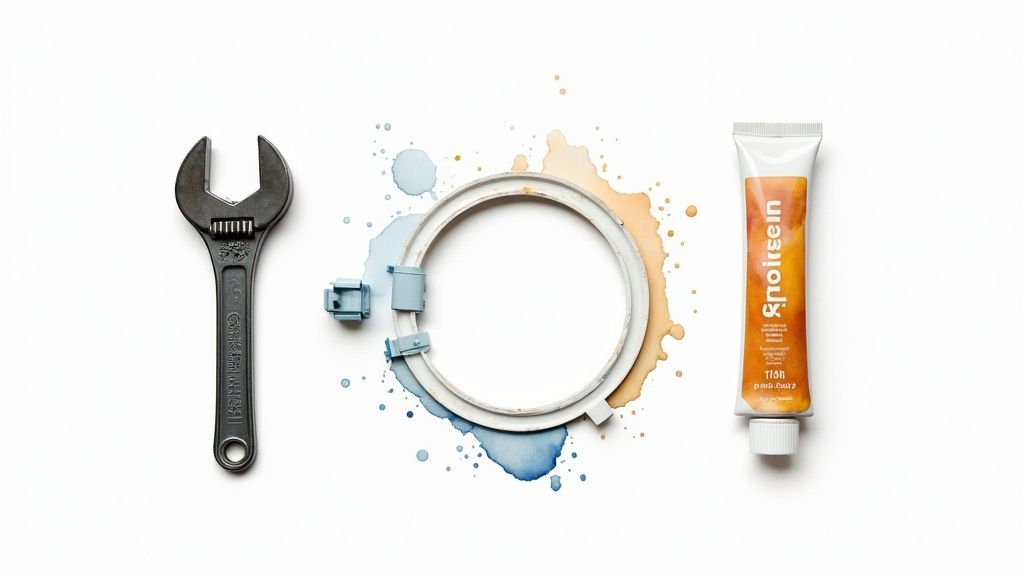
- 100% Silicone Adhesive: This is your most critical purchase. I'm not talking about regular painter's caulk or a latex blend—it absolutely must be 100% silicone. It’s completely waterproof, stays flexible, and creates the heavy-duty bond required to both support the sink's weight and keep water out of your cabinet.
- Denatured Alcohol: Adhesives hate grease and dust. Before you apply a single drop of silicone, both the sink rim and the underside of the counter need to be surgically clean. Denatured alcohol cuts through any manufacturing oils or grime, giving the silicone a perfectly prepped surface to grab onto.
- Mounting Clips: These are not a one-size-fits-all item. The clips you need are determined by your countertop material. The anchors for granite and quartz are very different from what you’d use on a wood, solid surface, or laminate counter. Always double-check what your sink's manufacturer recommends for your specific setup.
It's no surprise that many sinks are stainless steel; it's tough, looks great, and resists rust. In fact, the market for stainless steel undermount sinks hit a value of about USD 1.2 billion and continues to climb, which just shows how much people trust this material. You can find more details about undermount sink market trends on Data Insights Market.
Gear That Makes the Job Much Easier
These next few items aren't strictly required, but from my experience, they separate a good-enough job from a professional-quality installation. This is especially true if you’re working solo.
My single best piece of advice for anyone installing an undermount sink is to build a simple support brace. It’s like having an extra set of hands that never gets tired, holding the sink perfectly in place while the silicone cures.
Here’s how you build that support system:
- A 2×4 Wood Stud: Find one and cut it so it’s a few inches longer than your sink basin is wide.
- Bar Clamps (at least one, two is better): You’ll run this up from the 2×4 brace, through the sink's drain hole, and secure it to another piece of scrap wood resting across the top of the counter opening.
This simple rig applies steady, even pressure, squeezing the sink up against the countertop. It guarantees you get a watertight seal while you have your hands free to tighten the mounting clips and let everything set properly. It’s a game-changing trick that delivers a perfect result every single time.
Prepping Your Countertop and Sink for a Perfect Fit
Alright, let’s get into the most critical part of this whole project. If I’ve learned one thing over the years, it’s that a successful undermount sink installation is all in the prep work. Skipping or rushing these steps is the single biggest reason sinks fail—you end up with a weak bond, a slow drip, and a huge headache down the road.
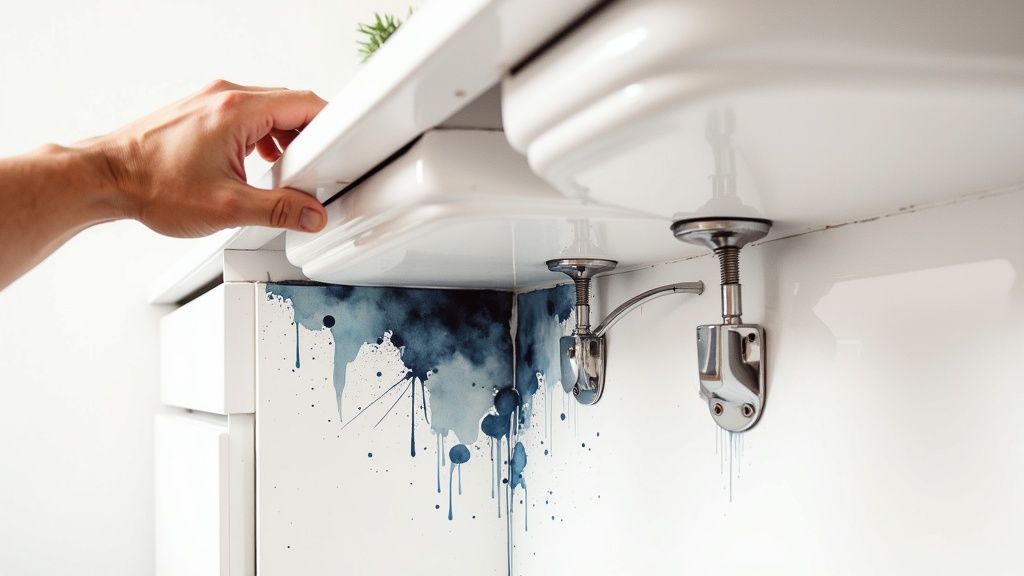
First things first, you need a pristine surface for that adhesive to grab onto. Grab a rag and some denatured alcohol. Give the underside of the countertop around the cutout and the entire top rim of the sink a thorough wipe-down. You’re getting rid of any grease, dust, or factory residue that could compromise the silicone's grip.
The All-Important Dry-Fit
Before you even touch that tube of silicone, you have to do a dry-fit. This is your one and only chance to spot problems while they’re still easy to fix. Carefully lift the sink up and press it firmly against the underside of the countertop.
You're looking for two things:
- Perfect Alignment: Is the sink centered exactly where you want it? Nudge it around until it’s perfect.
- A Flush Fit: Run your fingers along the seam. Does the sink’s rim sit completely flat against the countertop all the way around?
If you notice any gaps, it might mean the sink rim is slightly bowed or the counter has a low spot. Don't panic. You can use small shims (plastic or wood) during the final install to fill these tiny gaps and ensure solid, even contact. Just make a mental note of where they need to go.
A lot of people assume a brand-new sink and countertop are ready to go. Take it from me, that five-minute check—a quick wipe and a dry-fit—can save you from a major leak and hours of frustration later. It's the most important quality check you'll do.
Mark Out Your Mounting Clip Locations
While you have the sink held up there for the dry-fit, grab a pencil. This is the perfect time to mark where your mounting clip anchors will go. Your sink's instructions should give you a guide, but a good rule of thumb is to space them out evenly. For most kitchen sinks, aim for at least two clips on each of the long sides and one on each of the short sides.
Marking these spots now is infinitely easier than trying to do it blind when the sink is gooped up with wet silicone.
Protect Your Countertop Material
Now, not all countertops are created equal, especially when it comes to water. You need to prep the cutout edge based on the material you're working with.
| Countertop Material | Special Prep Needed |
|---|---|
| Granite & Quartz | These are solid, non-porous materials. Your main job is just that thorough cleaning with denatured alcohol. |
| Butcher Block | The exposed wood grain in the cutout is like a sponge. It must be sealed with a tough, waterproof finish like polyurethane or even a thin coat of epoxy. |
| Laminate | This is absolutely critical. You have to seal the exposed particleboard edge. A good two-part epoxy will create a rock-hard, waterproof barrier that water can't penetrate. |
If you don't seal a porous material like butcher block or the particleboard core of a laminate top, you're guaranteeing its destruction. Water will eventually find its way in, causing swelling and delamination.
Build a Simple Support Frame (A Pro-Level Trick)
Want to know a secret that makes this job ten times easier? Build yourself a simple support frame. This holds the sink perfectly in place, freeing up both of your hands to work.
It's easy. Lay a sturdy 2×4 across the sink opening on top of the counter. Then, from inside the cabinet, position another 2×4 directly underneath it. Now, run two long bar clamps up through each of the sink's drain holes. Hook one end of the clamp to the bottom 2×4 and the other end to the top 2×4.
As you slowly tighten the clamps, they'll lift the sink and press it against the countertop with steady, even pressure. This simple rig is your best friend for the next few steps, trust me.
Securing the Sink: Applying Adhesive and Mounting Clips
Alright, this is the moment of truth. All your prep work—the cleaning, the dry-fitting, the support setup—has led to this point. Now we're going to permanently fix that sink in place. A steady hand and a bit of patience here will pay off for years to come.
Applying a Perfect Bead of Silicone
Applying the silicone is the point of no return, so let’s get it right. You’re looking for a single, continuous bead of 100% silicone all the way around the top rim of the sink. Aim for a consistent bead about 3-4 millimeters thick. Think about the width of two dimes stacked on top of each other. Too little silicone and you’ll be hunting down a leak later; too much, and you’ll have a real mess to clean up.
Grab your caulk gun and start at one of the back corners. Apply the silicone in one smooth, unbroken motion. If you stop and start, you create potential failure points in the seal. The goal is to lay down a perfect “snake” of sealant that will compress nicely and create a watertight gasket between the sink and the countertop.
My go-to tip for this: Cut the nozzle of your silicone tube at a sharp 45-degree angle. This gives you much better control and lets you lay down a really clean, uniform bead as you guide it along the rim. A clean cut makes all the difference for a professional-looking line.
Don't hang around once the silicone is on. It starts to form a skin pretty quickly, so you need to get the sink into position while the adhesive is still wet and pliable.
This image breaks down the core principles for getting that perfect, waterproof seal.
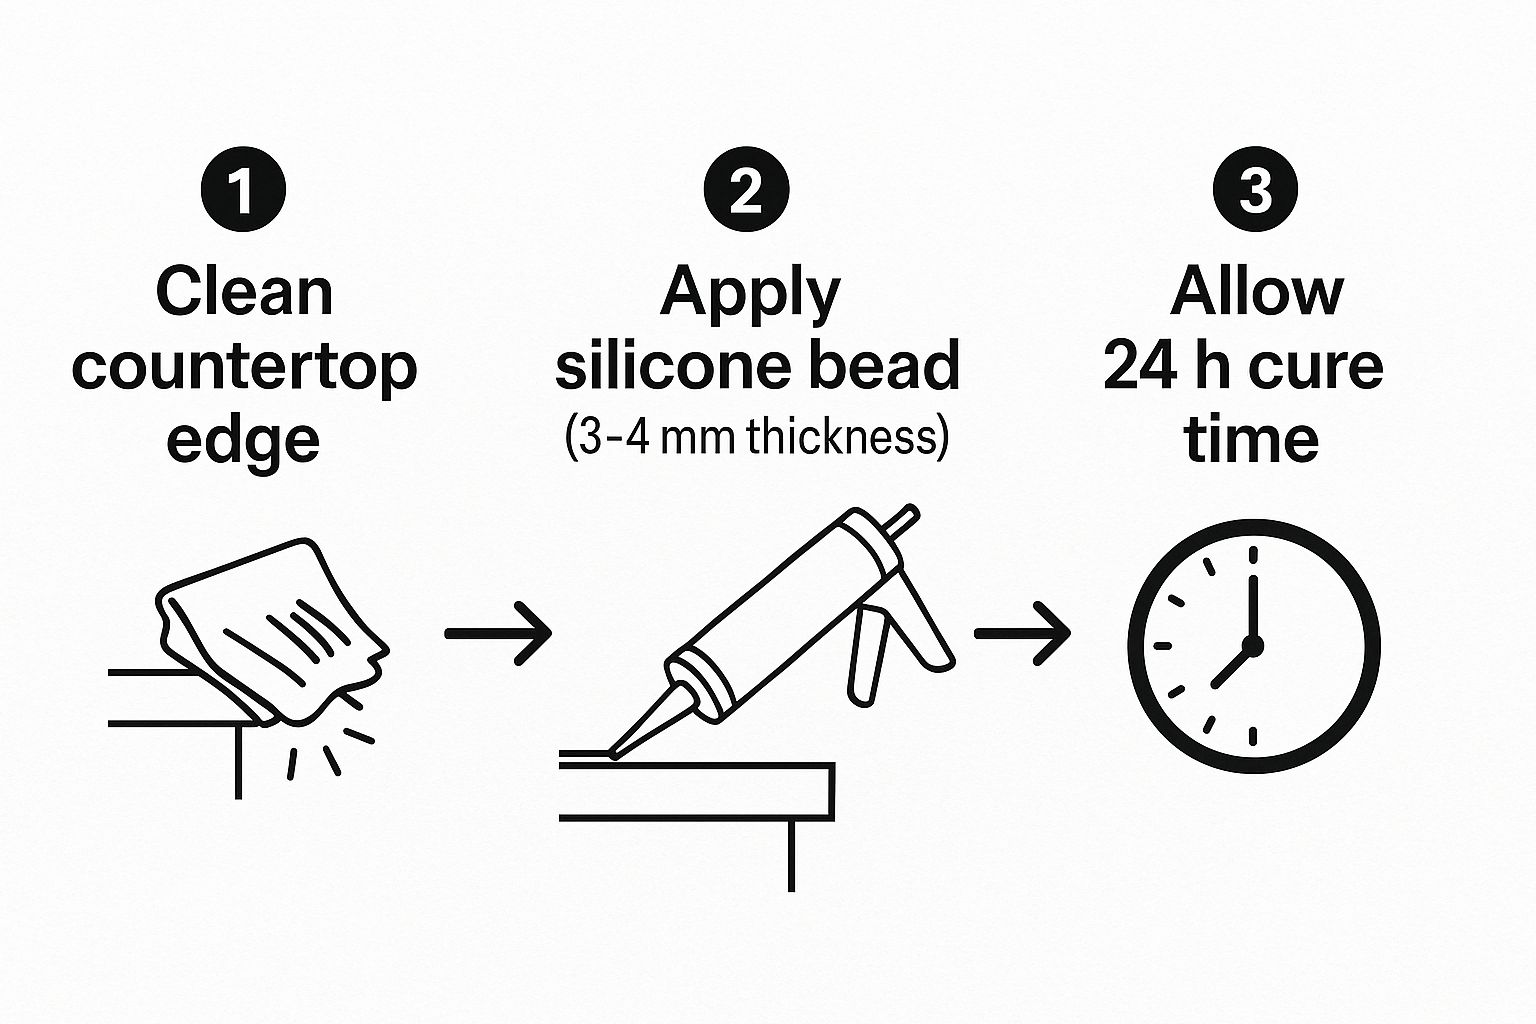
As the graphic shows, it really boils down to three simple but critical actions: make sure everything is clean, apply the right amount of adhesive, and respect that 24-hour cure time before you move on to plumbing.
Lifting and Securing the Sink
Using your support frame (or a helpful friend), carefully raise the sink up into place beneath the counter. Slowly start tightening your bar clamps or raising your support, keeping a close eye on the alignment. You want it to match up perfectly with the pencil marks you made during the dry fit.
As you apply pressure, you should see a small, even amount of silicone squeeze out around the entire perimeter. That’s a great sign! It tells you you’ve got a complete, gap-free seal.
Wipe away that excess squeeze-out immediately. A rag lightly dampened with some denatured alcohol or mineral spirits works best. Trust me, it's a hundred times easier to clean this up now than it is to chisel off cured silicone tomorrow.
With the sink held firmly by the supports, it's time for the mounting clips. These are the mechanical fasteners that do the real heavy lifting. While the silicone creates the waterproof seal, the clips are what will hold the weight of a sink full of water and dishes for the long haul.
Choosing and Installing the Right Mounting Clips
Not all countertops are created equal, and the clips you use are specific to the material you’re working with. Using the wrong hardware is a recipe for a failed installation down the road.
Here’s a quick guide to help you pick the right clips for your project.
Mounting Clip Guide for Different Countertops
| Countertop Material | Recommended Clip Type | Installation Notes |
|---|---|---|
| Granite or Quartz | Stud-and-Wingnut Clips | You'll need to drill shallow holes into the underside of the stone to set threaded studs with a strong epoxy. The clip then slides over the stud and is tightened down with a wingnut. |
| Solid Surface | Adhesive-Mount Studs | These are a great drill-free option. A special two-part epoxy is used to glue a mounting stud directly onto the countertop. The clip is then secured to that stud. |
| Butcher Block or Wood | Wood Screw Clips | The simplest of the bunch. The clip has a hole allowing you to drive a wood screw straight into the underside of the counter. Just be careful to use a screw short enough that it won't pop through the top! |
Regardless of which clip you're using, the tightening sequence is key.
Think of it like tightening the lug nuts on a car tire—you want to apply even pressure. Start by tightening one clip until it's just snug. Then move to the clip on the opposite side of the sink and do the same. Continue this star pattern, moving from side to side, until all the clips are snug.
This method prevents the sink from warping or shifting, ensuring you get a perfectly even seal all the way around. Once they're all snug, go around one last time and give each one a final quarter-turn to lock it securely in place.
Finishing Touches and Connecting the Plumbing
Alright, the sink is in place and looking sharp. It's tempting to call it a day, but this last stretch is where we turn that basin into a fully functional fixture. Before you do anything else, though, the most important tool you have right now is patience.
I can't stress this enough: you have to let that silicone adhesive fully cure. Give it a solid 24 hours. Seriously, don't touch it. I've seen homeowners get impatient, start working too soon, and break the seal they just spent hours creating. The result? A slow, frustrating leak that can cause real water damage. Just let it sit.
After that 24-hour wait is up, you can finally take out the 2×4 support brace and remove the clamps. The combination of the cured silicone and those mounting clips is now more than strong enough to hold the sink for good.
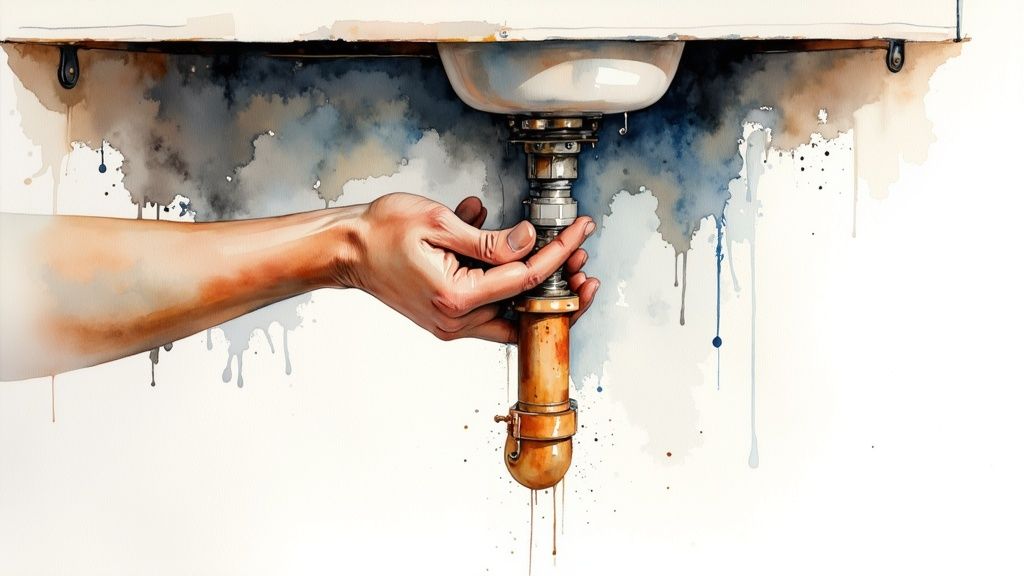
Connecting Your Plumbing Fixtures
With the support brace out of the way, you’ve got clear access to reinstall the faucet and drain. If you haven't already mounted the faucet to the countertop, now's your chance. Gently feed its supply lines through the holes and tighten it down from underneath, following the manufacturer’s guide.
Next up is the drain assembly. This means installing the sink strainer and, if you have one, reconnecting the garbage disposal. Pay close attention to the gaskets here—make sure they’re seated perfectly to get that watertight fit. Once that's done, you can piece the drain lines and the all-important P-trap back together.
The P-trap is that U-shaped bend in the pipe right under the drain. It’s designed to hold a little bit of water, which acts as a barrier to keep nasty sewer gases from coming up into your kitchen. Getting this part right is non-negotiable for a safe, smell-free home.
If you want to get a better handle on how this piece works, our guide explains in detail what a P-trap is and why it's so vital.
Preventing Drips and Checking for Leaks
As you start hooking everything back up, a couple of old-school tricks will save you a lot of headaches. For any threaded connections, like your water supply lines, wrap the threads with plumber's tape two or three times. Always wrap it in the same direction you'll be turning the nut (clockwise) to tighten it. This helps the tape stay put and create a better seal.
When you're dealing with plastic drain fittings, be gentle. Hand-tighten them first to get them snug, then give them just one last quarter-turn with a wrench. It's incredibly easy to overtighten and crack plastic, which is a guaranteed leak.
Now for the moment of truth. Turn the main water supply back on and let the water run—both hot and cold. Fill the sink up a bit, then let it drain while you inspect every single joint. Check the faucet lines, the strainer, the P-trap connections, everything. My favorite trick is to run a dry paper towel along the bottom of each connection; it’ll show you even the tiniest bead of moisture you might have missed.
Common Undermount Sink Installation Questions
No matter how thorough a guide is, you'll almost always run into a few head-scratchers during a real-world project. It's just part of the DIY process. So, let’s go over some of the most common questions and hangups I see when people are tackling an undermount sink for the first time. Getting these right can be the difference between a minor hiccup and a major headache.
One of the first things you have to decide on is how the countertop edge will meet the sink. This is what we call the "reveal," and there’s no single right answer—it really comes down to the look you want and how you like to keep things clean.
Choosing Your Countertop Reveal
The reveal style you pick has a big impact on both the look and the everyday function of your sink.
- Positive Reveal: This is where you can see a bit of the sink's rim because the countertop is cut slightly wider than the sink opening.
- Negative Reveal: A very popular choice. The countertop hangs over the edge of the sink by about 1/8 inch. It neatly hides the silicone bead and lets you wipe crumbs straight from the counter into the sink. Super practical.
- Zero Reveal: Also called a flush mount, this is where the countertop lines up perfectly with the sink walls. It offers the cleanest, most seamless look but requires an extremely precise cut.
In my experience, a negative reveal is the most forgiving and functional for most kitchens. But if you're chasing that sleek, modern aesthetic and have a skilled installer (or a very steady hand), a zero reveal is hard to beat. Always check your sink's specs, as some manufacturers recommend a specific style.
Installing an Undermount Sink with Laminate
I get this question all the time. The short answer is yes, you can, but you have to be extremely careful. Standard laminate countertops have a particleboard or MDF core, which is like a sponge for water. If moisture gets in, it will swell and completely ruin your countertop. It's a costly mistake.
To do this successfully, you need to use a sink designed specifically for laminate or be absolutely militant about sealing the exposed edge of the countertop cutout. Before you even think about mounting the sink, you have to apply a totally waterproof sealant—a two-part epoxy is your best bet—to create an impenetrable barrier.
Never install a standard undermount sink with a laminate top without sealing the raw edge. This is the single most critical step to prevent long-term water damage and ensure the integrity of your countertop.
Dealing with an Uneven Fit
What do you do if you dry-fit the sink and notice a gap where it doesn't sit perfectly flat against the countertop? Don't panic. First, double-check that the countertop itself isn't bowed. If you find a low spot, the fix is pretty simple: use shims.
During your dry fit, slide small plastic or composite shims into the gaps to see how many you need. Then, when you do the final installation, apply your silicone adhesive and put the shims back in place before tightening the mounting clips. This ensures you get even pressure all the way around for a solid, gap-free seal.
It’s a straightforward fix for a common problem. Speaking of problems, sometimes low water pressure can be mistaken for other plumbing issues. It’s always smart to know your home’s baseline; you can learn more in our guide on how to test water pressure.
If you encounter a plumbing challenge that feels beyond a DIY fix, don't hesitate to call in the experts. Professional Plumbers Denver offers comprehensive services across the Denver Metro area, from emergency repairs to full installations. Reach out to us for reliable, experienced plumbing solutions at https://professional-plumbers-denver.com.

Recent Comments