
Replacing a bathtub drain is one of those DIY jobs that looks intimidating but is totally manageable. At its core, you’re just unscrewing the old drain flange, cleaning everything up, and sealing a new one in its place. The secret weapons for getting a perfect, leak-free seal are a simple drain wrench and some fresh plumber’s putty. Nail this, and you’ll head off potential leaks and get your tub draining like new again.
Knowing When to Replace Your Bathtub Drain
It’s easy to put off replacing a drain, but it’s about more than just looks—it’s about stopping water damage before it starts. A faulty drain might seem like a small thing, but a slow, persistent leak can quietly destroy your subfloor or the ceiling below.
Before you go all-in and start buying parts, you need to be sure the entire drain assembly is the problem. A lot of times, people see a broken stopper and assume the whole thing is shot. Swapping a stopper is a five-minute fix, but it won’t do a thing if the drain flange itself is corroded or leaking.
Sometimes it’s obvious your drain has seen better days, but other times the signs are more subtle. Here’s a quick rundown of the common red flags that tell you it’s time for a replacement.
Key Indicators Your Bathtub Drain Needs Replacing
| Symptom | What It Looks Like | Potential Risk If Ignored |
|---|---|---|
| Persistent Leaks | Water stains on the ceiling below the tub, damp drywall, or pooling water around the base of the bathtub. | Serious water damage to subfloors, ceiling joists, and potential for mold growth. |
| Visible Corrosion or Rust | The chrome or metal finish on the drain flange is flaking, pitted, or showing clear signs of rust. | The corrosion creates gaps that break the watertight seal, leading to slow, hidden leaks. |
| Stripped or Broken Crossbars | You look down into the drain and the small metal ‘X’ inside is cracked, corroded away, or gone. | You won’t be able to get a grip with a drain wrench to remove the old drain. |
| The Drain Won’t Seal Properly | You close the stopper, but the water slowly drains out of the tub anyway. | The flange surface is likely warped or uneven from corrosion, preventing a new stopper from seating correctly. |
If you spot any of these signs, a full drain replacement is definitely the right call. You’re tackling the root of the problem instead of just putting a bandage on it.
The Problem with Aging Plumbing
So, why do these drains fail in the first place? It often just comes down to age. Think about it: a huge chunk of American homes have plumbing systems that have been working hard for decades. In fact, over 27% of the U.S. housing stock was built before 1960. That means millions of us are dealing with plumbing that’s well past its expected lifespan. If you want to dive deeper into market trends, you can discover more insights about the global drain market at Dataintelo.
Pro Tip: Don’t automatically blame a slow drain on a clog. If you’ve snaked out all the hair and gunk but the water still backs up, take a close look at the drain flange itself. A corroded or damaged flange can create a “lip” that obstructs water flow. Trying to fix it with chemicals is a waste of time; a full replacement is the only way to get things flowing smoothly again.
Gathering the Right Tools and Materials
There’s nothing more frustrating than getting halfway through a project only to realize you’re missing a critical tool. Replacing a bathtub drain is a straightforward job, but having the right gear on hand from the start is what separates a quick one-hour fix from a day full of trips to the hardware store.
Before you even think about touching that old drain, let’s get everything you’ll need laid out and ready to go. A little prep work now will save you a massive headache later.
Essential Tools for the Job
Your success here really boils down to having a few specific tools. You probably have most of what you need already, but one or two are specialized for plumbing and absolutely worth getting.
Here’s your must-have list:
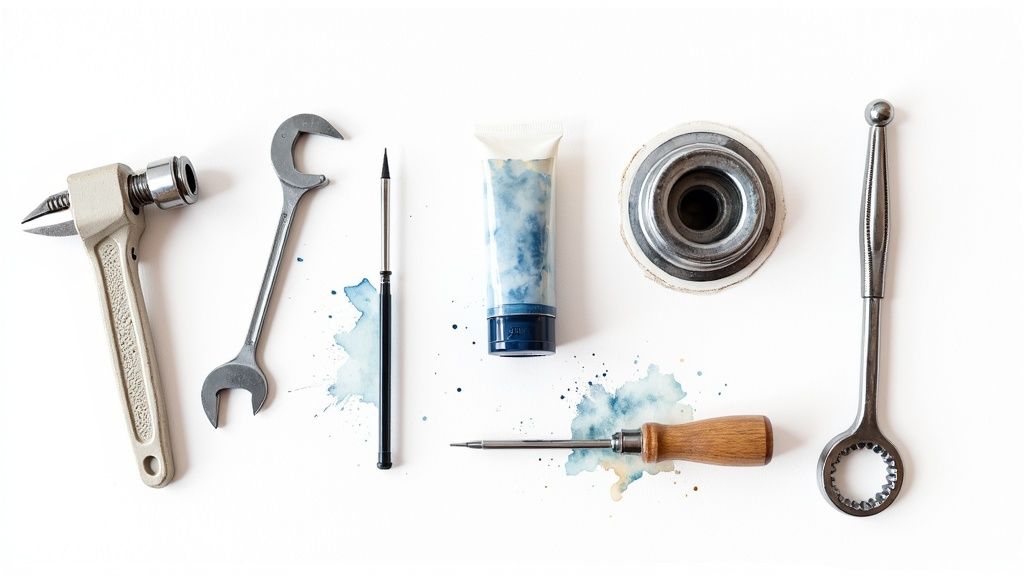
- Drain Wrench (Dumbbell Wrench): This is the star of the show. It’s designed to fit perfectly into the crossbars of the drain flange, letting you apply torque to unscrew it without breaking anything. This is a non-negotiable tool.
- Channel-Lock Pliers: You’ll want a large pair of these. Their adjustable jaws are perfect for gripping and turning parts of the drain assembly, especially if you have access to the drain shoe from below.
- Screwdrivers: Grab both a flathead and a Phillips head. The screws on your overflow plate could be either type, and you won’t know until you get in there.
- Utility Knife: A sharp blade is essential for slicing through old, stubborn silicone or putty that’s practically glued the old drain flange to the tub.
- Rags and Towels: You’ll definitely need these for cleaning up old gunk, wiping away excess sealant, and keeping your work area from becoming a wet mess.
If you’re looking to build out your home plumbing kit, our guide on essential plumbing tools is a great place to start.
A Quick Note on Drain Wrenches
Seriously, don’t try to use a hammer and screwdriver to chisel the old drain out. I’ve seen it tried, and it almost always ends in disaster—either broken crossbars or a chipped tub finish. A proper drain wrench is less than $20 and is built for exactly this task. It’s a small price to pay to avoid a much bigger problem.
Materials for a Watertight Seal
With your tools ready, it’s time to think about the materials that will create that all-important leak-proof seal. This is where you don’t want to cut corners.
Choosing Your Sealant
You’ve got two main choices here: good old plumber’s putty or a modern silicone sealant. Both work, but they have their pros and cons.
- Plumber’s Putty: This is the traditional, go-to option for a reason. It’s a pliable, oil-based compound that stays soft, which makes any future drain removals much easier. You just roll it into a rope and press it into place—it’s incredibly simple to work with.
- Silicone Sealant: Silicone creates a very strong, flexible, and waterproof bond. The downside is that it’s more of an adhesive, which can make removing the drain next time a real battle. If you go this route, make sure you get 100% silicone rated for kitchens and baths to prevent mold.
For most standard acrylic or enameled cast-iron tubs, I almost always recommend plumber’s putty. It’s reliable, effective, and forgiving.
The Right Replacement Drain Kit
Finally, you need the new drain itself. Bathtub drains aren’t all the same, so you have to buy the correct replacement kit for your specific stopper type.
Here are the most common styles you’ll run into:
- Lift-and-Turn: Has a little knob on top of the stopper. You lift and twist it to open or close the drain.
- Push-Pull (or Toe-Touch): The easiest to operate. You just push it down with your foot or hand to close it and push again to pop it open.
- Trip-Lever: This style has a lever on the overflow plate. Flipping the lever moves a plunger inside the drain pipe to stop or release the water.
The easiest way to get the right part is to just snap a quick photo of your current drain and overflow plate with your phone before you head to the store. Show it to an associate, and they’ll be able to point you to the exact match, guaranteeing a perfect fit.
Removing the Old Bathtub Drain
Alright, you’ve got your tools ready to go. Now comes what is often the trickiest part of this whole job: getting the old drain out. After years of mineral buildup, corrosion, and putty that’s practically turned to concrete, these things can be seriously stubborn.
But don’t worry. With the right approach and a bit of patience, you’ll get it out without damaging your tub. Remember, this is a job for finesse, not brute force. We’re going to tackle this step-by-step, starting with the stopper and overflow, then moving on to the main drain flange itself. A methodical approach here will make installing the new one a breeze.
Dismantling the Stopper and Overflow Plate
First things first, let’s get the visible parts out of the way. Your tub probably has one of a few common stopper types, and each comes apart a little differently. It’s usually pretty simple.
For a lift-and-turn or push-pull stopper, it’s a quick job:
- Pop the stopper open.
- Hold the main body of the stopper steady with one hand.
- Unscrew the little knob on top, turning it counterclockwise. If it’s slick or stuck, a rag and a pair of pliers will give you the grip you need.
- Once the knob is off, you’ll see a small brass post. Just use a flathead screwdriver to back it out, and the whole stopper will lift right out.
Got a toe-touch (or push-button) style? Even easier. Just push it to the open position and unscrew the entire cap counterclockwise. It should spin right off its post.
Next up is the overflow plate—the metal disc on the tub wall, usually held in with one or two screws. Unscrew it and gently pull it away. If you have a trip-lever, the whole linkage contraption will come out with it. Fair warning: be prepared for a nasty clump of hair and gunk to come along for the ride.
Unscrewing the Main Drain Flange
Now for the main event: pulling the drain flange. This is the metal ring sitting in the bottom of the tub, and it’s the component that puts up the biggest fight. The plumber’s putty has hardened, and the threads are likely seized. This is where your drain wrench proves its worth.
Bathtub drains have come a long way since they were first introduced. Early versions in the late 19th century were pretty basic, but designs quickly improved to create the tight, reliable seals we see today. If you’re interested in the history of these components, you can explore detailed market insights on Grandview Research.
This picture shows you exactly how a drain wrench works its magic.
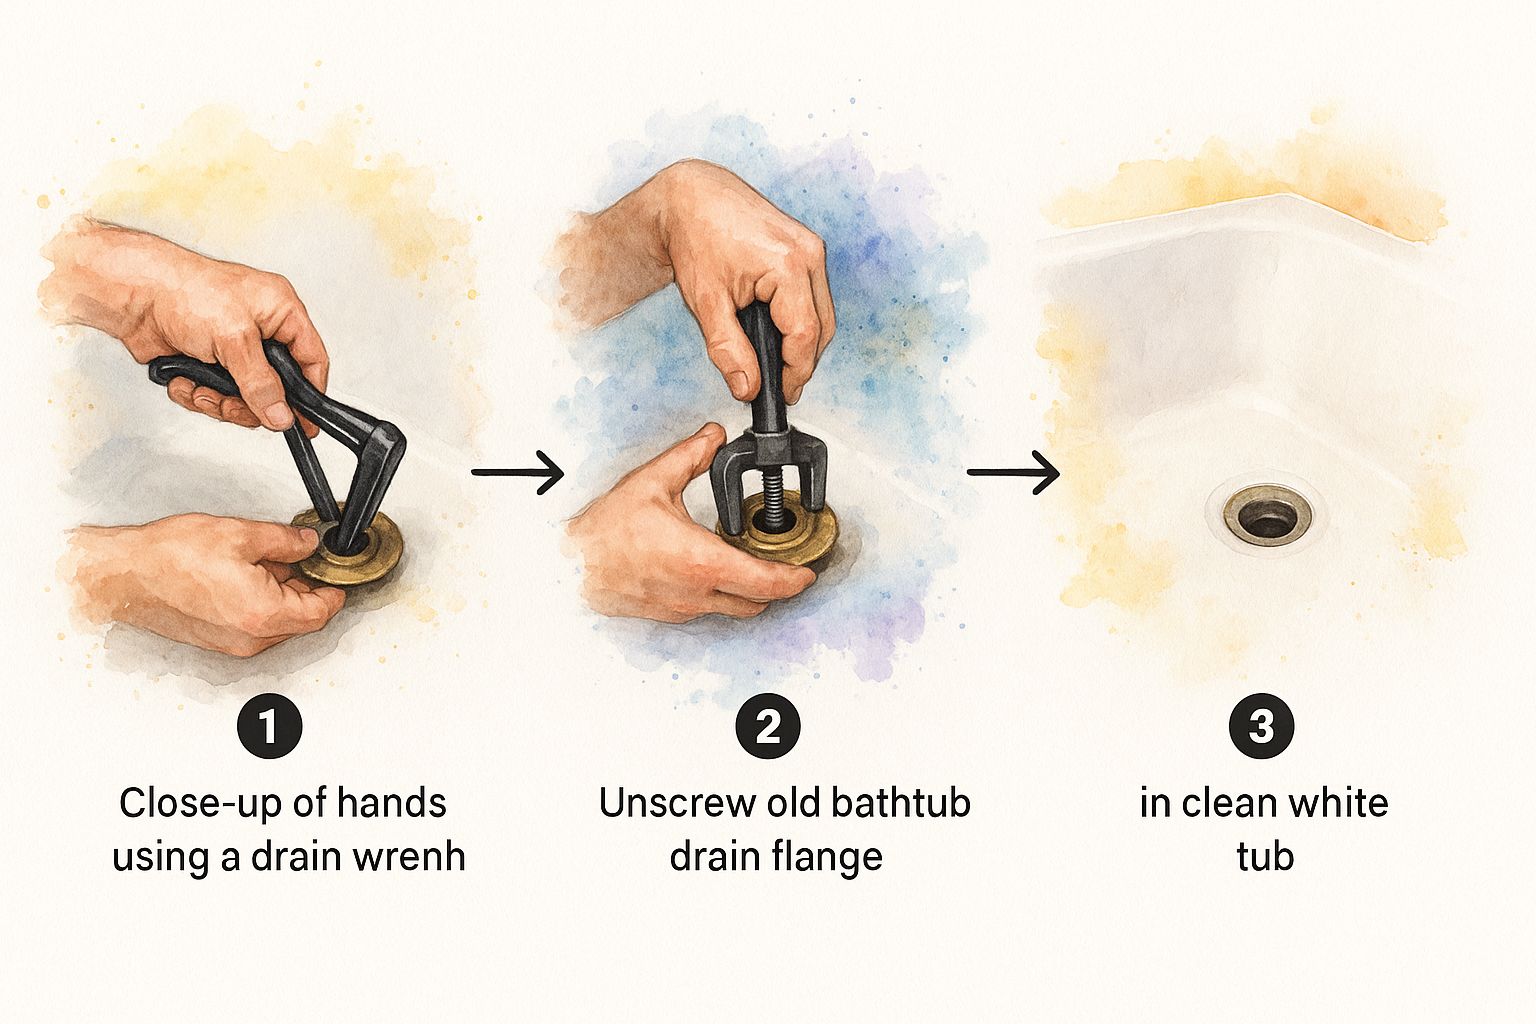
As you can see, the prongs on the tool lock into the crossbars inside the drain, giving you a solid grip to apply steady, even turning force.
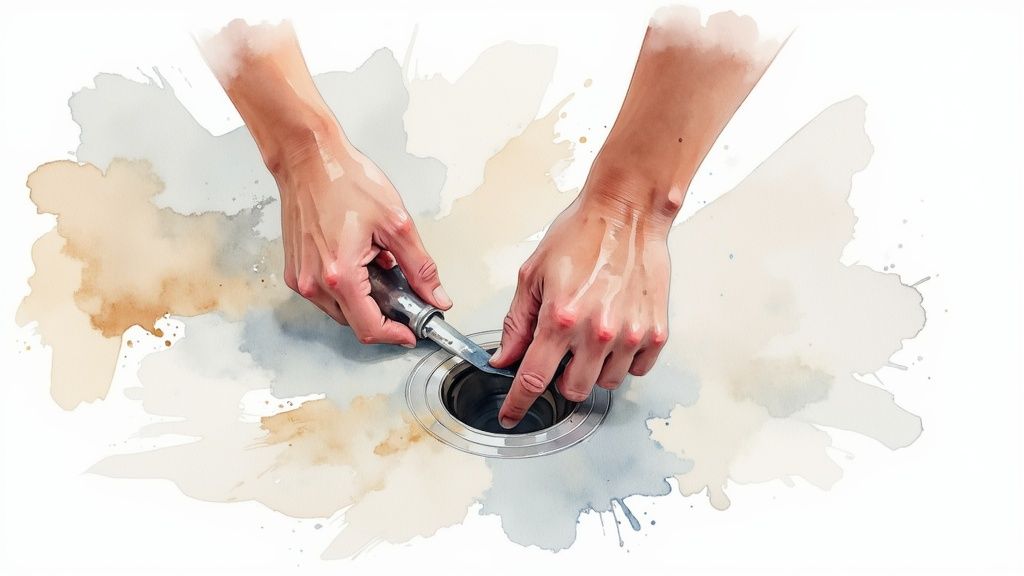
Fit the correct end of your drain wrench into the opening so the teeth engage with those internal crossbars. Stick a big screwdriver or the handle of your channel-lock pliers through the top of the wrench to make a T-handle. That’s your leverage.
Now, apply firm, steady pressure counterclockwise. If you’re lucky, you’ll feel it break free with a satisfying pop and then unscrew the rest of the way without much trouble.
Pro Tip: If you can get to the plumbing from underneath (maybe through a crawlspace or an access panel), have a helper grab the drain shoe—the pipe assembly right below the tub—with channel-lock pliers. Having them hold it steady while you turn from above will stop the whole pipe from spinning and potentially cracking.
Dealing with a Stubborn or Seized Drain
Of course, things don’t always go according to plan. If that drain just won’t budge, stop trying to force it. That’s the fastest way to crack your tub or break a pipe, turning a simple project into a nightmare. Instead, let’s try a few tricks of the trade.
Here are my go-to methods for a drain that’s putting up a fight:
- Apply Penetrating Oil: Give the drain flange a good spray with a quality penetrating oil like WD-40 or PB B’laster. Let it soak in for at least 30-60 minutes. The oil needs time to creep into the threads and dissolve some of that corrosion.
- Use a Little Heat: Metal expands when it’s heated. Grab a hairdryer (or a heat gun on low) and gently warm up the drain flange for a couple of minutes. The flange will expand just a tiny bit faster than the pipe it’s threaded into, which can be enough to break the seal. Absolutely no open flames! You’ll ruin the tub’s finish and create a serious fire hazard.
- Try the Tap-and-Turn: After letting the oil soak or applying heat, put your drain wrench back in. Before you heave on it, give the end of the wrench a few solid taps with a hammer. The vibration can help shatter the corrosion bond. Then try turning it counterclockwise again.
Patience is your best friend here. You might need to combine these methods or try them a couple of times, but the drain will eventually give in. Once it’s out, congratulations—you’ve just conquered the toughest part of the job.
Installing Your New Bathtub Drain
Alright, with the old drain out, you’re officially on the home stretch. This is where a little patience and attention to detail really count. Getting the new drain installed isn’t complicated, but doing it right is what will give you a leak-proof seal that stands the test of time.
Let’s walk through cleaning up the tub surface, applying the sealant like a pro, and getting everything tightened down just right—without breaking anything. Nailing these details is the difference between a temporary patch and a permanent repair.
Preparing the Drain Opening for a Perfect Seal
Before you even think about the new drain, the first job is to get the tub surface around the drain opening perfectly clean. Any leftover gunk from the old putty, silicone, or soap scum is your enemy here. It will absolutely sabotage the new seal and can lead to a sneaky leak you won’t find until it’s too late.
Grab a plastic putty knife or even an old gift card and gently scrape away any big pieces of old sealant. Steer clear of metal scrapers; they’ll scratch or chip your tub’s finish in a heartbeat.
Once the chunky bits are gone, take a rag with some mineral spirits or rubbing alcohol and give the area a good scrub. You’re aiming for a completely smooth, dry, and clean surface. This isn’t a step you want to rush—a clean slate is essential for a watertight fit.
Applying Plumber’s Putty or Silicone
Time to apply the sealant. This is probably the most crucial part of the whole process. Both plumber’s putty and silicone get the job done, but you handle them differently.
- For Plumber’s Putty: Grab a good-sized chunk of putty and knead it in your hands for about a minute to warm it up and make it pliable. Roll it between your palms into a uniform rope, about the thickness of a pencil. Make sure it’s long enough to go all the way around the underside of the new drain flange, then press it firmly in place to create a complete ring.
- For Silicone Sealant: If you’re going with silicone, you’ll need a steady hand. Apply a continuous bead, about 1/4-inch thick, to the underside of the flange. Try to keep the pressure on your caulk gun even so the bead is the same thickness all the way around. Any gaps are just an invitation for a leak.
Still on the fence about which sealant to use? Here’s a quick breakdown that should help you decide.
Plumber’s Putty vs Silicone Sealant
| Feature | Plumber’s Putty | Silicone Sealant |
|---|---|---|
| Ease of Use | Very easy; simply roll and press into place. | Requires a caulk gun and a steady hand for an even bead. |
| Cleanup | Simple; excess putty squeezes out and is easily wiped away. | Messier; requires mineral spirits or a special solvent for cleanup. |
| Adhesion | Forms a seal but does not permanently bond, making future removal easy. | Acts as an adhesive, creating a very strong bond that can be difficult to break later. |
| Flexibility | Remains pliable and flexible, accommodating minor shifts over time. | Cures to a flexible, rubber-like consistency. |
| Best For | Most common bathtub materials like enameled cast iron and acrylic. | Recommended by some manufacturers, especially for certain plastic or composite tubs. |
For most jobs, I tend to stick with plumber’s putty unless the drain manufacturer specifically calls for silicone. It’s just more forgiving and makes any future repairs much easier.
Threading and Tightening the New Drain
With the sealant on the flange, you’re ready to install. Carefully lower the new drain into the tub opening, making sure it’s sitting straight. From under the tub (if you can get there) or from inside, gently press it down and start threading it into the drain shoe by hand.
Turn it clockwise and feel for the threads to catch properly—the last thing you want is to cross-thread it. Hand-tighten it as far as you can. You should see a nice, even ring of putty or silicone squeeze out from under the flange. That’s exactly what you want to see; it means you’re creating a solid seal.
Now, insert your drain wrench into the crossbars. Give it a final quarter- to half-turn with your pliers or screwdriver. You’re looking for “snug,” not “Hulk-smashed.”
Crucial Tip: Do not over-tighten the drain. It’s incredibly easy to crack the drain shoe (especially PVC ones) or even the tub itself by cranking down too hard. The seal comes from the compressed sealant, not from sheer force.
Once it feels secure, just wipe away the excess sealant that squeezed out for a clean, professional-looking finish. The drain pipe assembly below, which includes the drain shoe and the P-trap, is what handles the wastewater. If you’re curious about how those parts work together, our article on what is a P-trap in plumbing is a great resource.
Installing the Overflow Plate and Stopper
You’re almost there. The last bit of assembly is the new overflow plate and stopper mechanism. This part is usually pretty straightforward.
- Position the Overflow Gasket: Your new kit will have a gasket, typically foam or rubber. Place it on the back of the overflow plate. This is what seals against the tub wall and stops water from getting behind it.
- Attach the Plate: Line up the screw holes on the plate with the overflow elbow pipe behind the tub wall. Pop in the new screws and tighten them down until the plate is snug and flush.
- Install the Stopper: For a lift-and-turn or push-pull stopper, you’ll just thread its center post into the crossbars of the drain flange you just installed. Tighten it with a screwdriver, then add the cap or knob on top.
With everything screwed in and tightened down, there’s only one thing left to do: test your work. Don’t skip this final check—it’s how you confirm the job is done right.
Troubleshooting Common Installation Problems
Even the most meticulous DIY project can throw you a curveball. When you’re replacing a bathtub drain, it’s not uncommon to hit a snag. But don’t worry, most of these issues have a pretty simple fix once you know what to look for.
Think of this section as your field guide for those “uh-oh” moments. We’ll walk through the most common headaches—from a drain that won’t cooperate to a leak that appears after you thought you were done—and give you the practical solutions to get your project back on track.
The New Drain Won’t Tighten Securely
So you’ve got the new drain in place, but it just keeps spinning and won’t tighten down. It’s a frustrating spot to be in, but it almost always points to one of two things: cross-threading or stripped threads on the drain shoe hiding beneath the tub.
First things first, back the drain out and take a close look at the threads. If you simply started threading it at an angle (that’s cross-threading), the fix is easy. Just be patient and carefully restart, making sure it goes in perfectly straight this time.
But what if the threads on the old drain shoe itself are worn out or stripped? This is a bigger challenge. Before you give up, try wrapping the new drain’s threads with three or four layers of Teflon tape. This adds just enough bulk to help the threads bite and can often create the friction needed for a secure, watertight seal.
Dealing With a Post-Installation Leak
There’s no feeling quite like the disappointment of filling the tub for a test run, only to find a slow drip forming underneath. Don’t panic. This is almost always an easy fix. In fact, about 90% of the time, a small leak is just due to a bad seal from the plumber’s putty or silicone.
Here’s your action plan:
- Drain and Dry: Empty the tub and make sure the drain area is completely dry.
- Remove the Drain: Unscrew the new drain flange you just put in.
- Clean Meticulously: Scrape off every last bit of the old sealant from both the tub’s surface and the drain flange. You want a perfectly clean slate.
- Reapply the Sealant: This time, be a little more generous. Make that rope of plumber’s putty a bit thicker to ensure it forms a complete, unbroken ring.
As you tighten the drain back down, you should see a consistent ring of putty squeeze out from under the flange. That little visual cue is the best sign you’ve got a solid seal.
Testing Your Work Correctly
This final test is non-negotiable. Close the stopper and fill the tub with a few inches of water. Now, walk away for at least 10-15 minutes. When you come back, check for any drips underneath. Finally, open the stopper and let the water rush out, keeping an eye on the drain shoe connection for any leaks while water is actively flowing.
What to Do If the Old Drain Crossbars Broke
Sometimes, those old crossbars are so corroded that they snap the second you put any torque on them with a drain wrench. Now you have nothing to grip. Before you throw in the towel and call a plumber, there’s one more tool to try: a drain extractor tool.
This handy gadget is designed for this exact situation. It fits inside the drain and expands to bite into the inner walls of the flange, giving you the leverage you need to turn the whole thing out. It’s a real project-saver and a great tool to have in your DIY plumbing kit.
Occasionally, a stubborn clog is the real reason a drain has been damaged over time. If you think there might be a deeper blockage, our guide on how to unclog a drain pipe can help you clear the line before you finalize your new installation.
Got Questions? We’ve Got Answers
Even with a step-by-step guide, you’re bound to have a few questions. Every bathtub and plumbing setup has its own little quirks, after all. Here are the answers to some of the most common questions I get from people tackling this project for the first time.
How Long Does This Actually Take?
Plan on blocking out 1 to 3 hours for this job, especially if it’s your first go. The biggest wildcard is always the old drain.
Sometimes, you get lucky and it comes out without a fight. If that happens, you could genuinely be done in under an hour. More often than not, though, you’re wrestling with years of corrosion. If that old drain is seized up, a good chunk of your time will be spent just getting it out. In that case, patience and some penetrating oil are your best tools, and you can easily add an hour or more to the project.
Can’t I Just Replace the Stopper?
Absolutely. If it’s just the stopper that’s broken or not holding water anymore, you can definitely swap it out on its own. It’s a quick fix that doesn’t involve touching the main drain assembly.
However, if the drain flange—that metal ring you see in the tub—is cracked, corroded, or leaking, a new stopper isn’t going to fix the real issue. You’ll need to do a full replacement to guarantee a watertight seal and prevent water from seeping under your tub.
My Two Cents: Think of it this way: the stopper is the gatekeeper for the water, but the drain flange is the foundation. If the foundation is bad, the whole thing needs to be replaced to avoid much bigger problems down the road.
What If My Pipes Are Plastic (PVC)?
No worries. The process is almost exactly the same whether your pipes are metal or plastic. You’ll use the same tools and follow the same basic steps.
The one thing you absolutely must be careful with is how much you tighten the new drain. Plastic threads are much easier to strip or crack than metal ones. Avoid over-tightening at all costs. Get it hand-tight first, then use your drain wrench for just a final quarter-turn or so until it feels snug. The real seal comes from the plumber’s putty being compressed, not from brute force.
When you’ve given it your best shot and the drain still won’t budge, or if you just want the peace of mind that comes with a professional job, it’s time to call for backup. For reliable service from folks who know the ins and outs of local plumbing, Professional Plumbers Denver is ready to help. You can schedule an appointment by visiting us at https://professional-plumbers-denver.com.

Recent Comments