
Let’s be honest—servicing your water heater probably isn’t high on your weekend to-do list. It’s one of those “out of sight, out of mind” appliances, right up until the moment you’re standing in an ice-cold shower. But treating your water heater as a set-it-and-forget-it machine is a gamble that can cost you big time. This isn’t just about saving a few bucks; it’s about protecting your home and your comfort.
Why Water Heater Maintenance Isn’t a Chore You Can Skip
Regular maintenance is your single best defense against the silent killer of water heaters, especially here in Denver: mineral sediment. Our famously hard water is full of minerals like calcium and magnesium. While they’re perfectly fine to drink, these tiny particles settle at the bottom of your tank over time, baking into a thick, gritty layer of scale.
The Hidden Costs of Neglect
Think of that sediment layer as an insulating blanket between the heating element (or burner) and the water it’s supposed to be heating. Your unit is forced to work overtime just to do its job, which creates a domino effect of problems. First, your energy bills creep up. Second, the constant overheating puts a massive strain on the whole system, drastically shortening its lifespan.
Neglecting this simple upkeep can slash a water heater’s efficiency by 10% to 30%, leading to sticker shock on your utility bills and, eventually, a total system failure. The good news? A little bit of consistent maintenance can help a quality water heater last for 20 years or more, turning a small time investment into a huge financial win. You can find more details on this in recent water heater market research.
Here’s how I think about it: You wouldn’t drive your car for 50,000 miles without changing the oil. Annual maintenance for your water heater is the exact same principle. It’s a small, proactive step that helps you avoid a massive, expensive, and deeply inconvenient breakdown later.
Annual Maintenance Benefits at a Glance
A proactive approach is what separates a well-maintained home from one that’s full of surprise emergencies. Taking care of your water heater is all about preventing those common headaches and saving yourself from frantic, late-night calls to a plumber.
Here’s a quick breakdown of why these simple tasks are so important and what real-world problems they solve.
| Maintenance Task | Primary Benefit | Recommended Frequency |
|---|---|---|
| Tank Flushing | Removes efficiency-robbing sediment, stops “popping” noises, and lowers energy use. | Annually (or every 6 months for hard water). |
| T&P Valve Test | Ensures the critical safety valve works, preventing dangerous pressure buildup. | Annually. |
| Anode Rod Check | Protects the tank’s interior from rust and corrosion, preventing leaks. | Every 1-3 years. |
When it comes down to it, dedicating just a few hours to your water heater each year is an incredible trade-off. You get to prevent messy basement floods, guarantee a hot shower is always waiting for your family, and avoid the premature—and expensive—replacement of one of your home’s most important appliances. It’s a simple strategy to protect your investment and keep your peace of mind.
Gathering Your Essential Toolkit and Safety Gear
Alright, before you lay a hand on that water heater, let’s talk prep. This is one of those home maintenance jobs that’s incredibly satisfying to do yourself, but only if you have the right gear ready to go. The good news? You probably already have most of what you need.
This isn’t about a trip to the hardware store for a cart full of new tools. It’s about being prepared.
Your Basic Maintenance Toolkit
Let’s run through the essentials. Having these items within arm’s reach will make the whole process smooth and clean.
- A standard garden hose: You’ll need this to drain the tank. A hose that’s 10-15 feet long should be enough to reach a floor drain or get the water safely outside. A good quality one with a solid connector will save you from a lot of drips.
- A 5-gallon bucket: This is your best friend for catching the initial gush of water when you test the pressure relief valve. It’s also handy for managing any little spills along the way.
- An adjustable wrench or channel-lock pliers: Perfect for giving a stubborn drain valve a gentle nudge to get it open or closed. You don’t need a ton of force, just the right tool.
- Work gloves and safety glasses: Don’t skip these. You’ll be dealing with hot water and metal parts, so protecting your hands and eyes is just common sense.
The biggest mistake I see homeowners make is not getting organized first. Having everything ready before you start is the difference between a quick, confident job and a frantic, messy disaster.
The Non-Negotiable Safety Checklist
Now, let’s cover the most critical part of this entire process. These steps aren’t just suggestions; they’re what stand between you and a very bad day. Your safety and your home’s integrity come first, always.
If you have an electric water heater, head straight to your home’s breaker panel. Find the breaker for the water heater—it’s often a double-pole breaker and should be labeled. Flip it all the way to the “OFF” position. Double-check it.
For a gas water heater, find the control knob or dial on the unit itself, usually near the bottom. You need to turn this from “ON” or “PILOT” all the way to the “OFF” setting. This cuts the gas supply to the burner, which is exactly what you want.
The final safety step for both types is to shut off the water supply. Look for the cold water pipe going into the heater. You’ll see a valve on it, either a lever or a round handle. Turn it clockwise until it stops. This prevents the tank from refilling while you’re trying to drain it—a crucial step unless you want a basement full of water.
Taking these few minutes to shut everything down properly is the foundation for any successful maintenance. Now you’re ready to get to work.
Flushing Sediment to Restore Your Heater’s Power
If there’s one maintenance task that will dramatically extend the life of your water heater, this is it. Denver’s notoriously hard water is full of minerals that, over time, settle at the bottom of the tank. This creates a thick, rocky layer of sediment that forces your heater to work much harder, wasting energy and reducing its effectiveness. Flushing all that gunk out is like hitting a reset button.
Don’t let the idea of working on a water heater intimidate you. The whole process is much simpler than most homeowners think. I’ll walk you through it from start to finish: getting prepped, draining the tank, and then refilling it the right way. Think of this not as a chore, but as a direct investment in lower energy bills and hotter showers.
Getting Set Up for the Flush
Alright, once you’ve shut off the power (at the breaker) or the gas (at the unit) and closed the cold water inlet valve on top, you’re ready to go.
Your first move is to connect a standard garden hose to the drain valve near the bottom of the water heater. Make sure you get a nice, snug connection here—you don’t want any surprise puddles on your floor.
Run the other end of that hose to a safe drainage point, like a floor drain, a utility sink, or even just outside to your driveway. The goal is a clear, downhill path for the water. You’re about to drain anywhere from 40-50 gallons, so double-check that the end of the hose won’t pop out and create a mess.
Here’s a tip I’ve learned over the years: Go open a hot water faucet somewhere in your house, like the kitchen sink. This lets air into the system, breaking the vacuum inside the tank. Trust me, it makes the water drain much, much faster.
Draining Out the Gunk
With your hose securely in place, it’s time to open the drain valve. Most heaters have a small spigot-style handle or a valve that you can turn with a flathead screwdriver. Turn it counter-clockwise to get the water flowing.
Don’t be alarmed if the first bit of water looks gross—cloudy, gritty, or discolored. That’s the built-up sediment you’re trying to get rid of!
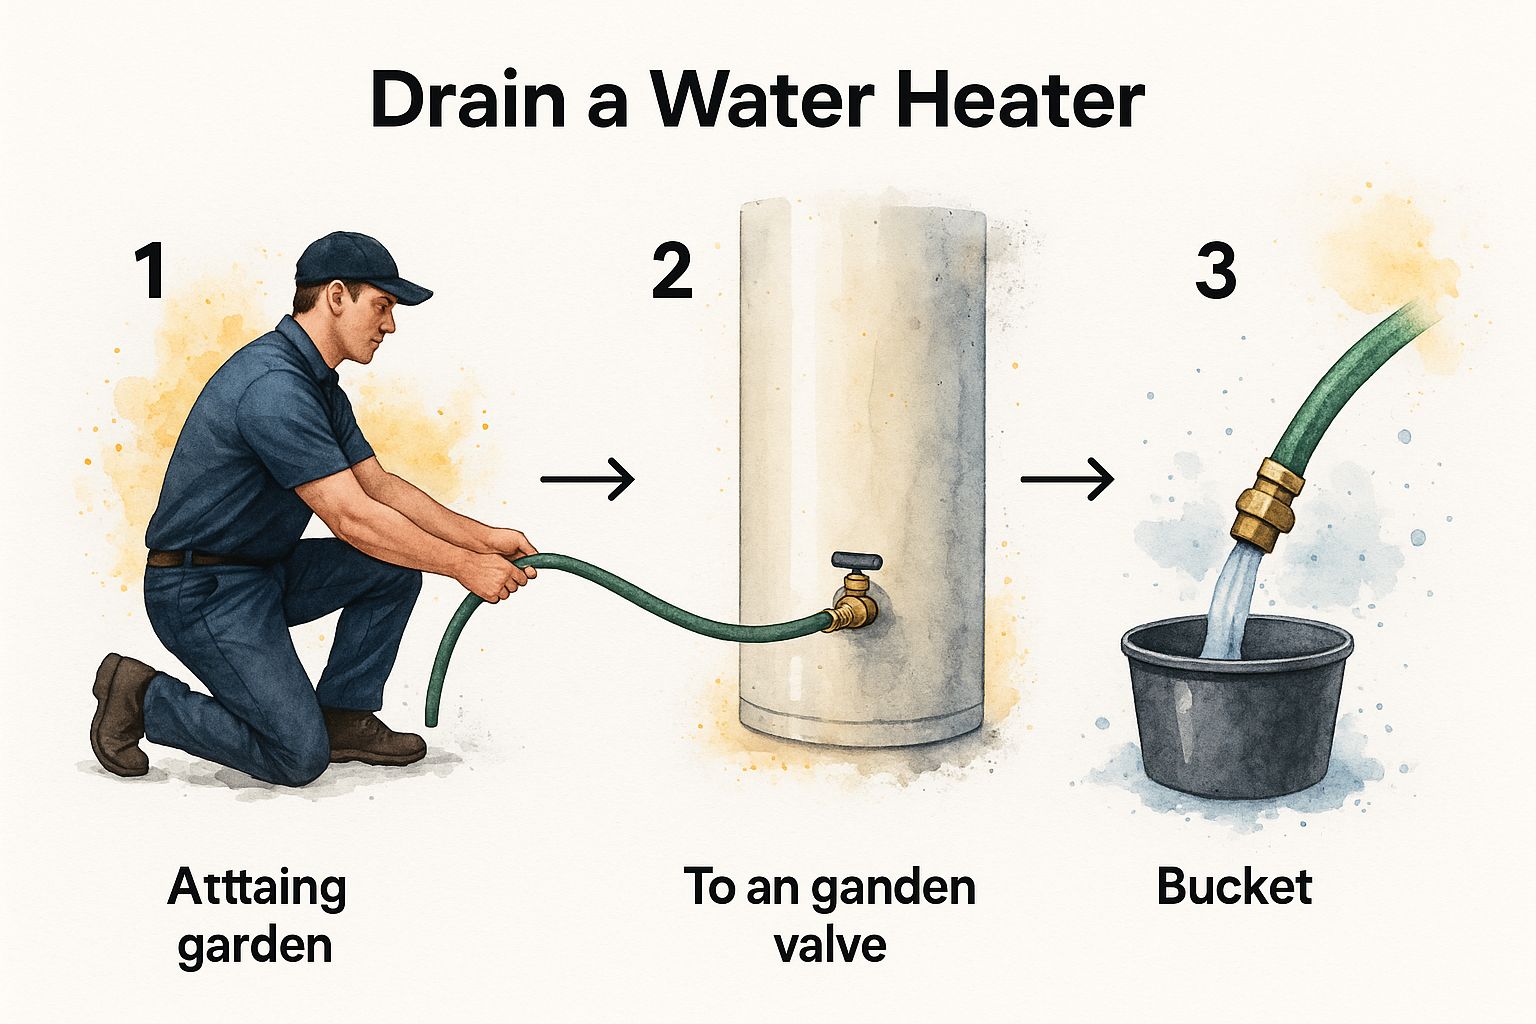
As you can see in the diagram, having a bucket handy can be a smart move to catch the initial surge. Just let the tank drain until you see the water running clear.
What if the flow slows to a trickle? This usually means a larger piece of sediment is blocking the valve. To clear it, just crack open the cold water supply valve for a couple of seconds. The blast of incoming water will stir things up and usually dislodge the clog.
Refilling the Tank and Firing It Back Up
Once the water is running clear and the tank is completely empty, go ahead and shut the drain valve tightly. Disconnect your hose, but be careful—it will still have water in it.
Now, head back to that hot water faucet you left open earlier. Leave it on for this next part.
Slowly and carefully, reopen the cold water inlet valve. You should hear the tank start to fill up again. By leaving that faucet open, you’re giving the air in the tank an escape route as it fills with water. When you see a steady, solid stream of water coming out of the faucet (no more sputtering air), the tank is full. You can now turn that faucet off.
Give the area around the drain valve one last look to make sure there are no drips. If all is dry, you’re clear to restore power. Flip the circuit breaker back on or turn the gas control knob back to “ON” or “PILOT,” and you’re back in business.
Flushing is a critical part of maintaining a traditional tank-style heater. If you find yourself doing this often and wish there was a lower-maintenance option, you might want to learn about the pros and cons of tankless water heaters, as they don’t have a tank that collects sediment. For now, though, you’ve just performed the single most important task for keeping your current heater running strong.
Checking Key Safety Parts Before They Fail
Beyond the gunk that can build up at the bottom of your tank, two other parts are silently working to keep your water heater from failing. Honestly, ignoring them is like driving your car without ever checking the brakes.
I’m talking about the Temperature-Pressure Relief (T&P) valve and the anode rod. These are your heater’s primary defenses against a sudden, catastrophic failure on one hand, and slow, silent rust on the other. Making this check a part of your annual hot water heater maintenance is absolutely essential for keeping your home safe and your unit running for years.

These components might sound intimidating, but giving them a quick once-over is simpler than you think. A few minutes of your time ensures they can do their job when it matters most, potentially saving you from a burst tank or the premature death of your heater.
Testing Your T&P Valve
Think of the T&P valve as the emergency pressure release. It’s a small, brass valve, usually with a little lever, found on the top or side of the tank. Its only job is to automatically open and dump water if the temperature or pressure inside gets dangerously high. This simple device is what prevents your water heater from turning into a bomb.
You should test it once a year. It’s easy.
- First, place a bucket under the discharge pipe that runs from the T&P valve down toward the floor.
- Next, gently pull the lever up for just a few seconds. You ought to hear a gurgle as a quick burst of hot water shoots into the bucket.
- Then, let the lever snap back down on its own.
The water flow should stop immediately. If you got a good, strong spurt of water, great! It’s working as it should. But if you only get a weak dribble, or worse, it continues to leak after you’ve closed it, the valve is failing. It’s time to call a plumber to get it replaced.
A functioning T&P valve is your home’s most critical protection against a worst-case scenario. When you see news stories about water heaters exploding, it’s almost always because this small, inexpensive valve was neglected and seized up. Don’t skip this test.
Inspecting the Sacrificial Anode Rod
If the T&P valve is the heater’s emergency brake, the anode rod is its personal bodyguard. This is a long rod, typically made of magnesium or aluminum, that screws right into the top of the tank. Its entire purpose is to corrode so your steel tank doesn’t have to. Through a natural process called electrolysis, corrosive particles in the water attack the rod instead of the tank lining, sacrificing itself over time.
To check it, you’ll need to find its hex head on top of the heater, which is sometimes hidden under a plastic cap. After turning off the water supply and draining a little water to relieve the pressure, you can use a socket wrench to unscrew it and pull it out.
Here’s what you’re looking for:
- A Healthy Rod: It’ll still look relatively thick and mostly intact, even if it’s a bit pitted or lumpy.
- A Depleted Rod: It will look like a thin, brittle wire. If it’s less than 1/2 inch thick anywhere or you can see the steel core wire, it’s done its job and needs to be replaced.
Swapping out a spent anode rod is a cheap fix that can literally add years to your water heater’s life. Especially with Denver’s notoriously hard water, I recommend checking it every 1-2 years. This simple piece of metal is the only thing standing between your steel tank and a rusty, leaky end.
Setting the Right Temperature for Savings and Safety
Here’s one of the easiest wins you’ll find in your entire hot water heater maintenance routine. This task takes maybe five minutes, you don’t need any special tools, and it immediately starts paying you back through lower energy bills and a safer home. We’re just talking about setting the right temperature on your heater’s thermostat.
A lot of water heaters come from the factory cranked up to 140°F (60°C), which is honestly overkill for most of us. The Department of Energy recommends a much more reasonable 120°F (49°C), and from my experience, that’s the sweet spot. It’s plenty hot to stop nasty bacteria like Legionella from growing, but it dramatically lowers the risk of scalding—a huge relief if you have kids or elderly relatives at home.
Just making this small adjustment can cut your water heating costs by 6% to 10% every year. That’s real money back in your pocket for a quick turn of a dial.
How to Adjust the Thermostat on Your Unit
The exact steps depend on whether you have a gas or an electric model. It’s a simple job either way, but the process is a little different.
For Gas Water Heaters:
This is usually the most straightforward. Find the gas control valve, which is that boxy component near the bottom of the tank with a dial on it. You’ll probably see markings like “Hot,” “Warm,” and maybe a “Vacation” setting for when you’re away. The 120°F setting is often a triangle or a specific dot right between the “Warm” and “Hot” labels. Just turn the dial to that spot.
For Electric Water Heaters:
On electric models, the thermostats are usually tucked away behind one or two metal panels on the side of the tank.
First things first: shut off the power to the water heater at your circuit breaker. This is non-negotiable.
Once the power is off, use a screwdriver to remove the access panel(s). You’ll have to push some insulation aside, and you’ll see a dial, typically marked with degrees. Set it to 120°F. If your unit has two thermostats (an upper and a lower), make sure you set them both to the same temperature to keep it working efficiently.
Quick tip: After you’ve made the change, give it a few hours for the water in the tank to adjust. I always tell my clients to test the water at the faucet farthest from the heater to make sure you’ve hit that new, safer temperature.
This small step is a perfect example of proactive maintenance. It’s part of a smart approach to homeownership, just like following a clear water heater maintenance schedule to keep everything in top condition.
Knowing When to DIY and When to Call a Pro
Taking charge of your home maintenance is a great feeling, but with water heaters, wisdom is knowing where to draw the line. It’s not about pride or saving a few bucks; it’s about keeping your family safe and your home intact. Let’s be honest, some jobs are perfect for a Saturday afternoon, while others are a fast track to disaster without a professional.
Plenty of routine tasks are well within the reach of a hands-on homeowner. Flushing your tank to clear out sediment, testing the T&P valve, and even adjusting the thermostat are all fantastic ways to extend your unit’s life. These tasks help you get familiar with your system and catch small issues before they become big headaches.
But some problems are definite red flags. When these pop up, it’s time to call in the experts.
Clear Signals to Call a Professional
Certain jobs go way beyond basic maintenance. If you notice any of these situations, your next move should be to call a licensed plumber, not to grab a wrench.
- Gas Line Issues: This is the most critical one. If you smell gas or hear a hissing sound near your unit, stop everything. Don’t touch any controls. Get out, call your gas company immediately, and then call a plumber. This is a non-negotiable emergency.
- Complex Electrical Work: For electric water heaters, your involvement should stop at flipping the circuit breaker. Messing with heating elements, thermostats, or internal wiring is a serious shock risk. Professionals have the right tools and training to handle it safely.
- Major Leaks or Heavy Rust: A tiny drip from a valve you were working on is one thing. But if you see water pooling around the base of the heater or find significant rust eating away at the tank, that’s often a sign of internal failure. You can learn more about the critical signs that your water heater needs repairs to help you tell the difference.
- Replacing Key Components: You might be able to inspect your anode rod, but getting it out is another story. They often get seized up and require a ton of force and specific tools to remove without damaging the tank. The same goes for replacing a tricky T&P valve.
Making the choice to call a pro isn’t a failure—it’s the wisest decision you can make when safety is on the line. A professional has the tools, training, and insurance to handle complex jobs safely and correctly the first time.
If you’re contemplating a full replacement, looking over a general tank installation guide can give you a stark reality check. It helps you understand the sheer scope of the project, making it much clearer whether it’s a job for you or a seasoned pro.
Answering Your Hot Water Heater Questions
Even with a good checklist in hand, it’s totally normal to have a few questions pop up. Your water heater is one of the hardest-working appliances in your home, and getting the maintenance right is important. We get a lot of the same great questions from homeowners around Denver, so I’ve put the most common ones right here to clear things up.
My hope is that this gives you that last bit of confidence you need to tackle your hot water heater maintenance and know exactly what to look for.
How Often Should I Really Do This Maintenance?
For a standard home in an area with average water, doing a full maintenance check annually is a solid plan. A yearly routine—flushing the tank, testing the T&P valve, and peeking at the anode rod—is usually enough to keep things humming along.
But here’s the thing about living in Denver: our water is notoriously hard. That chalky buildup you fight on your showerhead is doing the exact same thing inside your water heater tank, only worse. Because of that, I strongly recommend that local homeowners flush their tank every six months. Honestly, it’s the single most effective thing you can do to combat that efficiency-robbing sediment and squeeze a few more years out of your heater.
What Are the Warning Signs My Water Heater Is Failing?
Your water heater will almost always send up a few warning flares before it fails completely. You just have to know what to look (and listen) for. If you notice any of these, it’s time to pay close attention.
- Lukewarm Water: Are your hot showers turning disappointingly cool? This often signals a dying heating element. More often than not, though, it’s a thick layer of sediment at the bottom of the tank acting as an insulator between the burner and the water.
- Discolored or Rusty Water: This is a big one. If you turn on a hot tap and see brown or rusty-looking water, that’s a serious red flag. It’s a classic sign that the inside of the tank is corroding away, and a leak isn’t far behind.
- Loud Noises: We’ll dig into this next, but any kind of popping, rumbling, or banging from the tank is a clear signal of sediment buildup.
- Visible Leaks: Any drip, puddle, or even slight dampness around the base of your heater needs immediate attention. It’s a critical warning that the tank itself might be failing.
A crucial tip from the field: If you ever see water actively leaking from the main body of the tank itself—not a pipe fitting or the drain valve—it’s almost certainly game over for that heater. A compromised tank can’t be repaired; replacement is your only safe move.
My Water Heater Is Making a Popping Noise. What Should I Do?
That rumbling or popping sound is probably the number one complaint we get from homeowners. Think of it like a coffee pot gurgling, but much more violent. It’s the sound of steam bubbles struggling to escape from underneath that thick blanket of mineral sediment we’ve been talking about. The burner superheats the trapped water, which flashes to steam and has to “pop” its way through the sludge.
The immediate solution is a thorough tank flushing, exactly like the one we covered earlier in the guide. Getting all that gunk out allows the heat to transfer to the water directly and quietly. In most cases, a good, deep flush silences the noise completely and makes the heater much more efficient. If the popping continues after you’ve flushed it, it’s a good idea to have a professional come take a look.
When DIY maintenance isn’t enough, you need a team you can trust. Professional Plumbers Denver has the expertise to handle any plumbing issue, from emergency repairs to full system replacements. For reliable, expert service in the Denver Metro area, get in touch with our team.

Recent Comments