
It’s a sound you might dismiss at first—a faint, persistent hiss of running water when every faucet in the house is tightly shut. Or maybe it’s the shock of opening a water bill that’s double what you normally pay. These aren’t just minor annoyances; they’re your home’s early warning system. Catching these signals is the key to stopping a small leak before it turns into a full-blown, wallet-draining disaster. Think of it as your first line of defense.
Decoding the Signs of a Water Line Leak
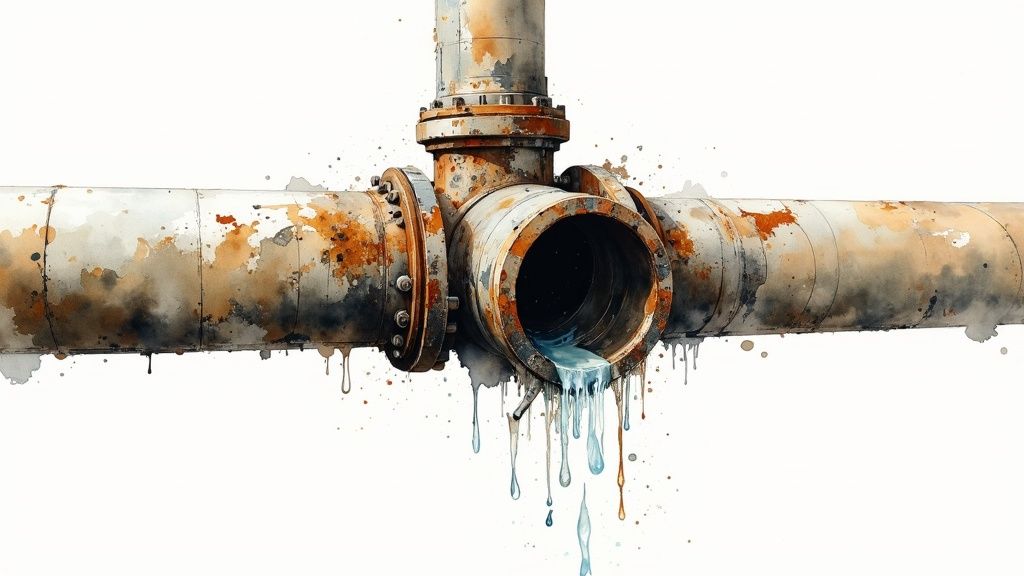
To become a leak detective in your own home, you have to look beyond the obvious puddle on the floor. A compromised water line often reveals itself in less dramatic, but equally telling, ways. It’s all about connecting the dots between the symptom and the potential cause.
For instance, persistent damp spots on walls, ceilings, or floors are a classic sign. If you find an area that’s always moist or discolored with no obvious explanation like a recent spill, that’s a major red flag. Water is almost certainly escaping from a hidden pipe.
Another big one? A sudden drop in water pressure across the entire house. If your shower suddenly feels weak and faucets are just trickling, it could point to a significant break in the main line. The water is being lost before it even gets where it needs to go.
Common Symptoms and Their Meanings
Sometimes, the clues are more about what you hear or even see in the water itself. In the quiet of the night, you might notice a faint hissing or dripping sound coming from behind a wall. Or maybe your water suddenly looks dirty or rusty. That could mean soil and other gunk are getting into your pipe through a crack.
Here are a few more signals that should definitely get your attention:
- A Sky-High Water Bill: If your water usage habits haven’t changed but your bill has shot up, a hidden leak is the number one suspect.
- A Surprisingly Green Lawn: Got one patch of grass in your yard that’s incredibly lush and vibrant, even when it’s dry? An underground water line leak could be providing it with a constant supply of water.
- Foundation Cracks: A long-term, slow leak can saturate the ground under your house, destabilizing the soil and eventually leading to costly cracks in the foundation.
To help you quickly assess what might be going on, here’s a simple table that connects common symptoms to their likely causes and how quickly you should act.
Quick Leak Symptom Checker
| Symptom | Potential Cause | Urgency Level |
|---|---|---|
| Sudden, unexplained spike in water bill | Hidden leak in the main line or within the walls. | High – Investigate immediately to avoid high costs. |
| Sound of running water with no taps on | A constant leak somewhere in the system. | High – Continuous water loss can cause rapid damage. |
| Low water pressure throughout the home | Significant break in the main water supply line. | Very High – Potential for major water loss and property damage. |
| Damp spots, mold, or peeling paint on walls/ceilings | Slow leak from a pipe inside the wall or ceiling. | Medium – Address before mold spreads and structural damage worsens. |
| Unusually lush green patch in the yard | Underground leak in the service line from the meter to the house. | Medium – Can cause sinkholes and high water bills over time. |
| Discolored or rusty-looking water | Corrosion or a break in the pipe allowing soil to enter. | High – Indicates a compromised pipe and potential water quality issues. |
Seeing these signs laid out makes it clear that even a “small” problem can have serious implications. Don’t ignore them.
A proactive approach to leak detection isn’t just about saving a few bucks on your water bill. It’s about protecting the structural integrity of your home. A tiny, unchecked leak can easily cause thousands of dollars in damage over time.
Understanding the Broader Impact
The need for better leak detection isn’t just a challenge for homeowners; it’s a global issue. With aging infrastructure all over the world, the market for leak detection and repair services has grown into a massive industry. It was valued at $21.51 billion and is expected to climb to over $32 billion.
This incredible growth, highlighted in various market research analyses, shows just how common pipeline failures are. It underscores why being vigilant as a homeowner is more critical than ever. Adopting this mindset helps you spot the need for a water line leak repair long before it gets out of hand.
Your Essential Toolkit for a Successful Repair

Walking into a hardware store for a water line leak repair can feel a bit like a pop quiz you didn’t study for. The sheer number of options can be overwhelming. To avoid that deer-in-the-headlights moment—or worse, a second trip—it’s smart to go in with a solid game plan. Having the right tools isn’t just for convenience; it’s the difference between a quick fix and a lasting one.
I always tell people to think of it like you’re a surgeon for your plumbing system. You wouldn’t go into surgery without the right instruments, and the same principle applies here. Any seasoned plumber will tell you that a successful repair often comes down to what you do before you even touch the pipe. It’s all about preparation.
Must-Have Cutting and Gripping Tools
First things first, you need to deal with the damaged pipe. A dedicated pipe cutter is your best friend here, especially for copper or PEX. It gives you a clean, perfectly square cut, which is absolutely critical for getting a leak-proof seal with the new fitting. Sure, you can use a hacksaw in a pinch, but they almost always leave behind burrs and an uneven edge that can easily compromise the connection down the road.
Next, let’s talk about leverage. You need two pipe wrenches. Not one. One wrench is for holding the existing pipe steady, while the other does the twisting. This simple trick prevents you from putting a ton of stress on other joints further down the line, which could easily start a whole new leak. Trust me, it happens more than you’d think.
Choosing the Right Repair Materials
The parts you use are just as important as the tools. What you’ll need depends entirely on your home’s existing plumbing and what you’re comfortable working with.
- Replacement Pipe: You have to match the material and diameter of the pipe you’re fixing. The most common types are copper, PEX, and PVC. The easiest way to get it right? Snap a photo of the pipe or, even better, bring a small cut-off piece with you to the store.
- Fittings: For a DIY-friendly fix, you can’t beat push-to-connect fittings (like the ones from SharkBite). They create an incredibly secure seal with no soldering required. Compression fittings are another solid, no-solder choice.
- Emery Cloth or Sandpaper: Don’t even think about skipping this. You absolutely must sand the pipe ends to get rid of any gunk, corrosion, or burrs left from cutting. A perfectly clean surface is non-negotiable for a watertight seal.
Remember, the whole point of prepping is to make the actual repair work go smoothly. A few extra minutes spent cleaning and deburring a pipe end can save you from the slow torture of a dripping leak you thought you fixed.
Lastly, grab your safety gear. A good pair of gloves and some safety glasses are essential. You’re going to be working with sharp tools and there’s always a chance of water spraying unexpectedly. Protecting your hands and eyes should be a top priority. Putting this kit together beforehand will give you the confidence to tackle that water line leak repair the right way.
How to Confidently Repair Your Leaking Water Line
Alright, you’ve pinpointed the leak and gathered your tools. Now for the satisfying part: the fix. I’ve seen countless DIY water line repairs, and the biggest mistake people make is rushing it. A hurried job almost always leads to a slow, maddening drip that’s sometimes even worse than the original leak. So, take a deep breath. Let’s walk through this the right way, making sure every step is done correctly for a permanent, watertight seal.
Securing the Scene and Prepping the Pipe
First things first, and this is non-negotiable: kill the water supply. Before you even think about touching a pipe, find your home’s main water shut-off valve. It’s usually tucked away in a basement, crawl space, or near your water meter. Give it a firm turn until it’s completely off.
To be certain the water is off, drain the lines. Open the lowest faucet in your house (maybe a basement utility sink) and the highest one (like an upstairs shower). This lets gravity do the work, clearing out any remaining water.
Now you can set up your workspace. Get a bucket and some old towels right under the leaky area to catch the last few drips. This keeps things dry and, more importantly, safe.
With the scene secure, it’s time to deal with the damaged pipe. Using a pipe cutter—not a hacksaw, you want a clean cut—carefully remove the bad section. Make sure you cut at least an inch on either side of the visible leak. You want to be working with solid, healthy pipe, not material that’s already compromised.
Here’s the step that separates a good repair from a leaky one: pipe preparation. A perfect cut means nothing if the pipe ends are dirty or rough. Grab your emery cloth or a deburring tool and get to work. You need to thoroughly clean and smooth both the inside and outside of the cut ends until they’re free of burrs, gunk, and any corrosion. A clean surface is absolutely critical for a proper seal.
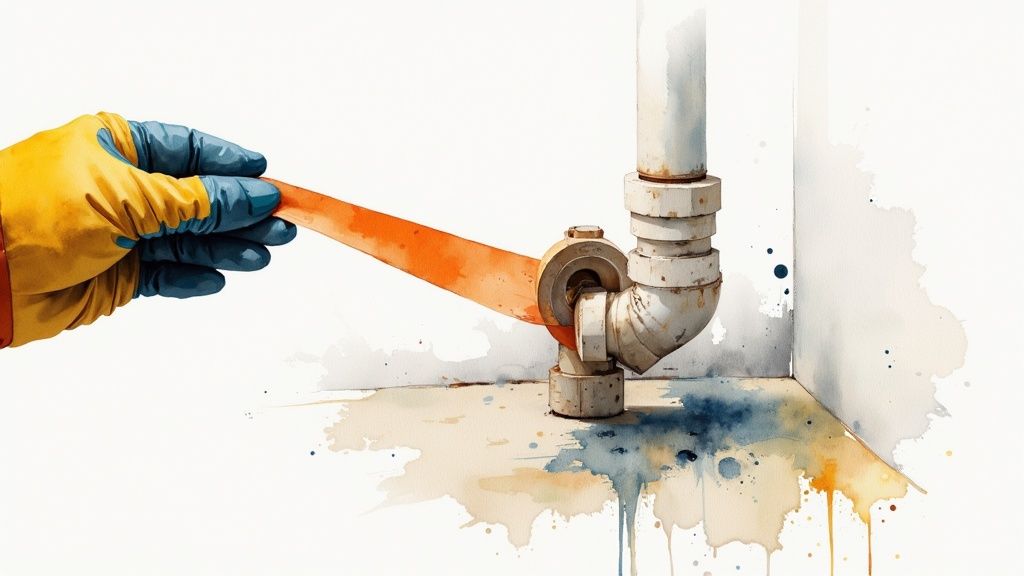
This quick visual guide shows a temporary fix for a small pinhole leak. It’s a great way to stop the immediate water flow in an emergency, giving you the breathing room to do a permanent repair correctly.
As you can see, stopping an active leak can be a matter of minutes. That buys you precious time to work without causing more water damage.
Choosing and Installing Your Repair Fitting
With your pipe ends perfectly prepped, it’s time to bridge the gap. The fitting you choose really depends on your pipe material and what you’re comfortable with.
For most homeowners, push-to-connect fittings are a game-changer. They work on copper, PEX, and CPVC pipes and don’t require any soldering or special tools. You just push the fitting firmly onto the clean pipe end until you feel it “click” or seat itself. It creates a surprisingly strong and reliable seal.
Another solid option is a compression fitting. This involves a nut and a brass ring (called a ferrule). As you tighten the nut with two wrenches—one to hold the body of the fitting, one to turn the nut—it compresses the ferrule against the pipe, creating the seal.
Soldering is the traditional method for copper pipes, but honestly, it takes a good bit of practice to get right. If this is your first time tackling a water line leak repair, I’d strongly suggest sticking with one of the solder-free options.
Finalizing and Testing Your Work
The new fitting is in place. Now for the moment of truth.
- Go Slow on the Water: Head back to your main shut-off valve and turn the water back on slowly. Just a quarter-turn to start. This prevents a sudden blast of pressure—what plumbers call a “water hammer”—from stressing your new connection.
- Inspect Everything: Walk back to your repair and just watch it for at least 10-15 minutes. Look for the tiniest bead of water. Run a dry finger underneath the fitting and along the seams to feel for any moisture you can’t see.
- Fully Open the Valve: If it’s bone-dry, you’re in the clear. Go ahead and open the main valve all the way. Then, go through the house and run your faucets for a moment to bleed any air that got trapped in the lines.
Getting this right is exactly why residential repairs are such a big deal. The global market for leak repair is valued at around $15 billion and is expected to hit $25 billion. Homeowners like you, maintaining their systems, make up about 60% of that market. As research from Data Insights Market shows, every successful DIY fix isn’t just saving you a plumber’s fee—it’s part of a massive, collective effort in protecting our homes and conserving water.
Finding Hidden Leaks with Modern Technology
Sometimes, the real challenge with a water line leak repair isn’t the fix itself—it’s just finding the source of the problem. You know something is wrong when your water meter won’t stop spinning or you can hear a faint hissing sound behind a wall, but there’s no visible puddle. This is where you’re up against a hidden leak.
Thankfully, we’ve moved past the days of blind guesswork. Modern plumbing technology gives us tools that are the next best thing to X-ray vision, letting us pinpoint a leak without having to tear everything apart.
Listening for Leaks
One of the first tools a pro will reach for is an acoustic leak detector. Think of it as a highly sensitive, specialized microphone. It’s designed to pick up the very specific, high-frequency sound water makes when it’s escaping a pressurized pipe, even if that pipe is buried under concrete or tucked away behind thick plaster.
A skilled technician will trace the suspected path of the water line with the sensor. As they get closer to the break, the sound gets louder, allowing them to zero in on the exact location with incredible precision.
Seeing Leaks with Temperature
Another fantastic piece of equipment is the thermal imaging camera. This tool doesn’t see water directly. Instead, it sees temperature. Water escaping from a pipe is almost always a different temperature than the surrounding materials, usually cooler.
A thermal camera highlights this temperature difference, showing it as a distinct cool spot—often a blue or purple shape on the screen. This image can perfectly outline the saturated area, revealing the extent of the water damage without ever touching the wall.
These advanced methods are absolutely essential for tricky jobs, particularly for leaks hidden beneath a concrete foundation. If you think you might be dealing with that kind of headache, it’s a whole different ballgame. You can learn more about how we tackle those issues in our guide on slab leak detection, which goes into much more detail. Using this tech saves homeowners from the huge mess and expense of just randomly tearing up floors and walls.
The most frustrating part of a hidden leak is the uncertainty. Modern diagnostic tools remove the guesswork, turning a potential disaster zone into a targeted surgical repair. It’s the difference between tearing down a whole wall and cutting a small, precise opening.
Smart Home Leak Prevention
Beyond professional diagnostics, technology now offers homeowners a way to get ahead of leaks. Smart water monitors are brilliant devices that you install right onto your main water line. They get to know your home’s typical water usage patterns.
The moment they detect something out of the ordinary—like the continuous flow from a slow leak or the sudden gush of a burst pipe—they can send an alert straight to your phone. Some can even shut off the water main automatically.
This push toward tech-based solutions is why the global market for water leak detection systems is exploding. It’s currently valued at around $5.63 billion and is expected to climb to $8.43 billion. That growth is all about homeowners and businesses demanding smarter, more proactive ways to manage water and prevent costly damage.
When It’s Time to Call a Professional Plumber
Tackling a water line leak repair yourself can be incredibly rewarding, but a smart homeowner knows when to hang up the tool belt. I’ve seen it happen too many times: a simple project turns into a costly disaster because someone overestimated their abilities. Knowing your limits isn’t failure—it’s the best skill you can have.
So, when should you pick up the phone instead of the wrench? There are some clear red flags that mean it’s time to call in the pros.
Obvious Signs You’re Out of Your League
Certain situations are non-negotiable. One of the biggest is a leak in your main water service line. That’s the big pipe that runs underground from the municipal supply to your house. Fixing this often involves digging up your yard, dealing with high-pressure water, and getting permits from the city. Trust me, this isn’t a weekend DIY job.
Another huge red flag is the leak’s location. If you see water anywhere near electrical panels, outlets, or wiring, step back immediately. Water and electricity are a lethal mix. No DIY repair is worth risking your life.
Assessing Damage and Complexity
Sometimes, the call isn’t about immediate danger but the sheer scope of the problem. A slow, hidden leak can cause way more damage than you see on the surface.
If you spot these issues, it’s time for an expert:
- Widespread Water Damage: Are there large stains spreading across ceilings or walls? Is your flooring starting to buckle? A persistent musty odor is another dead giveaway of a long-term leak that requires a professional.
- Foundation Cracks: Waterlogged soil can destabilize your home’s foundation. This goes way beyond simple plumbing; you need an expert to assess the structural integrity.
- Complex or Old Piping: I once had a job in an old Victorian where a homeowner was chasing a phantom leak. It turned out to be from an old, abandoned pipe that was never capped correctly. An experienced plumber knows how to navigate these confusing systems.
To help you decide, here’s a quick comparison of when you might DIY a repair versus when it’s best to call a professional.
DIY vs Professional Repair Scenarios
| Leak Scenario | Recommended Action | Key Considerations |
|---|---|---|
| A small, visible drip under a sink | DIY | The leak is easy to access, and the fix likely involves tightening a connection or replacing a simple part like a P-trap. |
| A leak in the main water line | Call a Professional | This requires excavation, specialized tools, and knowledge of municipal codes. It’s a major job. |
| A pipe leaking near electrical wiring | Call a Professional Immediately | The risk of electrocution is extremely high. Do not attempt to fix this yourself. |
| A leak behind a wall or ceiling | Call a Professional | Cutting into drywall is just the start. A pro can find the source without causing unnecessary damage. |
| Multiple leaks appearing at once | Call a Professional | This could signal systemic issues like high water pressure or widespread pipe corrosion that a simple patch won’t solve. |
Ultimately, a pro can diagnose issues that a homeowner might miss, preventing the problem from coming right back.
Recognizing when a job is beyond your skill set is a sign of wisdom, not defeat. A professional plumber brings not only the right tools but also the experience to diagnose complex issues that might fool the average homeowner, preventing repeat failures and further damage.
This is exactly https://professional-plumbers-denver.com/blogs/why-hiring-a-professional-plumber-in-denver-is-important/. They have the equipment and expertise to handle these situations safely and correctly the first time.
When Experience and Tools Make the Difference
At the end of the day, it comes down to having the right tools and knowledge. A licensed plumber arrives with thousands of dollars worth of specialized gear—from acoustic leak detectors to industrial pipe threaders—that you just won’t find at the local hardware store. They also have a deep understanding of local building codes.
For professionals, this expertise goes beyond just fixing pipes. Knowing how to price plumbing jobs for profit is part of a much larger body of knowledge that separates an expert from an amateur. If you’re facing a major leak or a problem you can’t figure out, calling a pro is the best investment you can make for your home.
Answering Your Top Water Line Leak Questions
After walking countless homeowners through the stress of a water line leak repair, I’ve heard just about every question in the book. It’s natural to have concerns, so I want to tackle the most common ones I hear on the job, giving you straight answers from an expert’s perspective.
How Much Does a Professional Repair Cost?
This is always the big one, and the honest-to-goodness answer is, “it depends.” The final bill for a water line leak can swing wildly based on what we find once we get to work.
A simple, easy-to-reach leak on a pipe in your basement? That might just set you back a few hundred dollars. But the price tag can climb fast when things get complicated.
Here’s what really moves the needle on cost:
- Leak Location: A leak under your kitchen sink is a world away from one buried under your front lawn. If we have to bring in an excavator, the cost will obviously be much higher.
- Pipe Material: Working with modern PEX or copper is usually straightforward. Wrestling with old, corroded galvanized or cast iron pipes? That takes more time, effort, and specialized tools.
- Extent of Damage: Fixing a tiny pinhole is one thing. Cutting out and replacing a ten-foot section of rotted-out pipe is a completely different job.
All said, you can generally expect a professional repair to fall somewhere between $250 for a minor fix and upwards of $2,500 for a major service line replacement that involves digging.
I know that potential cost can be scary, but trust me on this: don’t ignore the problem. The secondary damage from an ongoing leak—think mold, foundation issues, or ruined floors—will almost always cost you far more than calling a plumber in the first place.
Can I Use a Temporary Patch?
When water is spraying everywhere, a temporary patch can absolutely be a lifesaver. Those pipe repair clamps, specialty tapes, and epoxy putties you see at the hardware store can definitely stop a small leak in a pinch. They’re great for buying you some breathing room to figure out your next move.
But you have to see these for what they are: a temporary solution only. A bandage. They aren’t engineered to hold back constant water pressure for weeks or months on end, and they will fail eventually. A patch might get you through the weekend, but it doesn’t fix the real problem—a pipe that’s old, weak, or corroded. The only real, permanent fix is to have a professional cut out the bad section and replace it.
How Can I Prevent Future Leaks?
An ounce of prevention is worth a pound of cure, especially in plumbing. Preventing the next water line leak repair really comes down to smart, proactive maintenance.
The single best thing you can do is check your home’s water pressure. I see it all the time—pressure that’s way too high, putting constant strain on every pipe, joint, and appliance. Installing a pressure-reducing valve (PRV) is a game-changer and can add years to the life of your plumbing system.
It also pays to know what your pipes are made of and how old they are. PEX pipes might last 25 to 50 years, but if you have galvanized steel pipes from the 70s, they could be on borrowed time. For more on this, our guide on common plumbing problems and how to fix them is a great resource.
And if you live somewhere like Denver, do yourself a favor and insulate any pipes in unheated spaces like your crawl space or garage. It’s a simple, cheap way to avoid a catastrophic burst pipe during a hard freeze.
When a leak is more than you can handle, you need experts you can count on to protect your home. For any water line leak repair in the Denver Metro area—from emergency calls to full-scale replacements—Professional Plumbers Denver has the team and the tools to do the job right. Don’t let a small drip turn into a disaster. Contact us today for fast, reliable 24/7 service.

Recent Comments