
Welcome to the definitive guide for any Denver homeowner ready to tackle a water softener installation. If you’re tired of dealing with hard water and have some DIY spirit, you’ve come to the right place. This isn’t just a manual; it’s a real-world roadmap designed to take you from planning and purchasing all the way to a perfectly running, leak-free system.
Your Blueprint for Tackling Hard Water
We’re going to move past the generic, one-size-fits-all instructions you find elsewhere. Instead, we’ll focus on the practical knowledge you actually need to get the job done right here in the Denver area. This means highlighting the real challenges you might face and pointing out the critical moments where precision is everything. Let’s trade confusion for confidence and take control of your home’s water quality once and for all.
Why a Water Softener Is a Smart Home Upgrade
Hard water is more than a simple nuisance—it’s a problem that silently costs you money and wears down your home’s most important systems. When you install a water softener, you’re making a smart investment that pays off in several ways.
- Protect Your Appliances: Scale buildup from hard water is brutal on water heaters, dishwashers, and washing machines. A softener extends their lifespan and keeps them running efficiently.
- Improve Plumbing Health: Mineral deposits slowly clog your pipes, restricting flow and eventually leading to clogs and costly repairs. Soft water keeps them clear.
- Enhance Daily Comfort: The difference is night and day. You’ll notice softer skin, smoother hair, and glassware that comes out of the dishwasher sparkling clean without any spots.
It’s no surprise that more homeowners are catching on. The global water softener market, currently valued at around USD 3.3 billion, is on track to nearly double over the next ten years. This boom is fueled by a growing awareness of hard water issues, with residential demand leading the charge. Salt-based systems, which use proven ion-exchange technology, make up over 58% of all sales today.
Key Takeaway: Installing a water softener isn’t just about convenience. It’s a proactive investment in your home’s plumbing and a direct upgrade to your quality of life.
Before you grab your tools, it’s worth understanding exactly what you’re up against. Knowing the science behind hard water helps make sense of why each step in this installation process is so crucial. For a complete breakdown, I highly recommend reading our article that explains what hard water is and its effects.
Gathering Your Tools and Materials
I’ve seen it a hundred times: a weekend DIY project grinds to a halt because of a missing $5 fitting. A successful water softener installation starts way before you ever touch a pipe. Getting your tools and materials sorted out first is the single biggest thing that separates a smooth project from a weekend nightmare of repeat trips to the hardware store.
Think of this part as laying the foundation. Get this right, and the actual installation becomes a straightforward, satisfying job. The goal is simple: have every single item you need within arm’s reach before you make that first cut.
Your Essential Shopping and Tool List
Before running out to the store, take stock of what you already have. Most homeowners have a basic toolkit, but plumbing demands some specific gear. It’s not just about having a wrench; it’s about having the right one for the job. You’ll want to make sure you’ve got the essential DIY project tools on hand before you start.
To make things easier, I’ve put together a checklist of what you’ll typically need for a standard installation.
Essential Tools and Materials Checklist
| Category | Item | Pro Tip |
|---|---|---|
| Cutting & Deburring | Pipe Cutter (for copper, PEX, or PVC) | Make sure your cutter blade is sharp. A dull blade can crimp a pipe, causing a bad seal and future leaks. |
| Cutting & Deburring | Deburring Tool | After cutting, always clean the inside and outside of the pipe. It’s a small step that prevents big problems. |
| Wrenches | 2 x Adjustable Wrenches | You need two—one to hold the fitting steady and one to tighten. This prevents twisting your existing plumbing. |
| Sealing | Teflon Tape (Plumber’s Tape) | Don’t skip this. Wrap all threaded connections 3-4 times in a clockwise direction for a watertight seal. |
| Measuring | Tape Measure & Marker | The old saying “measure twice, cut once” is the golden rule of plumbing. Be precise. |
| Safety & Cleanup | Safety Glasses, Bucket, Towels | Even a drained system has residual water. Protect your eyes and have a bucket ready to catch the drips. |
| Connections | 2 x Flexible Water Lines | 1-inch diameter lines are standard. These make connecting the softener to your pipes much easier. |
| Connections | Appropriate Fittings | These will depend on your pipe type (e.g., SharkBite for copper/PEX, solvent weld for PVC). Take a picture of your pipes! |
Having a complete and organized toolkit is truly half the battle. If you want a more comprehensive look at the gear that makes any plumbing job easier, check out our guide on https://professional-plumbers-denver.com/blogs/essential-plumbing-tools/ for a pro-level rundown.
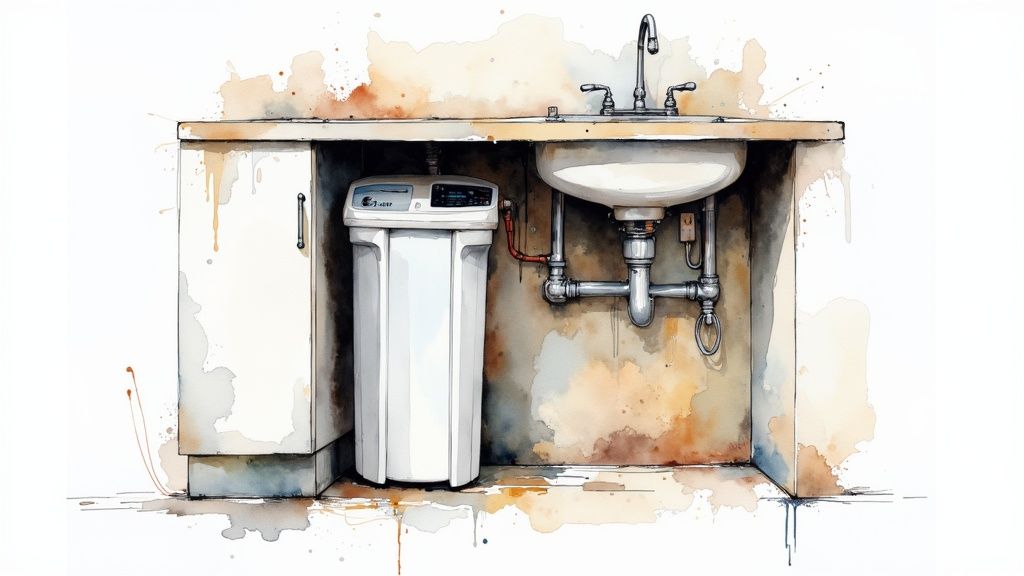
Selecting the Perfect Installation Spot
Where you put the softener is just as important as how you hook it up. A good location makes installation easier and saves you headaches later when it’s time to add salt or perform maintenance.
Your spot needs to check three critical boxes:
- Near the main water line: The softener has to go right after your home’s main shutoff valve but before the line splits to the water heater. This is non-negotiable if you want to treat all your water, both hot and cold.
- Access to a drain: During its regeneration cycle, the softener flushes out all the hard minerals it has collected. That salty brine needs somewhere to go, like a floor drain, utility sink, or standpipe.
- A nearby power outlet: The brain of the softener is its control valve, which needs electricity to run the regeneration cycles. A standard 110V GFCI outlet is what you’ll need.
Pro Tip: A basement, garage, or utility closet is usually your best bet. These spots keep the unit out of the way while meeting all the requirements. Also, make sure the floor is level and can handle the weight—a softener full of water and 40+ lbs of salt is incredibly heavy.
Matching Fittings to Your Home’s Plumbing
Finally, you need to play detective and figure out what your pipes are made of. This will determine the exact fittings you need to buy. Most homes in the Denver area have copper, PEX (that flexible plastic tubing), or PVC. Take a close look at the main water line where you plan to cut in.
- Copper: The traditional method is soldering, but for DIY, push-to-connect fittings (like SharkBite) are a game-changer.
- PEX: Often uses crimp rings or expansion fittings that require special tools, but push-to-connects work great here too.
- PVC/CPVC: You’ll need a specific primer and cement to create a permanent, solvent-welded bond.
Before you head to the hardware store, snap a clear photo of your pipes and measure their diameter. This one tiny step will ensure you walk out with the right parts the first time.
The Core Installation Process
Alright, you’ve got your tools laid out and the perfect spot picked. Now for the fun part—making it all happen. This is where we move from planning to plumbing. I’ll walk you through it, breaking down what seems like a complex job into a series of straightforward actions.
Pay close attention here, because even one small misstep can lead to a leak or a system that just doesn’t work right. And before we even think about touching a pipe, let’s talk safety. Make sure your workspace is dry, well-lit, and you’ve got plenty of room to move around.
Preparing Your Plumbing for Surgery
First thing’s first: you have to shut off the water to your entire house. Find your main water shutoff valve—it’s usually in the basement, a crawl space, or on an outside wall where the water line comes in. Give that valve a good turn clockwise until it’s completely closed.
With the main off, you still need to get the water out of the pipes. Head down to the lowest faucet in your house (a basement utility sink or an outdoor spigot is perfect) and open it all the way. Then, go to the highest floor and open a faucet there. This lets air into the lines, breaking the vacuum and allowing the system to drain completely. You’ll be surprised how much water comes out, so keep a bucket handy.
A Critical Safety Check: Before you make a single cut, be absolutely sure the water is off. Look at your water meter. Most have a tiny dial or triangle that spins when water is flowing. If that thing is moving even a little bit, your main valve isn’t fully seated.
Getting the prep work right is the foundation of a smooth installation. This infographic lays out the essential flow, from getting your gear together to working safely.
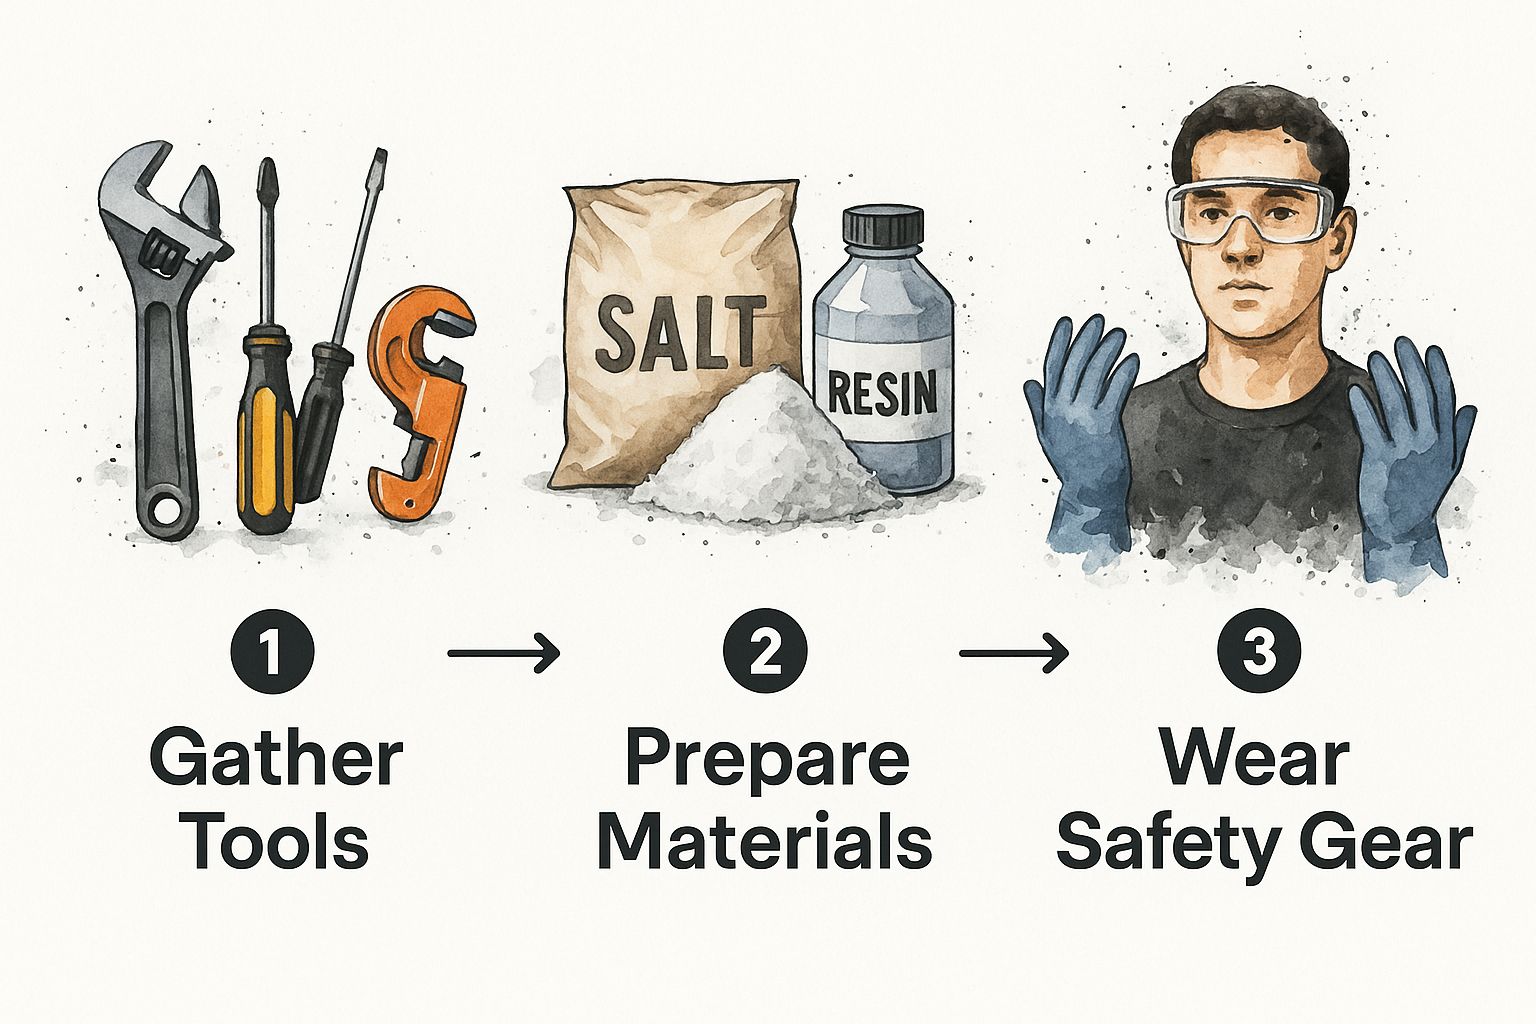
Think of it as a quick checklist. Having all your tools, materials, and safety gear ready to go before you start is half the battle.
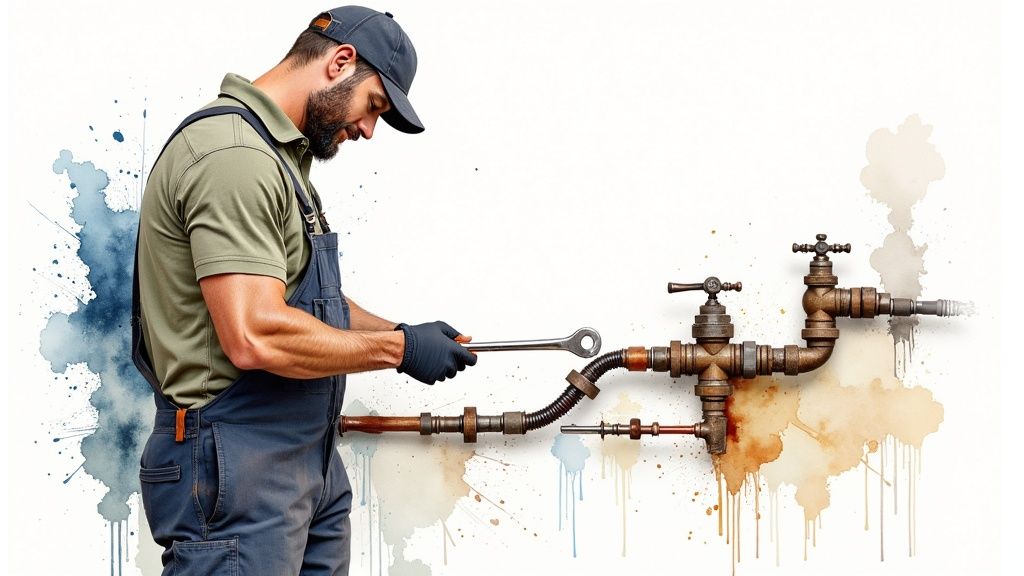
Making the Connection
This is the moment of truth: cutting into your main water line. Carefully measure the space you need for the bypass valve assembly and mark your cut lines with a sharpie. Grab your pipe cutter and make a clean, straight cut. A smooth cut is absolutely vital for a watertight seal, so take your time with it. Once it’s cut, don’t forget to use a deburring tool to clean up the inside and outside edges of the pipe.
With that section of pipe removed, you can fit in the bypass valve. This little device will be your best friend down the road, letting you service the softener without cutting off water to the rest of the house. Most new softeners come with a yoke or fittings that connect right to it.
- Push-to-Connect Fittings (like SharkBite): This is by far the easiest route for a DIY project. You just push the fitting onto the clean, deburred pipe until you feel it click. It creates a solid seal with no special tools.
- Soldering Copper: This is the old-school method. It requires a torch, flux, and solder to create a permanent, incredibly strong bond, but it definitely takes some practice and a healthy respect for the open flame.
- PEX Tubing: This is a popular modern option that involves using a crimp tool and rings to secure the tubing to fittings. It’s fast and very reliable once you get the hang of the tool.
Since a water softener is basically a specialized tank system, it can be helpful to review a general tank installation guide beforehand. It’ll give you a good feel for the principles of handling and securing these types of units.
Once the bypass valve is locked into the main line, it’s time to connect the softener itself. Run a flexible water line from the “inlet” port on the bypass valve to the “inlet” on the softener’s control head. Do the same for the “outlet” ports. This is a common point of error, so double-check your work. If you hook it up backward, the softener won’t do a thing. Look for the arrows indicating the direction of water flow.
Establishing the Drain and Overflow Lines
Your softener needs a way to get rid of the salty brine after it cleans itself out during a regeneration cycle. That means you need to set up two important tubes: the drain line and the overflow tube.
The main drain line hooks up to a port on the control valve and carries all the discharge away. You’ll need to run this to a suitable drain, like a floor drain, a large utility sink, or a dedicated standpipe.
The overflow tube is a safety net. It connects to an elbow fitting near the top of the salt tank (the brine tank) and prevents a salty flood if the tank’s float valve ever fails. This tube should also be routed to a drain.
Here’s how to hook them up properly to meet plumbing codes:
- Secure the Lines: Use the clamps that came with the unit to fasten the hoses to their fittings on the softener and brine tank. Give them a gentle tug to make sure they’re on tight.
- Maintain an Air Gap: This is non-negotiable and required by code. The end of the drain hose must have a physical gap of at least 1.5 inches between it and the drain opening. This simple gap makes it impossible for wastewater to ever get sucked back into your clean water supply.
- Avoid Kinks: Run the tubing in a smooth path, avoiding any sharp bends or kinks that could block the flow. A clogged drain line will cause the system to fail and could lead to a serious overflow.
With all the plumbing done, you’re on the home stretch. The heavy lifting is over. Next, we’ll get this system fired up, program the controls, and run the critical leak checks to make sure your work is solid.
Bringing Your New Water Softener to Life
Alright, the hard part’s over. The plumbing is connected, and your new water softener is sitting pretty. It’s easy to feel like you’re at the finish line, but these next steps are what turn a bunch of pipes and a tank into a system that actually works for you.
Getting this part right is all about being methodical. We’re going to slowly wake the system up, check our work under pressure, and then program the unit’s “brain.” A few extra minutes here will save you from a world of headaches down the road.
Waking the System Up and Hunting for Leaks
First thing’s first: make sure the bypass valve on the new softener is in the “bypass” position. This keeps the softener isolated while we re-pressurize your home’s main plumbing. Think of it as a critical safety net.
Now, walk back to your main water shutoff valve and open it slowly. Seriously, just crack it a quarter-turn. You’ll hear the pipes hiss and groan as they fill up. Letting the system pressurize gradually prevents a “water hammer”—a sudden jolt that can stress joints and fittings.
Once the sounds die down, open the main valve all the way. It’s time to go on a leak hunt. Grab a good flashlight and a roll of dry paper towels. You need to meticulously inspect every single connection you touched.
- Check the main pipe connections where the bypass valve assembly is tied in.
- Get a close look at the fittings on the hoses or pipes leading to the softener itself.
- Examine any threaded connections for even the slightest hint of moisture.
The paper towel trick is a game-changer; it will instantly show a tiny bead of water that your eyes might otherwise miss. If you find anything, shut the main off, drain the pressure, and retighten or reseal the fitting. Don’t proceed until every joint is bone-dry.
My Two Cents: Don’t get impatient here. A single, slow drip now can become a real mess over time. Patience during this check is your best defense against water damage.
Purging Air and Filling the Tanks
With your main plumbing confirmed as leak-free, it’s time to introduce water to the softener. Keeping the unit in bypass, find a nearby faucet (a utility sink is perfect) and run the cold water for a minute. This will help push any trapped air out of the main lines.
Next, slowly slide the bypass handle towards the “service” position. You’ll hear a rush of water as it floods the resin tank. This is exactly what you want—it’s pushing all the air out of the new unit and down the drain line. Let it run until the sound stops.
Now you can give the brine (salt) tank a head start. Pour about 3-5 gallons of water directly into it. After that, you’re clear to fill it with salt. A good rule of thumb is to fill it about halfway for the initial load.
Programming the Brains of the Operation
The control valve is where the magic happens, but it needs you to tell it what to do. Your manufacturer’s manual will walk you through the specifics for your model, but they all need the same three critical pieces of info.
1. Water Hardness
This is the most important setting, period. You need to input your water’s hardness in grains per gallon (GPG). Here in the Denver area, this can vary quite a bit, but it’s often in the 10 to 20 GPG range. The best way to know for sure is to check your local water report or use a simple home test kit. Getting this number right ensures the system regenerates only when it needs to, which saves a ton of salt and water over time.
2. Time of Day
Simple enough—set the current time. The softener needs to know what time it is so it can run its cleaning cycles when you’re not using water.
3. Regeneration Time
Most units default to 2:00 AM, and for good reason. At that hour, nobody is usually showering or running the dishwasher, so the regeneration cycle won’t cause any inconvenience. Unless you work the night shift, it’s best to just leave this setting alone.
With the basics programmed, your final step is to trigger a manual regeneration. This forces the system to run through its first full cycle, drawing the brine solution into the resin tank and getting everything fully prepped. It’s the perfect final test to confirm everything is working as it should. Once that cycle completes, your system is officially online and ready to deliver soft water.
Keeping Your System Running Smoothly
Alright, the hard part’s over—your new water softener is installed. But don’t walk away just yet. Think of it like a new car; a little routine maintenance goes a long way in protecting your investment and making sure it runs perfectly for years to come.
The good news? Modern water softeners are pretty low-maintenance. Most of what you’ll be doing revolves around one simple but critical task: keeping that brine tank filled with salt. Get this one habit down, and you’ve already won half the battle.
Salt is Everything
The salt in your brine tank is the fuel that makes the whole system work. It’s what recharges the resin beads so they can keep pulling those hard water minerals out of your water. Honestly, the number one reason a softener “stops working” is simply that it ran out of salt.
I always tell my clients to peek at the salt level at least once a month. A good rule of thumb is to keep the tank at least a third of the way full. You don’t need to pack it to the brim, as that can cause problems of its own. For a typical family of four here in Denver, you can expect to add a 40-pound bag of salt every month or two.
One of the most common headaches I see is something called a “salt bridge.” This is when a hard crust forms over the water in the brine tank, and the salt underneath can’t dissolve. The system goes through its cycle, but it isn’t actually making the brine it needs, so you suddenly get hard water again.
If you think you have a salt bridge, just grab a broom handle and gently poke and prod the crust until it breaks apart. It’s an easy fix for a really frustrating problem.
Picking the Right Salt
When you head to the hardware store, you’ll see a few different salt options. They’ll all get the job done, but some are definitely better for the health of your machine.
- Evaporated Salt Pellets: This is the good stuff. At 99.9% pure sodium chloride, it’s the cleanest option and the least likely to gunk up your tank or cause bridging. It’s what I recommend for worry-free performance.
- Solar Salt Crystals: Made from evaporated seawater, this is another high-purity choice (99.6%) that works great. It’s usually a bit more budget-friendly than evaporated pellets.
- Rock Salt: It’s the cheapest, for sure, but it comes with a lot more dirt and minerals. This sediment builds up in the bottom of your brine tank over time, meaning you’ll have to clean it out more often.
The Occasional Deep Clean
Beyond just topping off the salt, a few other simple tasks will help you get the full 15-20 year lifespan out of your unit.
About once a year, plan on cleaning out the brine tank. The easiest way is to let the salt level run down low, then just scoop out what’s left. Dump the water, give the inside a quick scrub with some soap and water to get rid of any sludge, and you’re good to go.
Making these little jobs part of your regular home upkeep is the key. In fact, for a bigger picture of how to care for your home’s plumbing, our plumbing maintenance checklist is a great resource. A little proactive care now is the best way to avoid a big, expensive headache down the road.
Got Questions? We’ve Got Answers.
No matter how detailed a guide is, you’ll always have questions once you’re standing in front of your own plumbing. It’s just part of the process. I’ve been there, and I’ve seen it all. Think of this section as a quick chat with a plumber who’s done this a thousand times.
Getting these little details right is what separates a softener that just works from one that works perfectly for the next decade. Let’s dig into the questions I hear most often.
How Do I Figure Out the Right Size Softener for My House?
Sizing is everything. Get it wrong, and you’re either wasting a ton of salt and water or, even worse, dealing with hard water half the time. A unit that’s too small will be constantly regenerating, and one that’s too big is just plain inefficient.
To nail the sizing, you just need two pieces of info:
- Your daily water use: The average person uses about 75 gallons a day. So, for a family of four, you’re looking at around 300 gallons total.
- Your water hardness: You can usually find this on your Denver water utility’s website or get a precise number with a simple water test kit. It’s measured in grains per gallon (GPG).
Got those numbers? The rest is just simple math. You multiply your daily water use by the GPG to see how many hardness grains the system needs to pull out every single day.
Let’s run a quick scenario: Your family of four uses 300 gallons of water a day, and your test comes back showing 15 GPG—pretty typical for the Denver area.
300 gallons x 15 GPG = 4,500 grains of hardness per day.
Since a well-run softener should only need to regenerate about once a week, we multiply that daily number by seven. 4,500 x 7 days = 31,500 grains. A 32,000-grain capacity unit would be the sweet spot for your home.
What are the Common Mistakes People Make During Installation?
Oh, I’ve seen some doozies. A few simple slip-ups can turn a straightforward job into a weekend-long headache. Stay sharp and you can easily sidestep these common pitfalls.
- Plumbing it in Backward: Happens more often than you’d think. Your softener’s bypass valve has arrows molded right into it showing the direction of water flow. Double- and triple-check that you’ve connected the inlet and outlet pipes correctly. Get this wrong, and you’ve just installed a very expensive piece of plastic that does nothing.
- Skipping the Drain Line Air Gap: This isn’t just a suggestion; it’s a critical safety step and a plumbing code requirement. The drain hose must have a gap of at least 1.5 inches between the end of the hose and the drain it flows into. This air gap makes it physically impossible for gross wastewater to ever get sucked back into your clean water supply. Don’t skip it.
- Cranking Down on Plastic Fittings: When you’re dealing with plastic threads, more muscle is a bad thing. It’s incredibly easy to crack the fittings by overtightening them, which leads to those maddening, slow drips you won’t discover until hours later. The rule of thumb is hand-tight, then just a final quarter-turn with a wrench to snug it up. That’s it.
My Water Still Feels Hard After I Installed It. What Do I Check?
That’s a frustrating feeling, but don’t call for backup just yet. The solution is almost always something simple. Before you start questioning your work, run through this quick checklist.
- Is the bypass valve open? This is the number one culprit. After testing for leaks, people often forget to switch the bypass valve from “bypass” back to the “service” position. Make sure that handle is pointing the right way.
- Are the settings correct? Pop back into the control panel. Did you program the correct GPG for your water hardness? Is the clock set to the right time of day? An incorrect setting can throw the whole regeneration schedule off.
- What’s the salt level? Take a peek inside the brine tank. Is it low on salt? Even more common is a “salt bridge”—a hard crust of salt that forms above the water level. It looks full, but the salt isn’t dissolving. If you see one, carefully break it up with a broom handle.
- Did it actually regenerate? Find the manual regeneration button on your control head and press it. You should hear the motor start to turn as it moves through the cycles. If it’s dead silent, you might have a power issue or a problem with the control head itself.
If you’ve worked through this guide and still feel like you’re in over your head, that’s okay. Sometimes a project throws you a curveball. When that happens, don’t hesitate to call in a pro. The team at Professional Plumbers Denver has the tools and expertise to make sure your installation is perfect, up to code, and ready to give you years of great water. For expert help in the Denver Metro area, check out our services.

Recent Comments